Want to edit or add information in this guide?
Submit an Issue on Github!![]()

Official Game Guide
Last Updated: July 27, 2024
Welcome to Tackle Tanks!
Battle with your buddies and defeat the enemies in our online multiplayer tank game. With the different game modes (such as the classic Team Deathmatch[25] ) and all of the different tanks to choose from, earn scarps to unlock new skins!
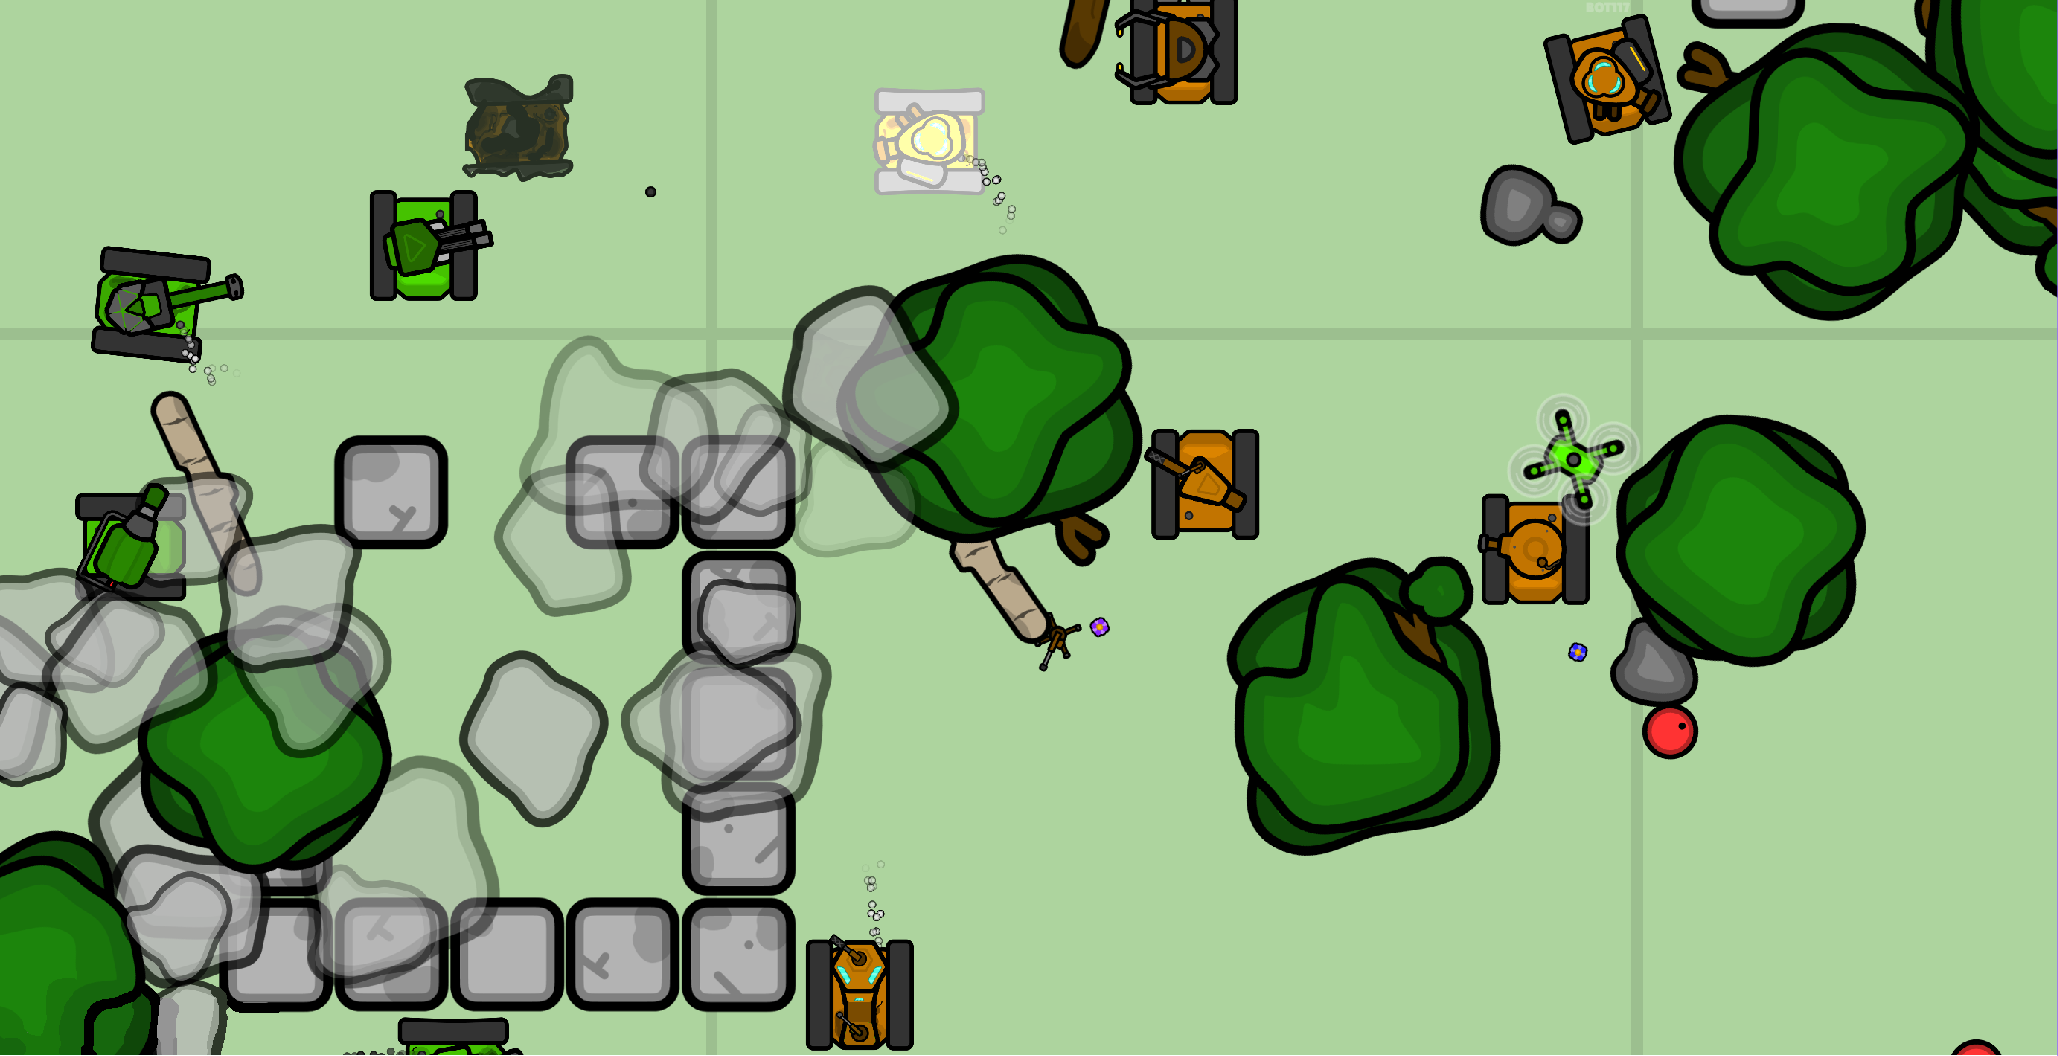
From epic tank battles to sneaky reconnaissance, work together to complete missions. Rewards are given at the end of a match which based on your team's completion and your own personal contributions. With these rewards you can buy skins from the shop.
History and Origins
The first version of this game started on MIT's Scratch, created by the user Rboombox. This version has only campaign missions; there is no multiplayer mode available. Being the basis of Tackle Tanks, there are no abilities or powerups in this version. The game is still playable as of now. Click here to play this version!
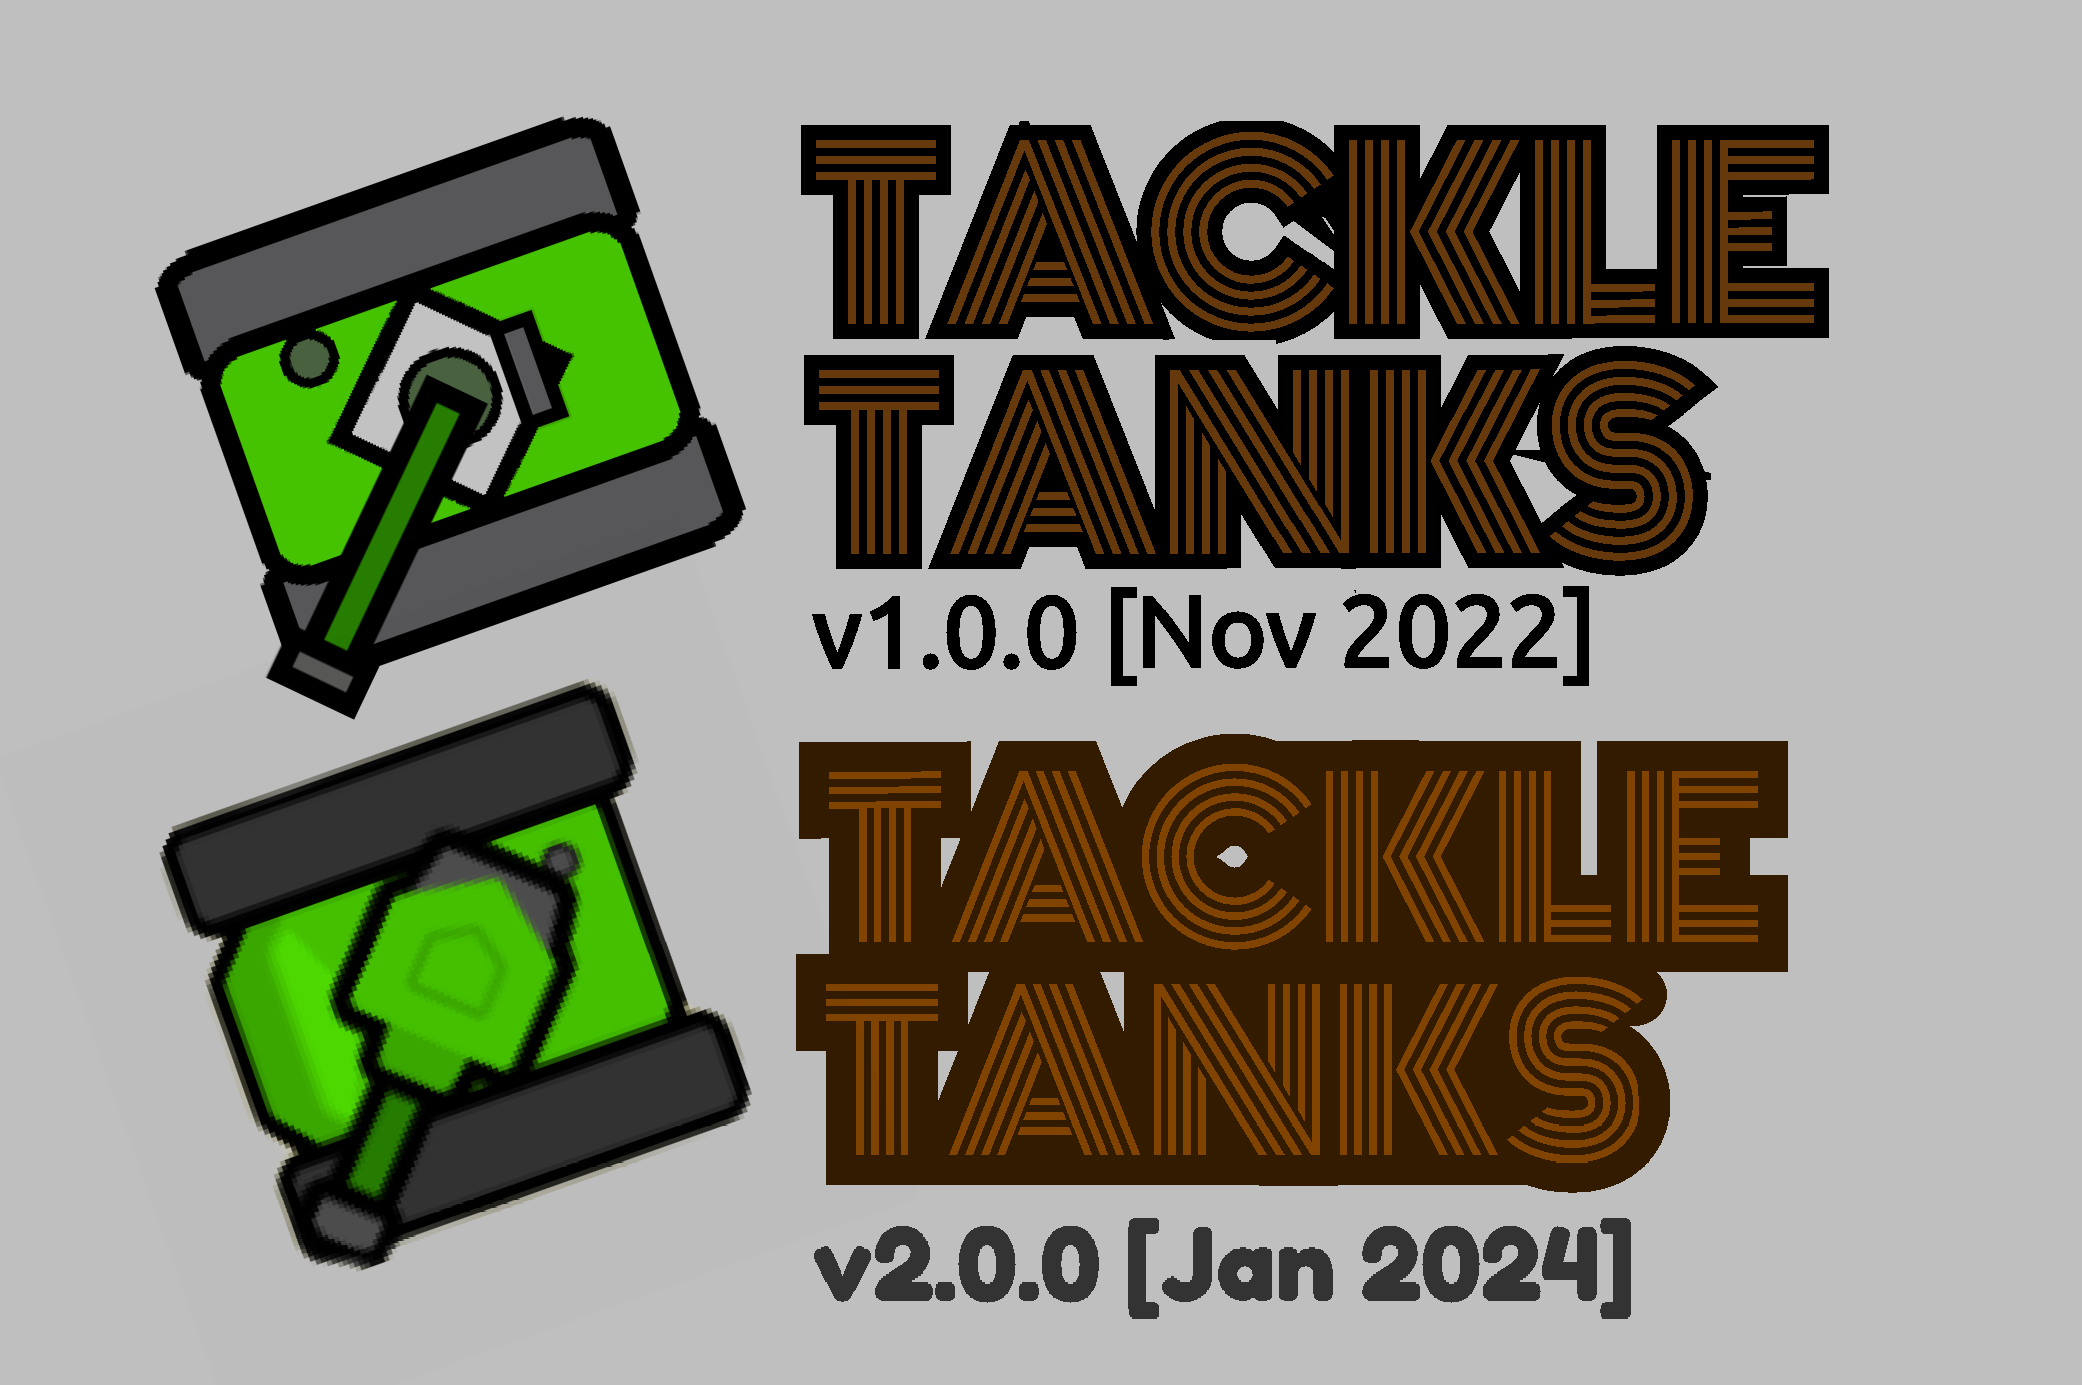
As Rboombox, I was inspired by the other io games on the internet, and decided to make one myself. Using Javascript, HTML5, and CSS we made the first version and publish it November 2022. The game has now had multiple updates, such as having two abilities for each tank. There were also updated guns and machinery, maps and objects, and the implementation of shop. This version of Tackle Tanks is now what you see today.
This beta version is no longer available. Older versions of Tackle Tanks are overwritten by the newest version.
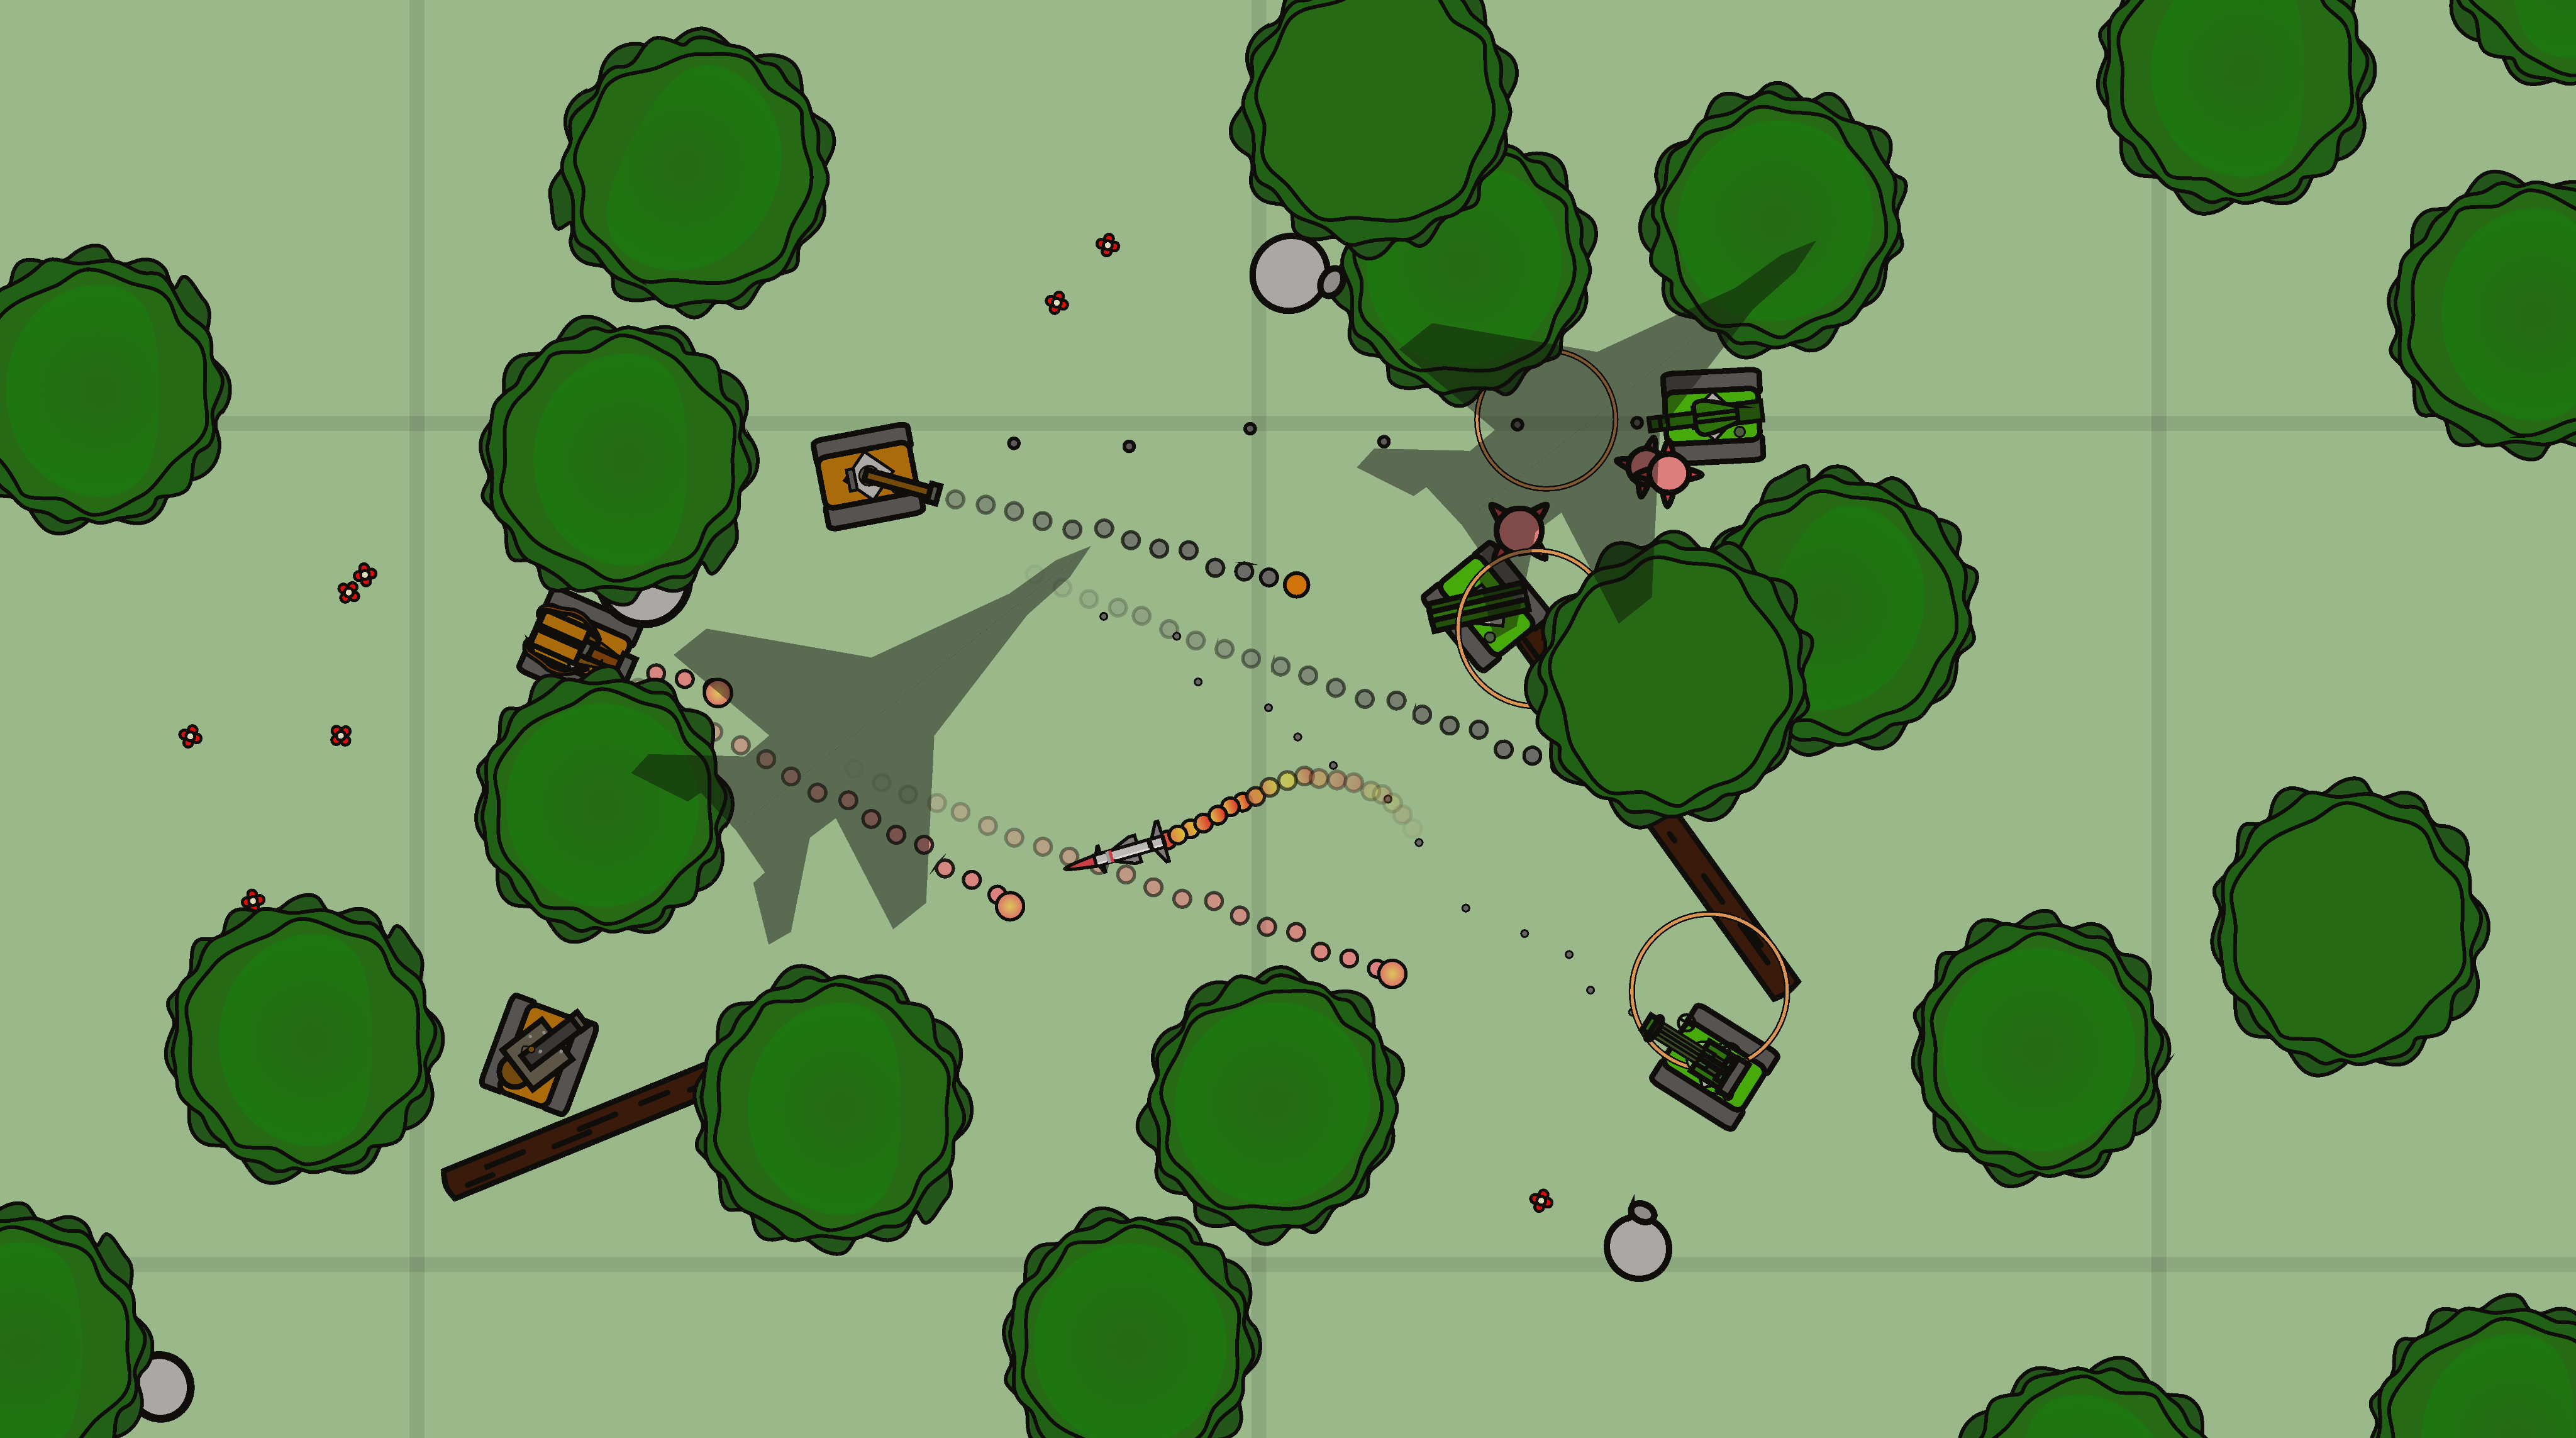
In this new update -- Tackle Tanks v2 as of January 2024 -- there are major improvements. Most of the art and style of the game is upgraded, as well as the abilities and weaponry of each tank. The main problem of the old version was how laggy and slow it ran. This version runs smoother and can handle more objects!
Other updates include: new game modes, more skins, upgraded scoring system, better effects and particles, better options/settings, ect. This game guide is another advancement as well. If you are trying to find any information about how something works, search it up in this game guide--you are sure to find it!
Github and Programs
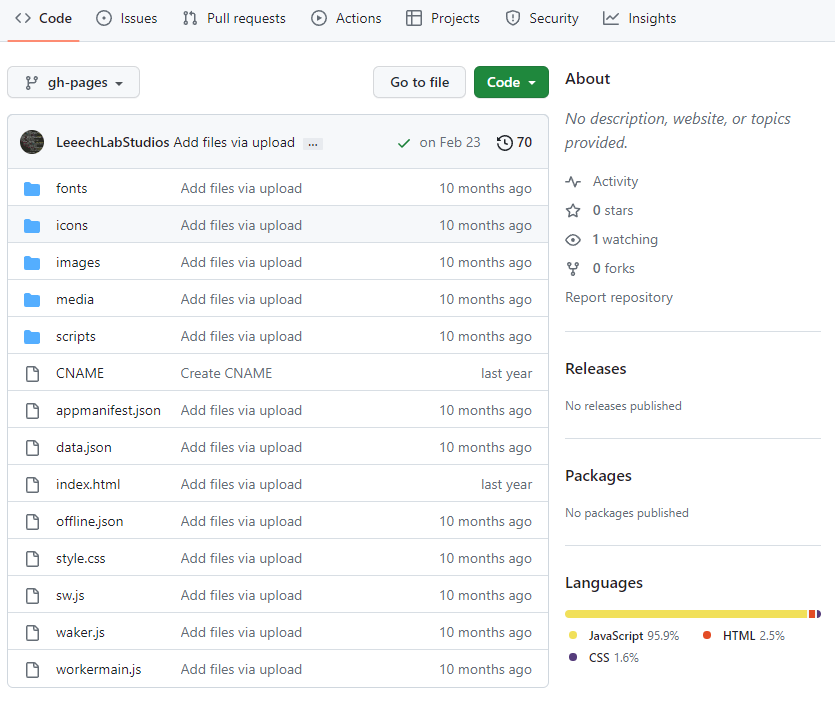
Since we are all for transparency, you can see all of the scripts and
programs that will run on your browser as you're playing the game. To
check this out,
click this link. This is posted on Github.
If you find errors/bugs or you have a suggestion for the game, submit
a statement in the Issue category. You'll have to create an account in
order to do this.
We do not care if you try to make a modded game. Some of the scripts
that runs the server connection, like
c3runtime.js, may help you in your journey. Maybe in the future we will create a program to assist in creating
mods (This hasn't changed as of right now). If you are successful
creating a modded server, we encourage you to share it with the world.
Server Options
This section of the guide will recapitulate each function of a server.
In order to join a game, click play, scroll through the game list, and
then join the game. In order to host a game, click play and then host
a game. This will lead you to a page of game options, titled "Host A
Game". Make sure your device can handle multiple calculations and
rendering if you do this. Low-end processors may result in lag for you
and your players. Also, to clarify most misconceptions, hosting a
server is FREE.
The first thing that appears is the map options. In order to change
how people can select the next map, select "Change of Map". "Map vote"
means that after a game, your players can vote on the next map (this
poll is open for 30 seconds). Random means that the next map will be
arbitrary. The rest of the options means that the map is always
constant (Ex: If you select "Grasslands Only", the map will stay as
Grasslands until the host leaves). If you select these options, you
will not be able to change the "Starting Map". Otherwise, if you click
"Starting Map", this will change the first map in your game.
In order to change the size of the field, click on "Map
Size". The options, Small, Medium, and Large, are exactly what they
represent.
IMPORTANT: Some server options may be immutable based on certain gamemodes! (Ex: If the gamemode “Zombies" is selected, the amount of players will change. If the gamemode "Mini Arena" is selected, the map size will change to Mini). Check out each gamemodes to see every limitation!
After the map segment there is a "Gamemode" segment. There are only
two options you can change here. The first option will change the
actual objectives and style of the game. To see each gamemode and
their rules, go to the
Gamemode[25]
guide.
The next option is "Time Limit". Exactly as it's
written, this represents the amount of time for each round. The
default is 15 minutes, but the maximum amount is an hour (the minimum:
1 minute).
The next segment is the "Tank" category. The
first option changes the number of players PER TEAM. This said, if the
number of players per team is 50, a maximum of 100 players can join
your server because there are two teams. The next option is titled
"Select your tank". It can either be disabled or enabled. Disabling
this will result in players receiving a randomly selected tank. If
enabled, players can choose their tank. They can only do this each
round though, changing the tank is not allowed during the match.
After
this, there is an option to designate what tanks are allowed in your
game (Titled, "Allowed Tanks"). By default, all of the tanks are
selected. You can unselect a tank be clicking on it, changing the
color to be gray. Gray obviously means it's unselected. If you think a
tank will not suit your needs, unselect it. At least one tank should
be selected.
The last option is "Automated Bots". You can
enable/disable if your game has bots. A bot will be destroyed after a
player has joined. If a player leaves, a bot will be created. Bots
will also even out a team. If disabled, there will be no bots at
all.
The very last segment is the "Advanced" section. The
first option is "Dedicated Server". This implies that, if enabled,
when you host the game, the game will automatically run until you end
it by clicking "End Server". In basic terms, if your computer is left
on for 24/7, your game will stay up and running. Even though it is
healthy for your computer to run 24/7, this may affect your internet
usage. Check your internet provider to see if running this will stay
in your price range. Otherwise, just disable this. It's really
unnecessary, but it's an option you can select.
Lastly, the
final option for hosting the game is the "Public/Private Game"
selection. If it's public, anybody can find your game and join it. If
private, the only way to enter the game is if you have a code or url.
If you select "Private", invite all your friends by sending them the
link.
After you decided on all of these options, tap "Host
Game", and the server will start. Remember that creating a server will
run programs, manifesting multiple calculations every second. This
game is designed for average computers, so even though you might not
have the best PC, you can still make a game and play with your
friends.
Settings and Each Function
Just like the "Server Options" part above, this is a recapitulation of
each option. To change how your game works in Settings, click the
setting symbol located on the top right corner of the home page. This
will bring you to a page labeled "Settings". There are a number of
settings to change, so modify each option to create the best gameplay
possible.
The first segment on this page is titled
"Gameplay". The first option enables or disables Screen Shake. As the
name implies, your screen will shake or rumble when you are near an
explosion (Ex: Let's say you are underneath an airstrike. Your screen
will shake like crazy!). Disable it in order to get rid of this. The
next option is titled "Dim Flashbang". When you are flashbanged by a
Sniper[21], your whole screen turns stark white. This might result in temporary
blindness and damage to the retinas if you are playing in a dark room.
When you enable "Dim Flashbang" this will change the flashbanged
effect to become black instead of white, saving your eyes!
The
next option is "Anonymized Usernames". As the name implies, you will
play against friendly default names (Ex: "BraveOperator", or
"UsefulTank"). This will also disable kill feed. This is automatically
set to disabled, so you might see inappropriate names. The final
option for the Gameplay section is "SFX Volume". This changes the
volume for all sounds in the game.
The next section is titled "Key Bindings". To change a key for any
action, click on the action's button and press a key. If you press the
escape key or a key that already exists for another action, the key
will not change. You cannot set the keybinds to Escape or the Arrow
keys.
The first four keybinds of the settings is "Move Up",
"Left", "Right", and "Down". The WASD keys are the defaulted for the
movement of your tank. Also, the arrow keys are constant for moving
the tank. So regardless of what keybinds you use for movement, you can
always rely on moving your tank with the arrow key pad.
The
next keybind is "Alternate Shooting". The name implies that there is a
main button used for shooting. This is the left mouse button, which is
constant. Some tank' powerups (Like
Heavy's[16] Grenade Launcher) or main
gun (Like Sniper's[21] gun) allows
you to aim when you click the right mouse button. This is constant as
well.
The next button is "Reverse". This button, when held, will move the
tank backwards. So if you move your tank and press the reverse key,
you still move in the correct direction, it is just the back of your
tank that faces the direction. This is helpful in some cases,
especially for Cannon's[10] Riot
Shield ability. The default for this key is Shift.
The next
to keybindings you can edit is "Activate Left or Right Ability".
Naturally Q and E, these buttons activate the ability your tank has.
If you activated the ability, and press the same key again, it
deactivates the ability. Deactivating before the main cooldown of that
ability may result in less cooldown.
The next ability is
"Detonate", which is defaulted to the X key. This is meant for certain
gadgets your tank might have. For instance if you are a
Mechanic[12] tank and you activate
your RC Car ability, you can explode your car early by holding the
detonate key.
The next bind you can edit is the "Show/Hide
Chat" key. This key, as implied, shows or hides the chat if clicked,
and the default is T. To add on to that, the next keybind allows you
to chat. This key is naturally ENTER. In order to actually message
people, you first tap this key, then type whatever message, and then
press ENTER. Regardless of what key you set this to, ENTER will
ultimately send the message.
Messaging in Chat is global! There is no team chat. Make sure you don't inform the enemy about your whereabouts.
The last keybind is "Show/Hide Scoreboard and Menu". As the name
implies, this key when clicked will show the scoreboard and other menu
options. This key by default is TAB.
Finally, the last
section in the Settings page is "Advanced". Here, there are some
settings people normally don't look for. The first option is to show
FPS and Ping. FPS is basically the refresh rate your computer runs. An
average computer might run at 60 Frames Per Second, but if something
that causes your computer to lag (like high CPU usage from this game,
or some internet troubles), your FPS will decrease. You will notice
this naturally when you see lag. Ping (the technical term is latency)
means the time it takes for data to be transmitted from your device to
the server. When you join a game in Tackle Tanks, if the Host lives
somewhere very far from you, lagginess will show up. If you enable FPS
and Ping, you can see how much time data reaches your server and back.
20 m/s or less is a very great ping. 100m/s or more is a bad ping. If
you are a host, your ping is 0 m/s, because you are the connector.
The
next two options are "Effects" and "Particles". There are various
effects in Tackle Tanks. For example, when you see fire in the game,
you visibly see orange flames stretching and dilating. This motion is
caused by an effect by our software. Particles on the hand, are
objects you see. When you are in any of the maps, you will see
flowers. These flowers are particles. Particles have no collision, but
it takes space, making the CPU usage rise. More CPU usage means more
lag. If your computer can't handle these particles and effects,
disable both of these.
"Object Limiter" is the next option.
Here, you can set the number of objects in your game. Trees, rocks,
anything with collision, are mandatory objects. Since there around
1000 mandatory objects in any given game, this is set as the minimum
number. If you enter a number below this, it will set it to 0, meaning
there is no limit. The maximum is 2000 because it is not possible for
this game to have more than 2000 objects at a time. Some objects might
not disappear if you are the host.
Lastly, the final option
is the red warning button. This is asking to clear ALL of your user
data. There is no going back if you click this option. All your skins,
stats, even your settings, will disappear. Your progress will be
reset. Don't worry, if you accidentally click this, another warning
prompt will appear. Here you can click cancel.
After editing and modifying everything to suit you needs, scroll at
the very top of the page. Here, you can click "Save". Do not click out
of the page because it will not save. There is another button titled
"Reset to Default". As the name implies, if you click it, it will
reset all of the settings, returning everything to the default.
Gameplay
The mechanics of this game is very simple, allowing all players to
enjoy. Each user is a tank. You can control the tank by moving up,
down left, or right (default is WASD, arrow keys are constant). You
can aim and fire using your gun or ability (Default is left mouse to
shoot and right mouse to aim, Space is constant). Every tank has a
main weapon and two secondary abilities. There are limits. Gun Cool is
a variable that affects your firing. Each tank afflict this variable
at different speeds. For example, the
Sniper Tank[21] can only fire three
times back to back until the gun heat disallows you to shoot. The gun
will have to fully cool in order to shoot again.
The
abilities have limits as well. Every ability will have timer based on
how powerful they are. For example,
Recon's Airstrike[20] has a cooldown
of 120 seconds before it can be used again. This is because the
airstrike is massive and has a devastating effect. Each tank has at
least one defensive and one offensive ability.
The baseline
integrity for all tanks is 1000hp. In order to fully destroy a tank,
you must deplete their health. There are three types of damage,
Explosive damage (may be referred to as “Area damage”), Impact damage,
or Continuous damage. Impact damage is the damage caused by collision
of a projectile (For example,
Cannon's cannonball[10] damages when
it collides against a tank). Explosive damage, as the name suggest, is
damage caused by explosions, an area effect, contrary to impact. If a
kerosene can blows up, it causes damage over a short period of time
(the longer the tank is in range with the explosion, the more damage
the tank receives). Explosive damage, decreases the farther away you
are from the explosion. Continuous damage is damage caused when a
substance is within contact with your tank. (For example, each of
Corrosive’s particles[24] damages
your tank when it’s touching you). This damage is usually small, but
can build up insidiously.
After each match, you are
rewarded Scraps (in-game currency) based on what you did on the
battlefield. Even though you might have lost the match, you will be
rewarded. During the game you can find your stats by pressing the
Leaderboard button in the bottom right corner.
To save your scraps, make sure you click the leave button. Anything else (reloading, back page, ect) will result in a loss of your hard earned rewards. Scraps are automatically saved after each match.
The scraps you earn can be used to buy different skins. These skins are located back on the main page in the top left corner, labeled “Shop”. Here you can also find the amount of Scraps. Once you click the shop button, you will land on the shop page, where you can select the skins you want to equip and buy skins if you have enough Scraps. We might add more types of items in the future.
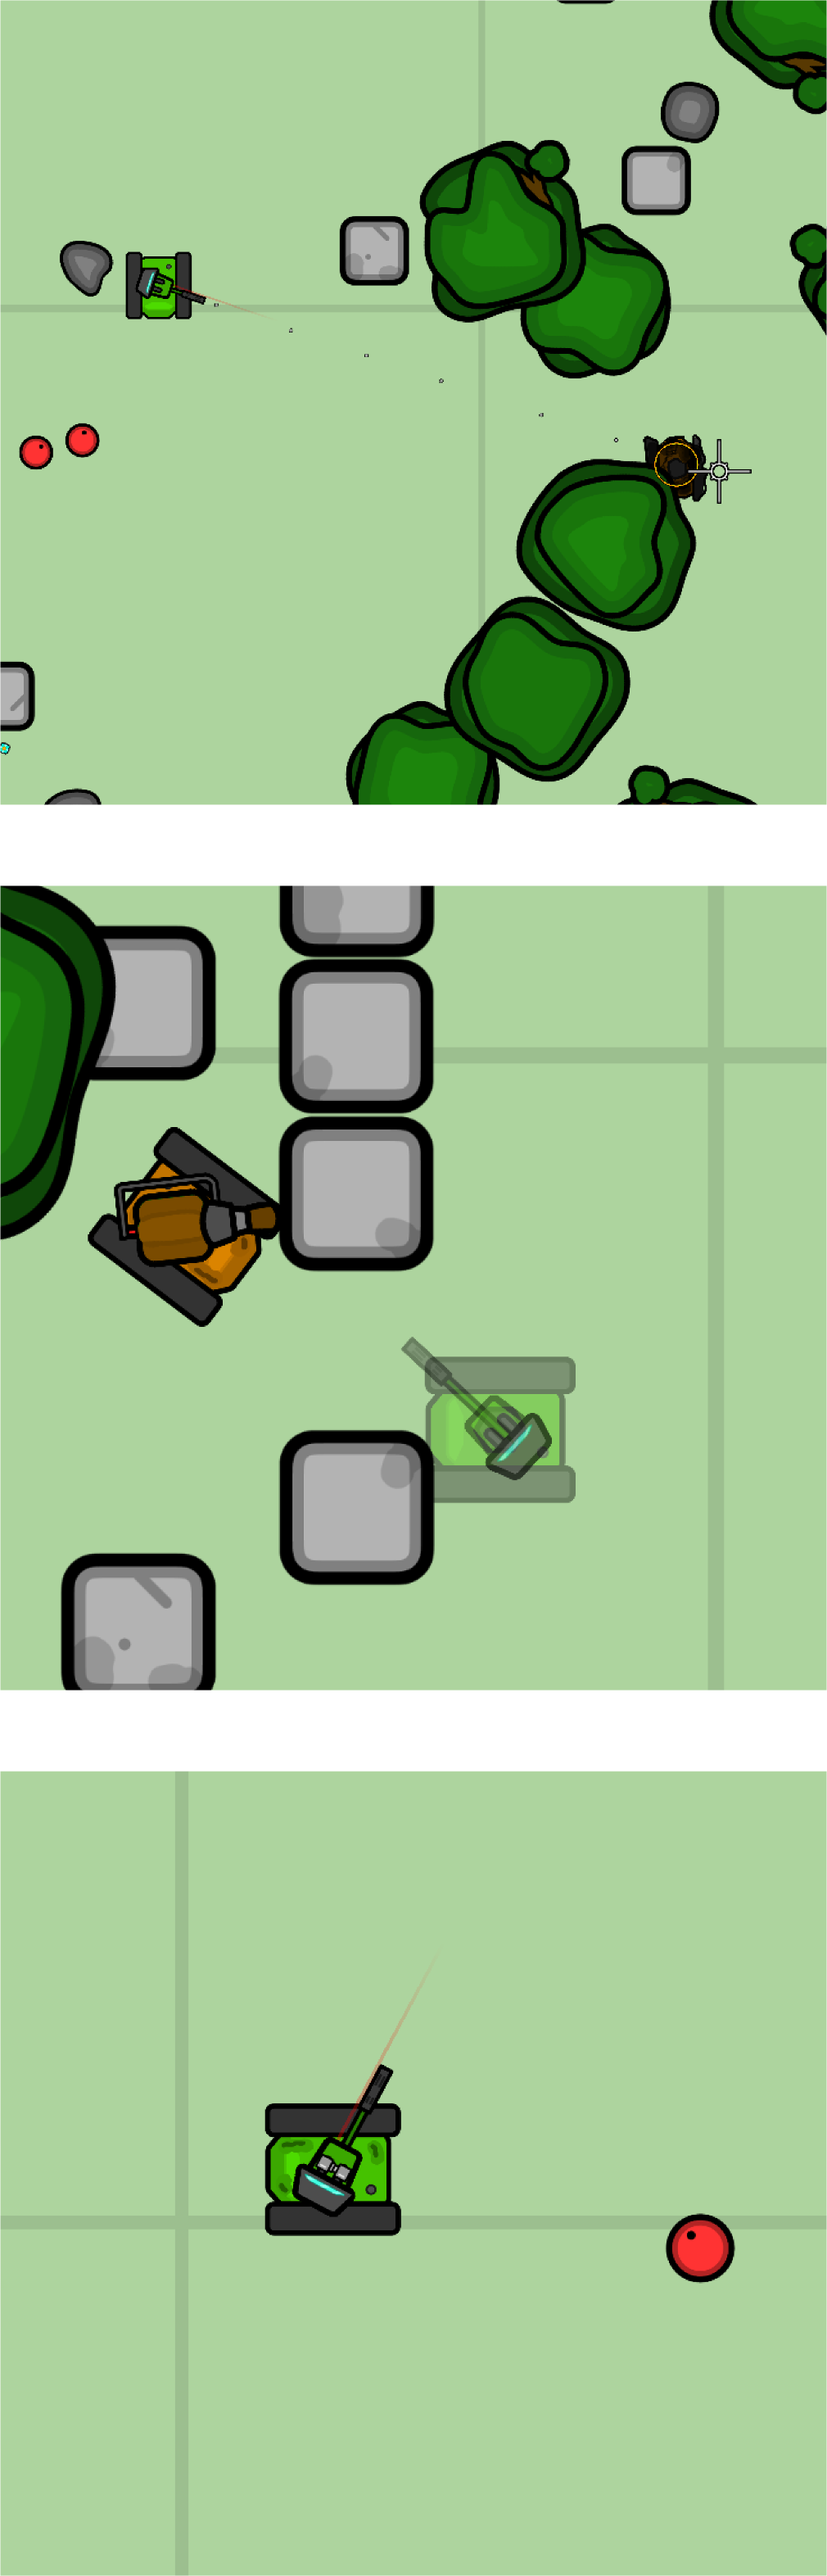
Basic User Interface and HUD
This section will give you all the information about the basic user
interfaces. The UI that are purposed for a certain gamemode, like
Capture The Bases's Base Information[26], will be explained in the Gamemodes category. Any other general
interface will be explained here.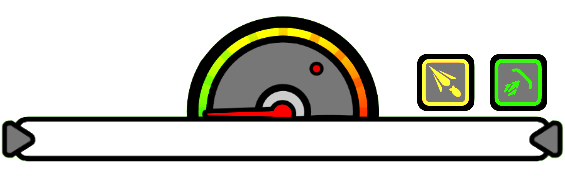 The first and most prominent design you might find is the health and
gun temperature indicators. The health bar, as named, tells you the
total integrity of your tank. Another indication of your health would
be the damage indicated on your tank. Your gun temperature is marked
by the red gauge. The higher the temperature, the more it reaches the
end point. If the end point is reached. A red LED will flash on,
indicating that you can no longer fire.
The first and most prominent design you might find is the health and
gun temperature indicators. The health bar, as named, tells you the
total integrity of your tank. Another indication of your health would
be the damage indicated on your tank. Your gun temperature is marked
by the red gauge. The higher the temperature, the more it reaches the
end point. If the end point is reached. A red LED will flash on,
indicating that you can no longer fire.
Just above the
health bar is two abilities. Both abilities can be clicked to activate
it (or re-clicked to cancel). After the ability is used, the button
will turn dark and display the time it takes until you can activate it
again.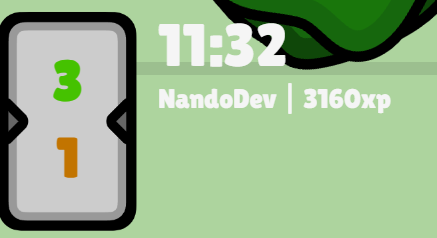
The next interface can be seen in the top left. Here,
you will find the current objective and the time until the match ends.
Below the time you will see the current Tackle Leader. The Tackle
Leader tally will be shown based on gamemode (For example,
Team Deathmatch's[25] Tackle
Leader is based the amount of XP you earn).
In the top right corner you will find the kill feed. If
you destroy another player, it'll show here. If you accidentally
destroy yourself in any case, it will also show up in the Kill Feed.
If you are destroyed, you will land on the spectate page. Here you'll
find the current person you're watching and arrows to change who you
want to watch. You can see their current gun cool and integrity (in
the place where yours would be). After 10 seconds, you can click the
respawn button to respawn (if there is respawn in the gamemode you are
playing).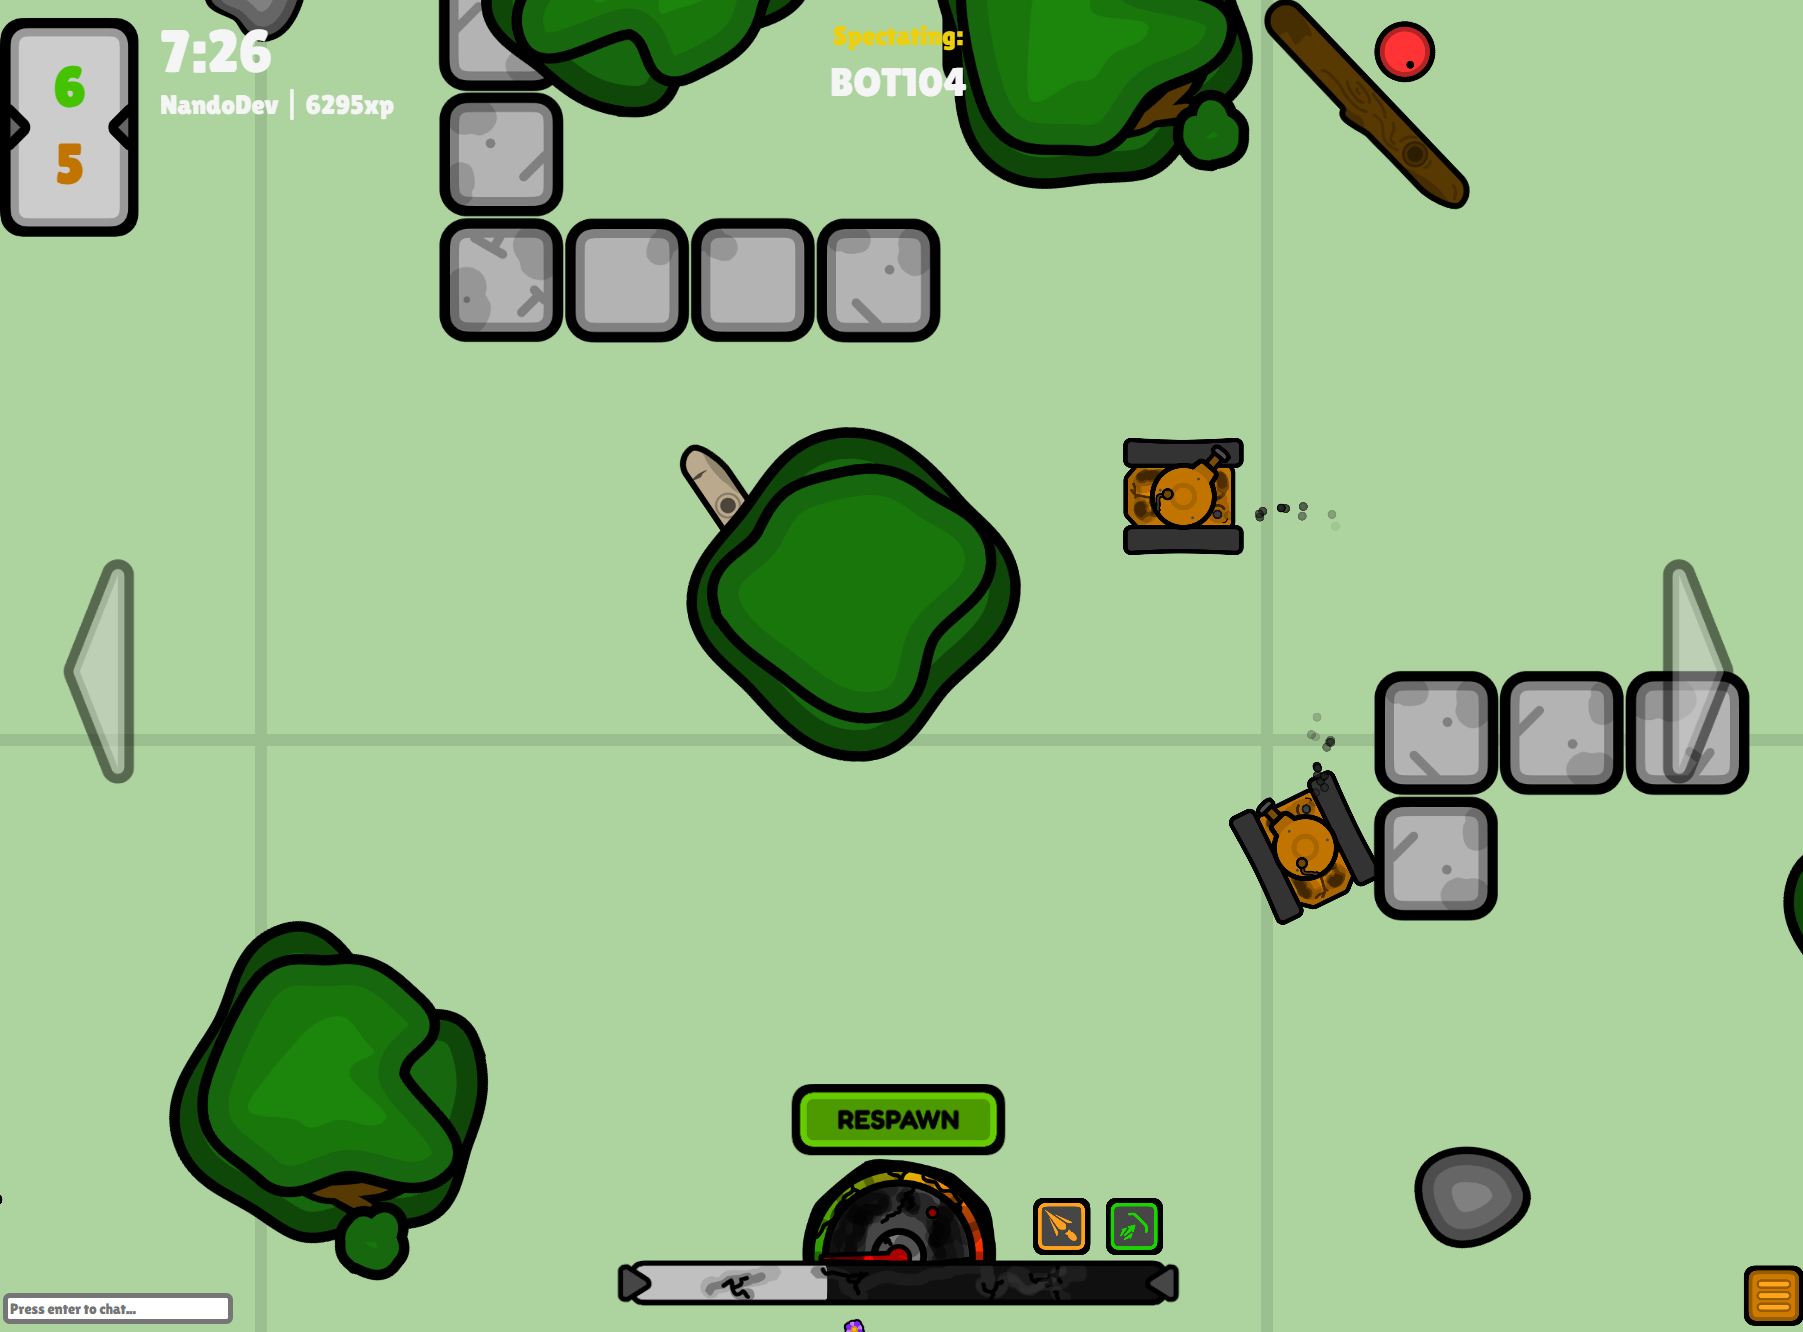
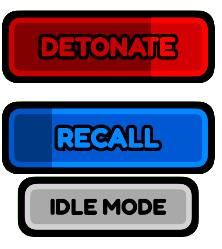
In certain cases, you can control a gadget. Each gadget that you can
control will either have a "Detonate" button or a “Recall” button.
Just as the name suggests, you can click this button (or press the
default key "X") to detonate or call back your gadget. You will not be
able to see your integrity, guncool, or power ups during this time.
Finally, each tank has their own cursor. This cursor will always face
the direction you would want to fire. Make sure that you nozzle is in
the direction to fire before you do shoot. Every tank has a rotate
speed for their turret. It takes about 1.25 seconds for your nozzle to
turn 180 degrees.
There are other small and minor UI, such as the pop up to select your
tank, but it's very self explanatory.
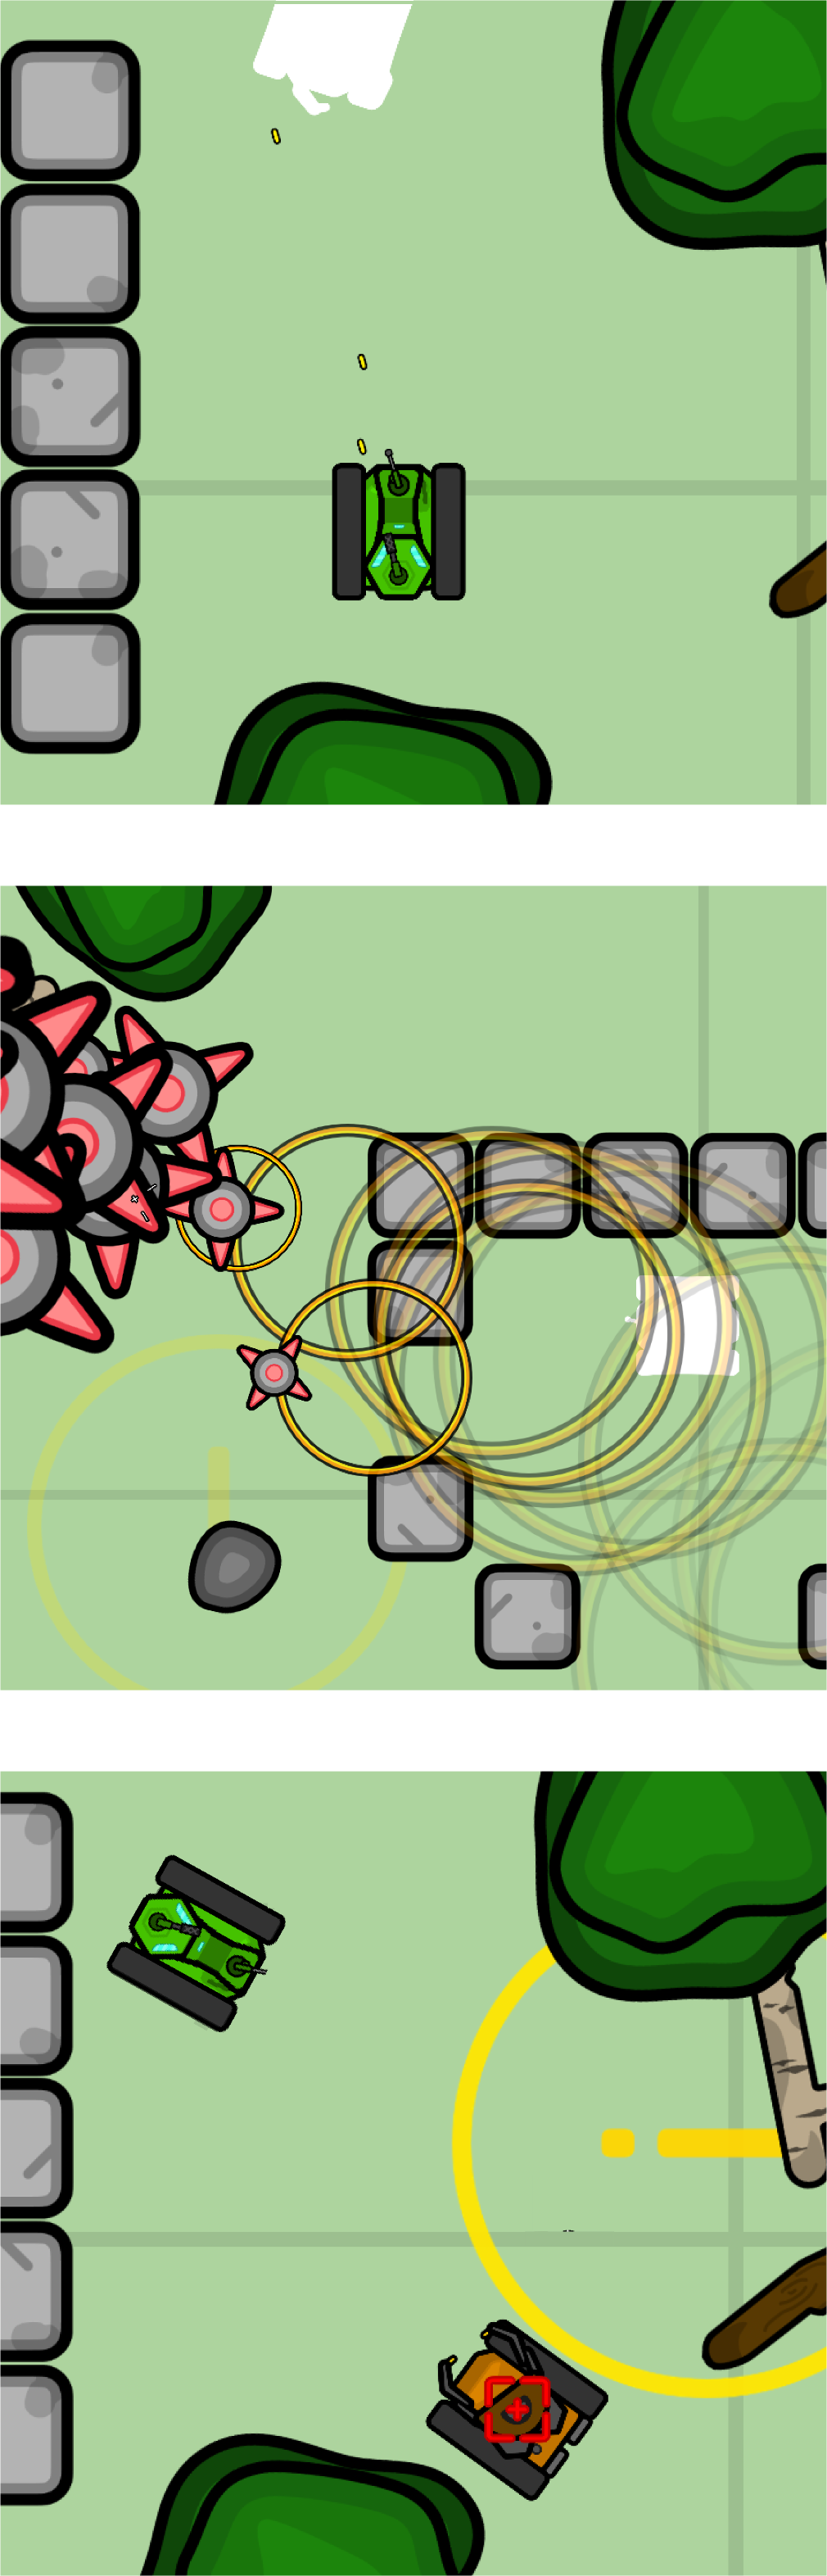
Targeting and Ping System
Targeting enemies is another key factor in this game. Certain power
ups, passive abilities, and gadgets have the ability to ping an enemy
tanker (for example,
Scout's UAV[19] pings enemies as you
fly over them). 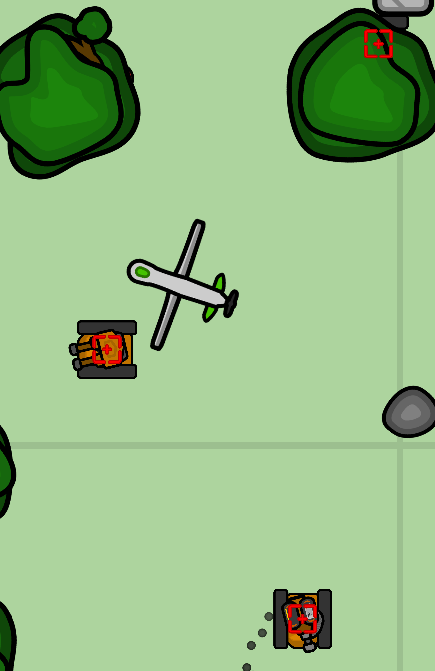 If someone pings an enemy, everyone on their team will be able to see
the ping. In order to see the ping, there are arrows that point to the
enemy on your screen (there is a radius around your tank that provides
pointers). An enemy will not know that they are pinged, nor their
team. This goes for your team as well: everyone in your team are
vulnerable of being targeted without them even knowing it.
If someone pings an enemy, everyone on their team will be able to see
the ping. In order to see the ping, there are arrows that point to the
enemy on your screen (there is a radius around your tank that provides
pointers). An enemy will not know that they are pinged, nor their
team. This goes for your team as well: everyone in your team are
vulnerable of being targeted without them even knowing it.
If you target an enemy, the ping's highlight will not last forever. It
will disappear after about 5 seconds.
There are other
pointers that are not targeted enemies. Yellow arrows are created by
Recon's Move Marker[20], which points you in the general direction of where most of the
enemy team is (or whatever your fellow Recon targeted).
Capture The Bases[26] also
displays pointers. A team colored arrow (green or orange) will point
towards a base. The greener it is, the more the Green Team captured
the base, the more orange, the Orange Team. The more white the arrow,
the more neutral the base is.
XP Merit and Scoring System
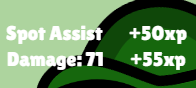
XP, also known as your score, is earned by doing various actions that
will propel you to team victory. There is no way to lose XP, you can
only be rewarded. The more XP you earn, the more Scraps you earn. In
most game modes, Tackle Leader is based on someone who earns the most
XP. At the end of a match, you are rewarded scraps based on the team
win ratings, how much XP you earned, and the placement you are in. if
you are first place in rank, you are rewarded more Scraps. So
generally, build your score by doing stuff!
You are given different amounts of XP for different actions:
Eliminating an Opponent - 1000xp
5 HP worth of Damage - 4xp
(Continuous adding for each damage)
5 HP worth of Repair - 4xp
(Continuous adding for each HP added)
5 flames extinguished - 4xp
(Continuous adding for each flame)
Enemy Grappled - 100xp
Gadget
Destroyed - 50px
Explosive Destroyed- 25xp
Enemy Flashed-
25xp
Enemy Immobilized- 25xp
Spot Assist- 25xp
For Capture the Bases:
Captured Point - 750xp
Discovered Point - 500xp
Neutralized
Point - 250xp
Cannon Tank
(Alias: Assault Tank, Default Tank)

MAIN WEAPONRY:
The main gun is a cannon. It shoots high-power
armor-piercing rounds. These rounds are based on impact damage,
dealing a minimum of 75 HP and a maximum of 125 HP each round. The
rate of fire is 60 rounds per minute. 12.5% of heat is added to the
gun temperature after each round. The gun is highly accurate.
ABILITY #1:
The first ability is an Artillery Strike.
Once activated you have the ability to click on 6 points anywhere on
your screen (You cannot place these points near respawn bases). The
strike will not start unless all the points are activated. After all 6
are selected, Artillery shells are fired from your base onto the
coordinates. These shells have major explosive damage over a large
area. Any tank directly on the fire of two of these shells will
ultimately die. It takes 120 seconds to use this power up again.
ABILITY #2:
The second ability is a Riot Shield. When
activated, a shield emerges and protects the front and back of your
tank. Your main weaponry is disabled. This shield protects you from
all impact damage for up to 30 seconds. You can deactivate this
ability at any time. It takes 15 to use this power up again. To
control the direction of the shield, move your cursor towards to front
or the back of the tank and the shield will move accordingly. (Be
aware! Your sides can be exposed!)
The Riot Shield ability can be difficult to use, but if used correctly, it allows for a greater push for you and your teammates. Press your reverse key (Default is SHIFT), to reverse, allowing you tactically lose ground so your teammates can escape!
PASSIVE ABILITY:
Since it can be fairly difficult to get kills
with only the main weapon, a natural ability is resetting the gun
temperature after kills. This works for any type of kill, whether it
be with the main cannon or your artillery strike. The gun temperature
will be reset completely.
Turret Tank
(Alias: Support Tank)

MAIN WEAPONRY:
The main gun is a machine gun. It shoots multiple
rapid pellets in a short amount of time. These pellets deal small
impact damage, decreasing a minimum of 5 HP and a maximum of 25 HP for
each bullet. The rate of fire is 600 rounds per minute. 2.5% of heat
is added to the gun temperature after each pellet is fired. The turret
has a 15 degree spread, so stay in close range to your enemies.
ABILITY #1:
The first ability is a Deflector Shield.
Once activated, a two foldable shield flips up, attached to your
nozzle. The side that is protected is the side where you point your
nozzle, but you can still take damage if a projectile hits right in
between the two parts of the shield. You are able to fire with this
power up activated. Recharge time is 45 seconds.
ABILITY
#2:
The second ability is a Deployable Turret. When activated,
you can click anywhere around you to set one turret. Once selected,
the turret is ejected towards your select area. This turret will
automatically shoot enemies nearby. If shot at or run over, the turret
will be destroyed. It takes 75 seconds to use this power up again.
PASSIVE ABILITY:
Your main weaponry has an automatic
turret attached to it. This turret will shoot when enemies come close.
It shoots with a fast rate of fire until eventually it has to reload.
Reloading and firing is automatic.
This tank hails a bunch of firepower on the enemy. To get the most kills, activate both of your powerups simultaneously to get maximum damage!
Mechanic Tank
(Alias: Medic, Repair Tank, Mech)

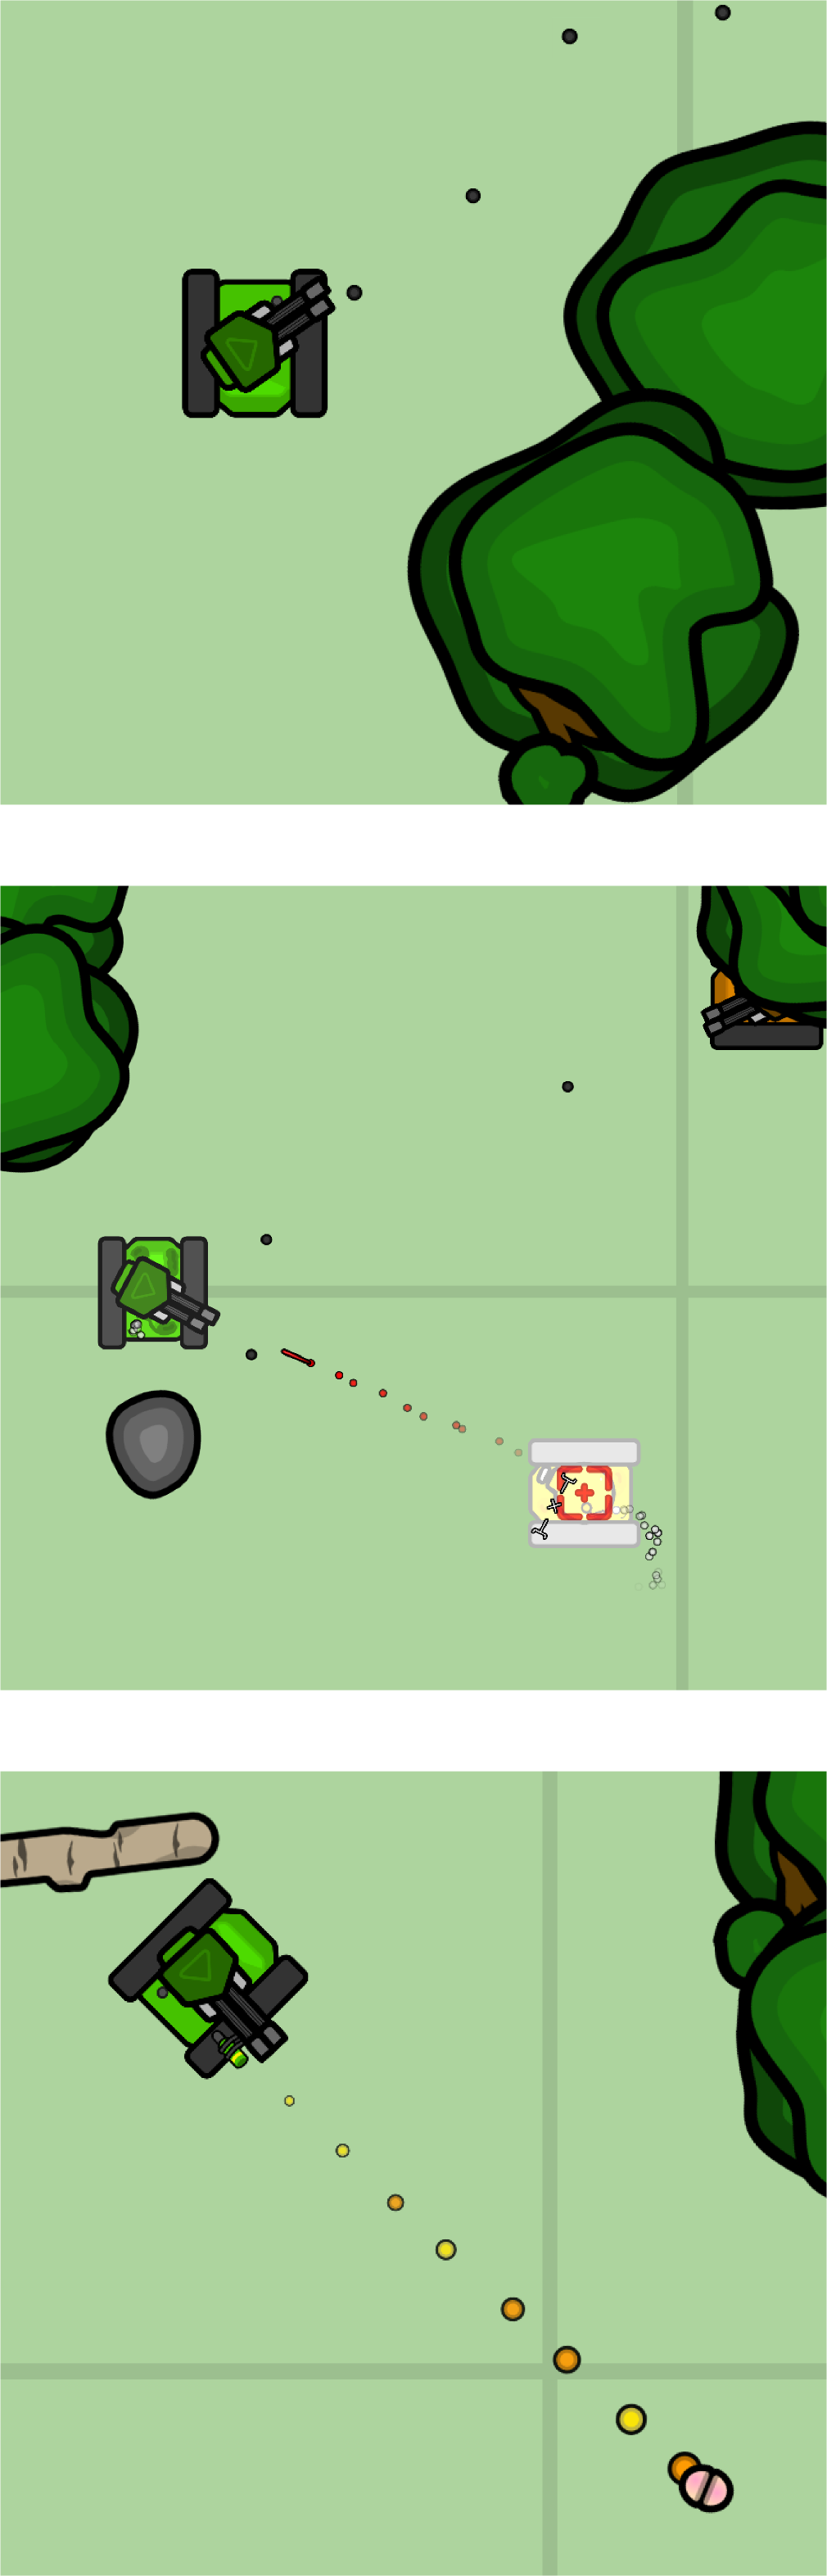
MAIN WEAPONRY:
The main tool is dual welding machine. It is
mainly used to repair your fellow tanks, but it can also damage
enemies if they come too close. You have to be within melee distance
to repair or to damage. It repairs a minimum of 225 and maximum of 300
hp per second. It damages a minimum of 225 hp and a maximum of 450 hp
per second.
You can become unstoppable. Find a fellow mechanic and team up with them, healing your allies while healing each other. This diminishes incoming enemy fire!
ABILITY #1:
The first ability is a Remote Controlled Bomb Car.
Once activated, a RC car slides out of the back of your tank. You can
control the car by holding the mouse down, making the car drive
towards your mouse pointer. Once close to an enemy, you can blow up
the car by holding the detonation key (Default is “X”). The detonation
has a maximum damage of 735 hp, but keep in mind this is
explosion damage[6]. You have 30 seconds until the car will detonate. Once detonated,
you have to wait 75 seconds until you can use this ability again.
ABILITY #2:
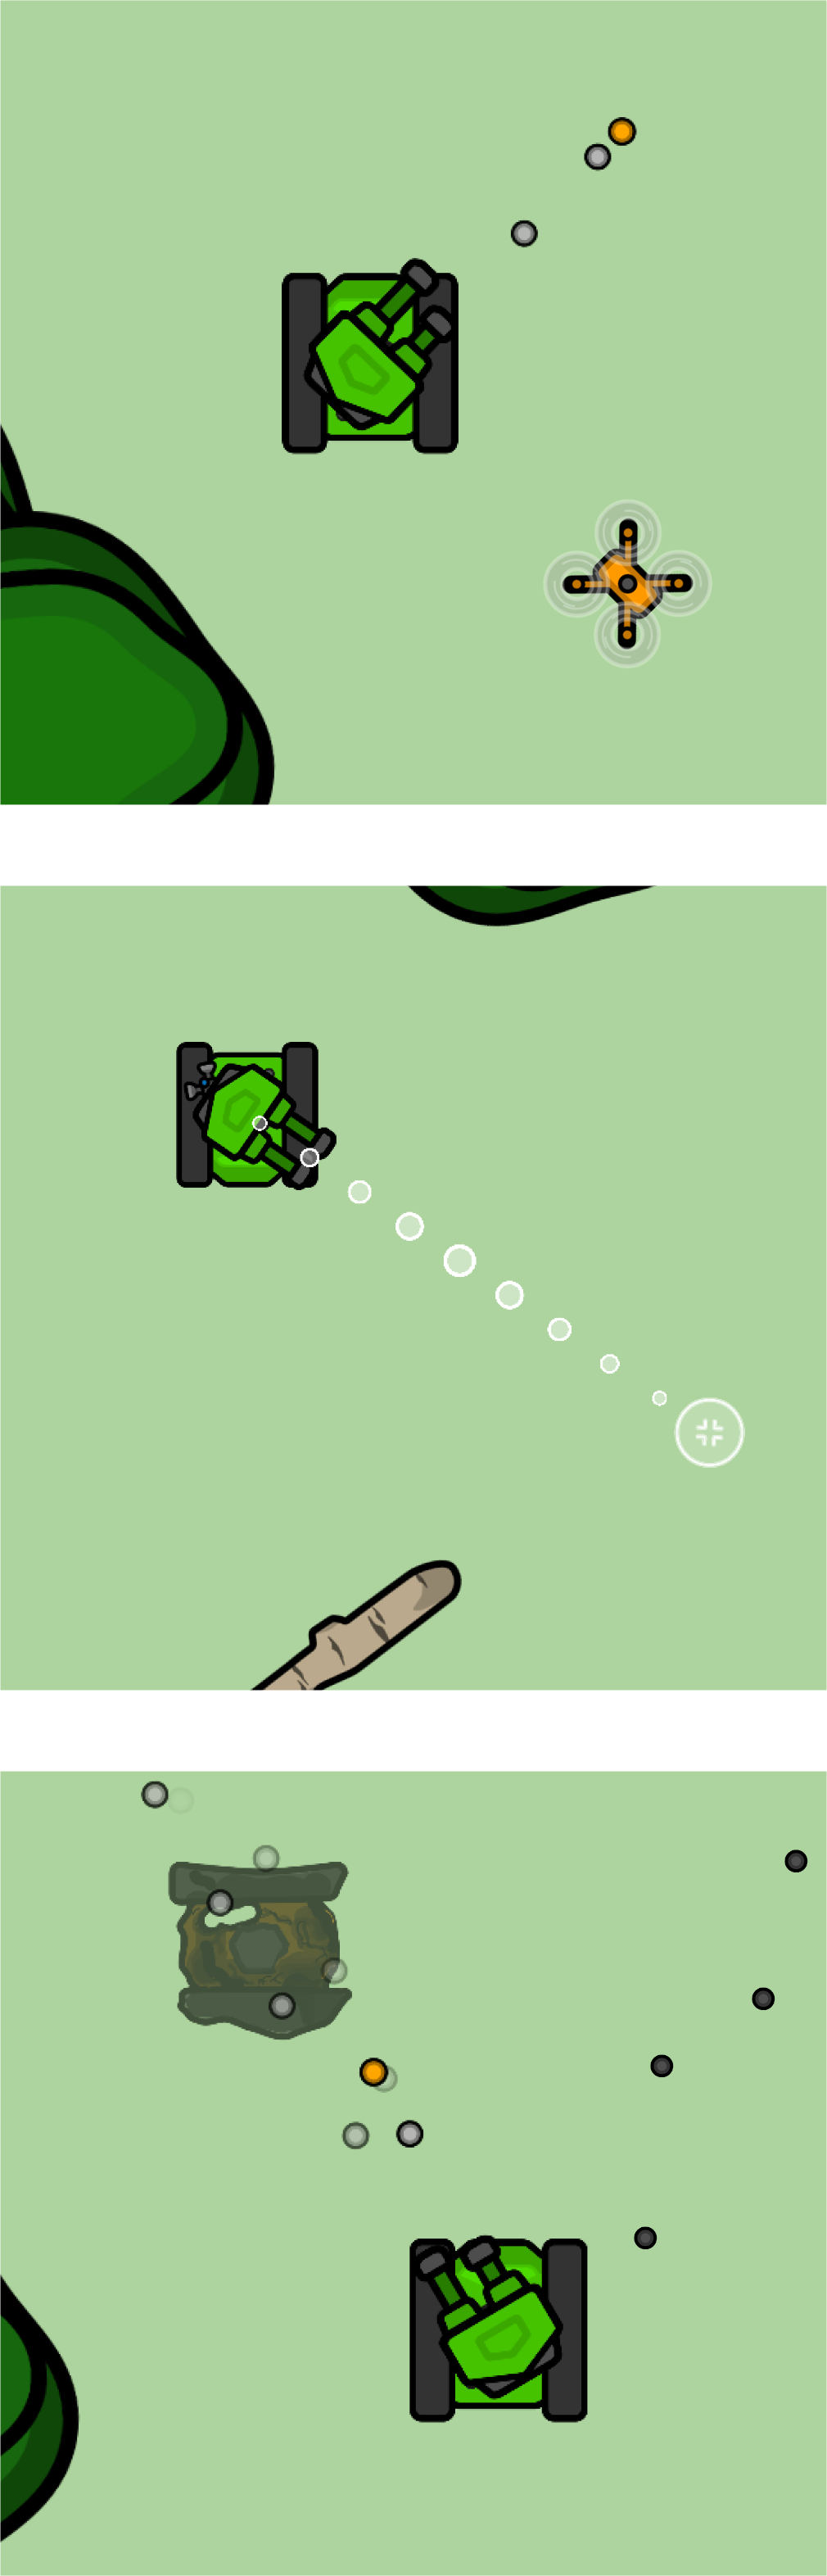
The second ability is a Targeter Drone.
When activated, a drone is deployed from the back of your tank. You
can fly by pressing your mouse down, allowing the drone to move
towards your mouse pointer. The drone can target enemy positions,
pinging them to you and your allies. In order to ping someone, you
must click on the enemy tank. It pings enemies for about 15 seconds
before fading away. If the battery runs out, or you hold down the
detonation key, the drone will fly back to your tank. Hold still to
allow the drone to land.
PASSIVE ABILITY:
Mechanics
passive ability is self-repairment. This happens automatically,
repairing 5 hp every second.
The mechanic has a reach over thin objects. This allows you to heal or damage players through some wooden or metal fences! So if you see an enemy who can't shoot you, you can still damage them if they get too close!
Sweeper Tank
(Alias: Multi, Shotgun Tank)
MAIN WEAPONRY:
The main gun is a shotgun. It shoots 10 pellets at
the same time. The spread of the pellets has an angled range of 25
degrees. Each pellet deals a small amount of impact damage, decreasing
a minimum of 5 HP and a maximum of 25 HP for each bullet. The rate of
fire is 82 rpm, shooting 827 pellets per minute. 6% of heat is added
to the gun temperature after each burst is fired. The turret has a 15
degree spread, so stay within close range of your enemies.
ABILITY #1:
The first ability is called “Shredder”
for a good reason. It significantly increases your rate of fire. The
rate of fire is 240 rpm, shooting 2400 pellets per minute. After you
use the powerup, you have to wait 45 seconds in order to recharge it.
Even though you can fire faster with the Shredder ability, your gun cool still changes the same amount after each round. Make sure you spread out your shots or you might overheat your gun too quickly!
ABILITY #2:
The second ability causes the front of your tank to
be spiked. This allows your tank to deal heavy damage if you collide
with an enemy head on. This is great for clearing areas. You can use
this ability for 30 seconds before the spikes retract. After the
ability is used, you have to wait 60 seconds before using it again.
PASSIVE ABILITY:
You are more resistant to
Sniper’s Flashbang[21] and
Railgun’s Immobilizer[21]. The disorienting effects last shorter than any other tank. This
allows you to get back into the battle quicker.
Missle Tank
(Alias: Silo Tank)
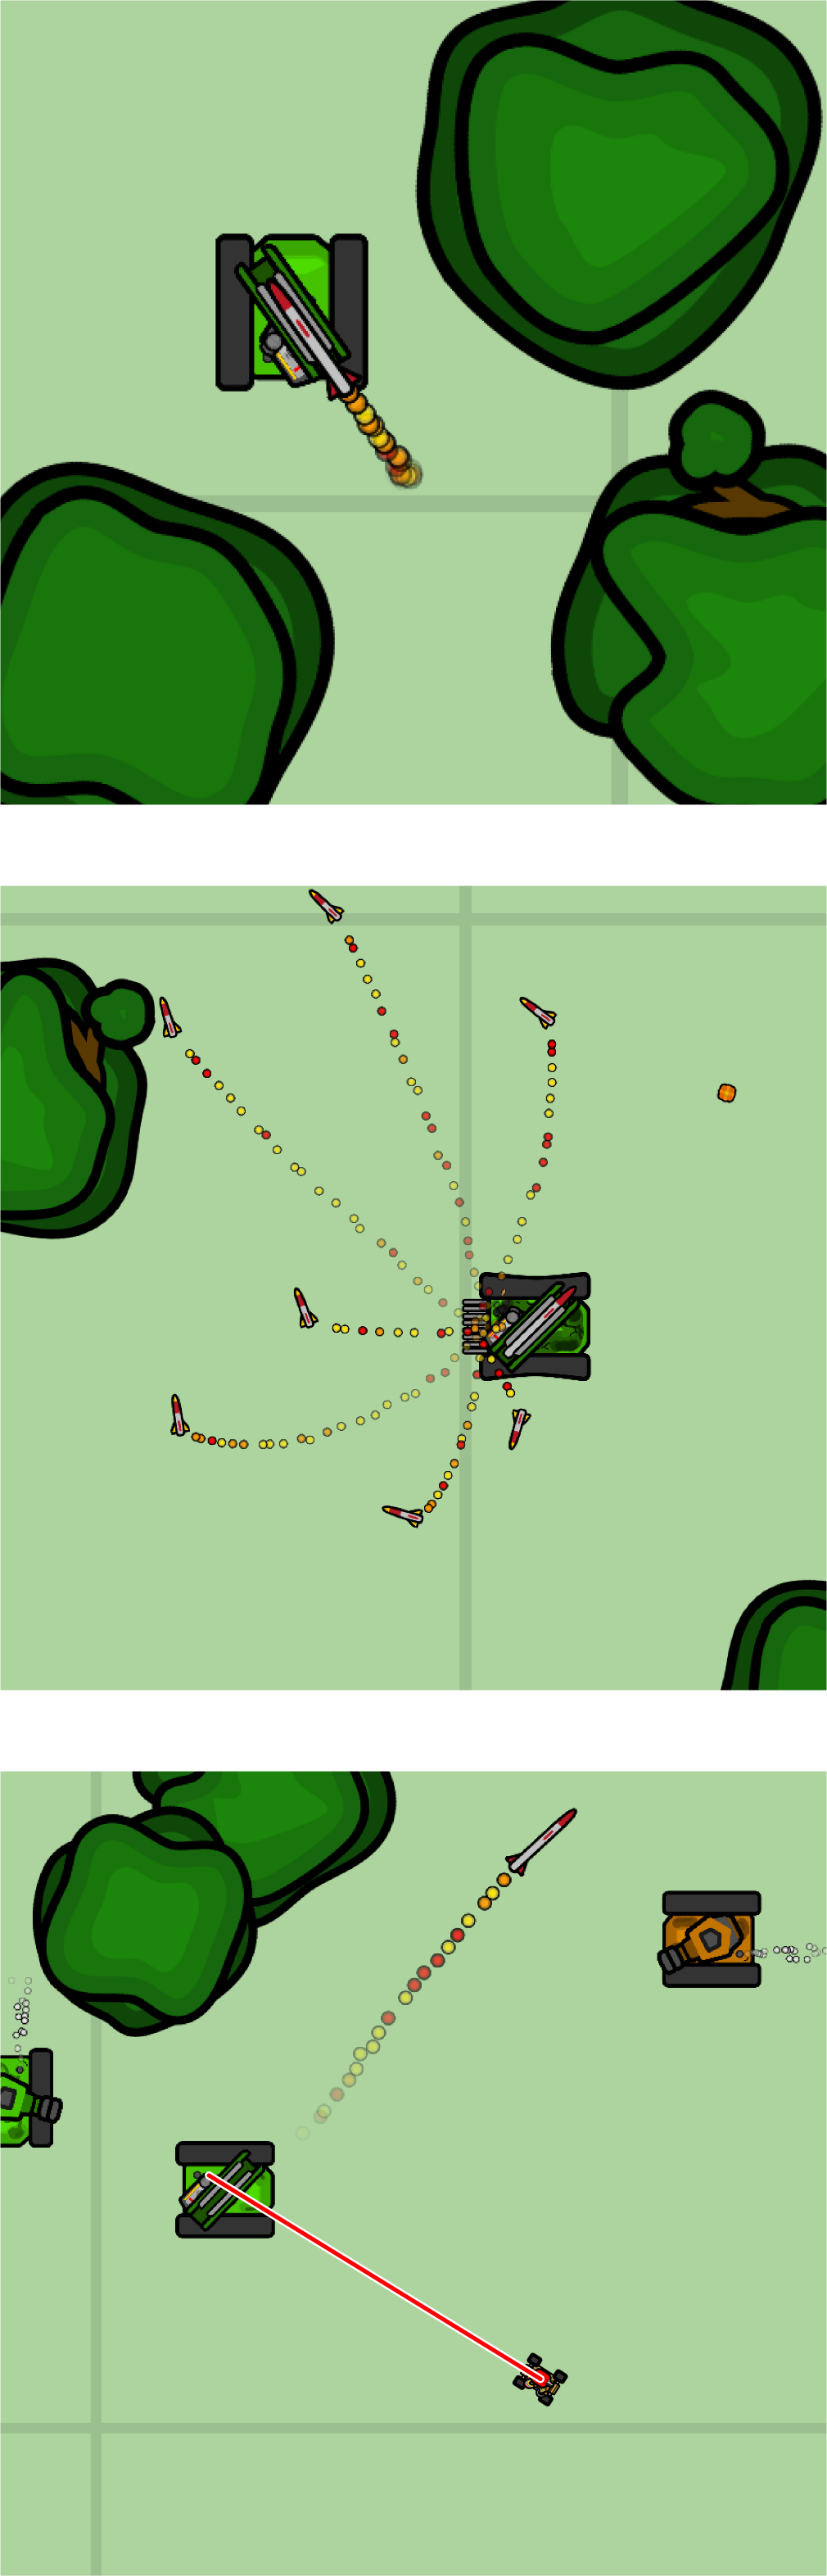
MAIN WEAPONRY:
The main weapon is a guided missile. It fires a
missile, guided by your mouse pointer. Once the missile contacts any
enemy tank or object, the missile will explode with huge impact
damage, dealing a minimum of 650 HP and a maximum of 750 HP. The
reload time is based on the gun cool, because once fired, the gun cool
reaches its maximum. This is a ranged weapon, and it takes space to
fire accurately. Do not put the back of your nozzle facing the wall
when firing; the missile will explode.
ABILITY #1:
The
first ability is Swarm. Once activated, multiple mini missiles will
deploy, actively auto-guiding towards the nearest enemy. You cannot
guide these missiles. It takes a bunch of space to fire the Swarm as
it spreads out from the back of your tank. Have at least four
tank-lengths of distance from the back of your tank to the nearest
object; Otherwise, some of the guided missiles will explode. It takes
75 seconds to use the power up again.
Since the Swarm projectiles are activated from the back of the tank, face the back of your tank towards the enemy. This will give the missiles more range and velocity against the enemy.
ABILITY #2:
The second ability is HELIOS defense (High Energy
Laser with Integrated Optical-Dazzler and Surveillance). Once
activated, this device begins to search and burn any nearby moving
electronics, from enemy UAVs[19] to
Drones[12] and even enemy guided
missiles. It is also a direct counter to the Swarm. Any enemy
projectile or gadget that can be moved by the user can be shot down by
the HELIOS defense system. You cannot control this device; it locks on
to the nearest enemy gadget. It takes 30 seconds to regenerate this
powerup.
PASSIVE ABILITY:
This tank’s passive ability
is the Early Warning System. It pings any set-down enemy gadget
ranging from Mines[19] to
Turrets[19]. Only you can see this ping. The ping is a blue target that turns
into an arrow if you are a distance away from it. In order for this
ping to activate you have to find the gadget.
Dual Tank
(Alias: Double, Akimbo Tank)
MAIN WEAPONRY:
The main weapon is two cannons. It fires
high-impact armor-piercing rounds, at a faster rate than
Cannon Tank[10]. The rate of fire is 100 rounds per minute. Each projectile deals a
minimum of 75 HP and a maximum of 125 HP. It increases the gun cool by
12.5%.
Although the main cannons fire accurately, the left gun is aiming slightly left of your cursor, and the right is aiming slightly right. Don’t expect the projectile to hit exactly on your cursor! Make sure each cannon cursor icon is aiming at the target.
ABILITY #1:
The first ability doubles your fire rate. Once
activated you have the ability to fire 16 shots 200 rounds per minute.
After 16 projectiles are fired, the ability is deactivated. You will
have to wait 45 seconds until you can use this powerup again.
ABILITY #2:
The second ability is a Trophy System.
When activated, you can click anywhere around you to set one trophy
system. Once selected, the system flings towards your select area.
This turret will disable any explosive ordinances within 2.5
tank-lengths. The trophy system can only handle 200 HP worth of damage
before being disabled. It takes 75 seconds to use this power up again.
PASSIVE ABILITY:
Since this is relatively a bigger
tank, it has 125 more HP, having a total of 1125 HP.
Heavy Tank
(Alias: Tubby (or Tub) Tank)
MAIN WEAPONRY:
The main weapon is a heavy machine gun. It fires
armor piercing rounds at a high rate of fire; 333 rounds per minute.
Each projectile deals a minimum of 20 HP and a maximum of 50 HP. The
machine gun has a 8 degree spread, categorizing this as a medium range
tank. Each time a projectile is fired it adds 4.5% to the gun cool.
ABILITY #1:
The first ability is flak armor. Once
activated, all types of damage are reduced by 50% for 30 seconds,
requiring the enemy to use double the effort to destroy you. Once your
30 seconds is up, it takes 30 seconds for you to use the ability
again.
ABILITY #2:
The second ability is a Grenade
Launcher. When activated, you can fire 10 explosive rounds with your
aim button (Default is Right Mouse Button). Each explosive round does
an impact damage of 50 to 100 HP. On impacts, or hits the ground due
to range, it explodes with a maximum area damage of 450 HP within a
radius of 1.75 tank-lengths. This round can fire over walls, but you
need to back up at least 3 tank-lengths away from the wall. This
projectile has a range of 12 tank-lengths. Once you used up the 10
rounds, you have to wait 60 seconds until you can use the ability
again.
Since the Grenade Launcher requires you to press the aim button to launch, fire the explosive rounds only when there is multiple targets that are in range of the Grenade Launcher. Fire normally if the enemies are too close or too far! You can fire both your main weapon and the grenade launcher at the same time to maximize your damage. (Also, Grenade Launchers do not affect your gun cool)!
PASSIVE ABILITY:
If your enemy unfortunately defeats you, you
will explode. This explosion has a maximum area damage of 900 HP
within a radius of 2.5 tank-lengths. If you are about to die, charge
towards your enemy to have the last laugh. Take them down with you.
Minigun Tank
(Alias: Mini Tank, Speeder, Rally Tank)
MAIN WEAPONRY:
The main gun is a rapid gatling gun. It shoots
multiple rapid pellets in a very, very short amount of time. These
pellets deal very small impact damage, decreasing a minimum of 5 HP
and a maximum of 10 HP for each bullet. The rate of fire is 2000
rounds per minute! To combat this insane fire rate, it takes about a
second to charge up the gun, which you can do either by holding fire
or aiming (aim button does not fire, it only charges the gun). 1.15%
of heat is added to the gun temp after each pellet is fired. The
minigun has a 4 degree spread, allowing for almost direct aiming.
ABILITY #1:
The first ability is a NOS boost. Once
activated, your tank moves 4.65 tank-lengths per second (rather than
the original 3 tank-lengths per second). This is a 55% increase,
allowing you to move faster for 15 seconds. After the 15 seconds is
up, you have to wait 30 seconds in order to activate the NOS again.
ABILITY #2:
The second ability is a Grappling Hook.
When activated, you can click anywhere around you to set a trap. Once
selected, the trap flings towards your select area. If an enemy drives
over the hook of the trap, the hook will hold the enemy in place for
30 seconds. The enemy is only allowed to move within a radius of 2.5
tank-lengths around the trap. If no enemy is trapped, the trap will
wait 60 seconds before dismantling. It takes 45 seconds to recharge
this ability.
With the Grappling Hook ready, aim ahead of the enemy to grab the enemy. Then circle around them with NOS while firing to defeat them. It’s best to use this ability as a weapon rather than a trap to ensure their deaths!
PASSIVE ABILITY:
Other tanks rotate their turrets 180 degrees per
second, but the Minigun’s turret moves 240 degrees per second. This
allows you to snap towards enemy positions with ease.
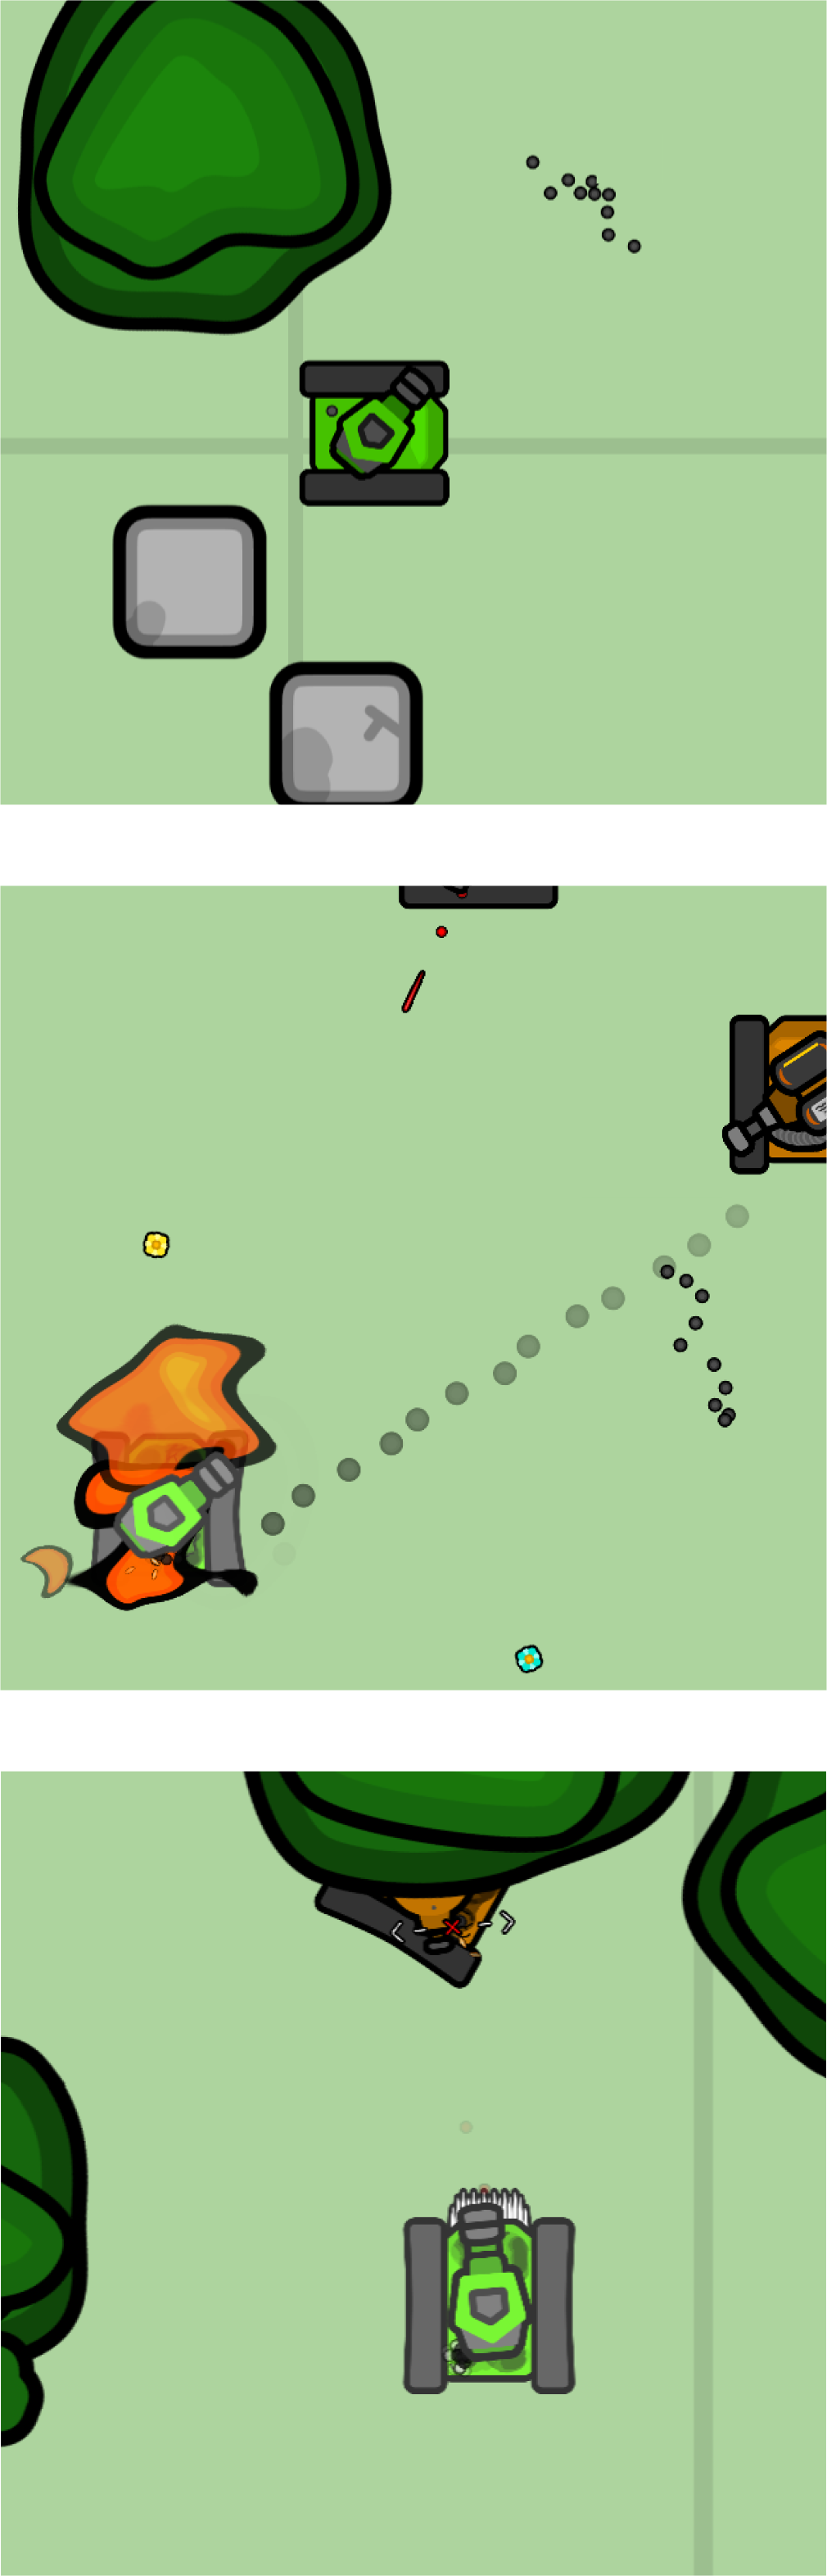
Napalm Tank
(Alias: Pyro Tank, Flame Tank)

MAIN WEAPONRY:
The main gun is an armor-piercing incendiary
cannon. The projectile deals a minimum of 50 HP and a maximum of 100
HP, but once impacted, the projectile bursts into flames, which causes
Continuous Damage[6]. The rate of fire is 150 rounds per minute. 17% of heat is added to
the gun temp after each projectile is fired. The cannon has a 10
degree spread. The incendiary round has a range of 5 tank-lengths and
will ultimately burst into flames if nothing is impacted. So stay in
close contact with your enemies!
ABILITY #1:
The
first ability is a Flamethrower. Once activated, you can shoot flames
for a maximum of 30 seconds. These flames are thrown within a range of
3 tank-lengths. These flames cause Continuous damage, and will
immediately catch their enemy tank on fire.
ABILITY #2:
The
second ability is a Fire Extinguisher. Once activated, you can
extinguish fires for a maximum of 30 seconds. These particles are
thrown within a range of 5 tank-lengths. If friendlies are on fire,
this Extinguisher can almost immediately extinguish them. Be careful, you can also
extinguish enemy tanks on fire as well!
You can disable the first and second ability at any time, and you only have to wait double the amount of time you used it for! For example, if you use the Flamethrower for 5 seconds, you only have to wait 10 seconds to reactivate it again.
PASSIVE ABILITY:
This tank is completely fireproof, so you are
not affected by enemy flames. This will make it tough to defeat enemy
Pyro tanks.
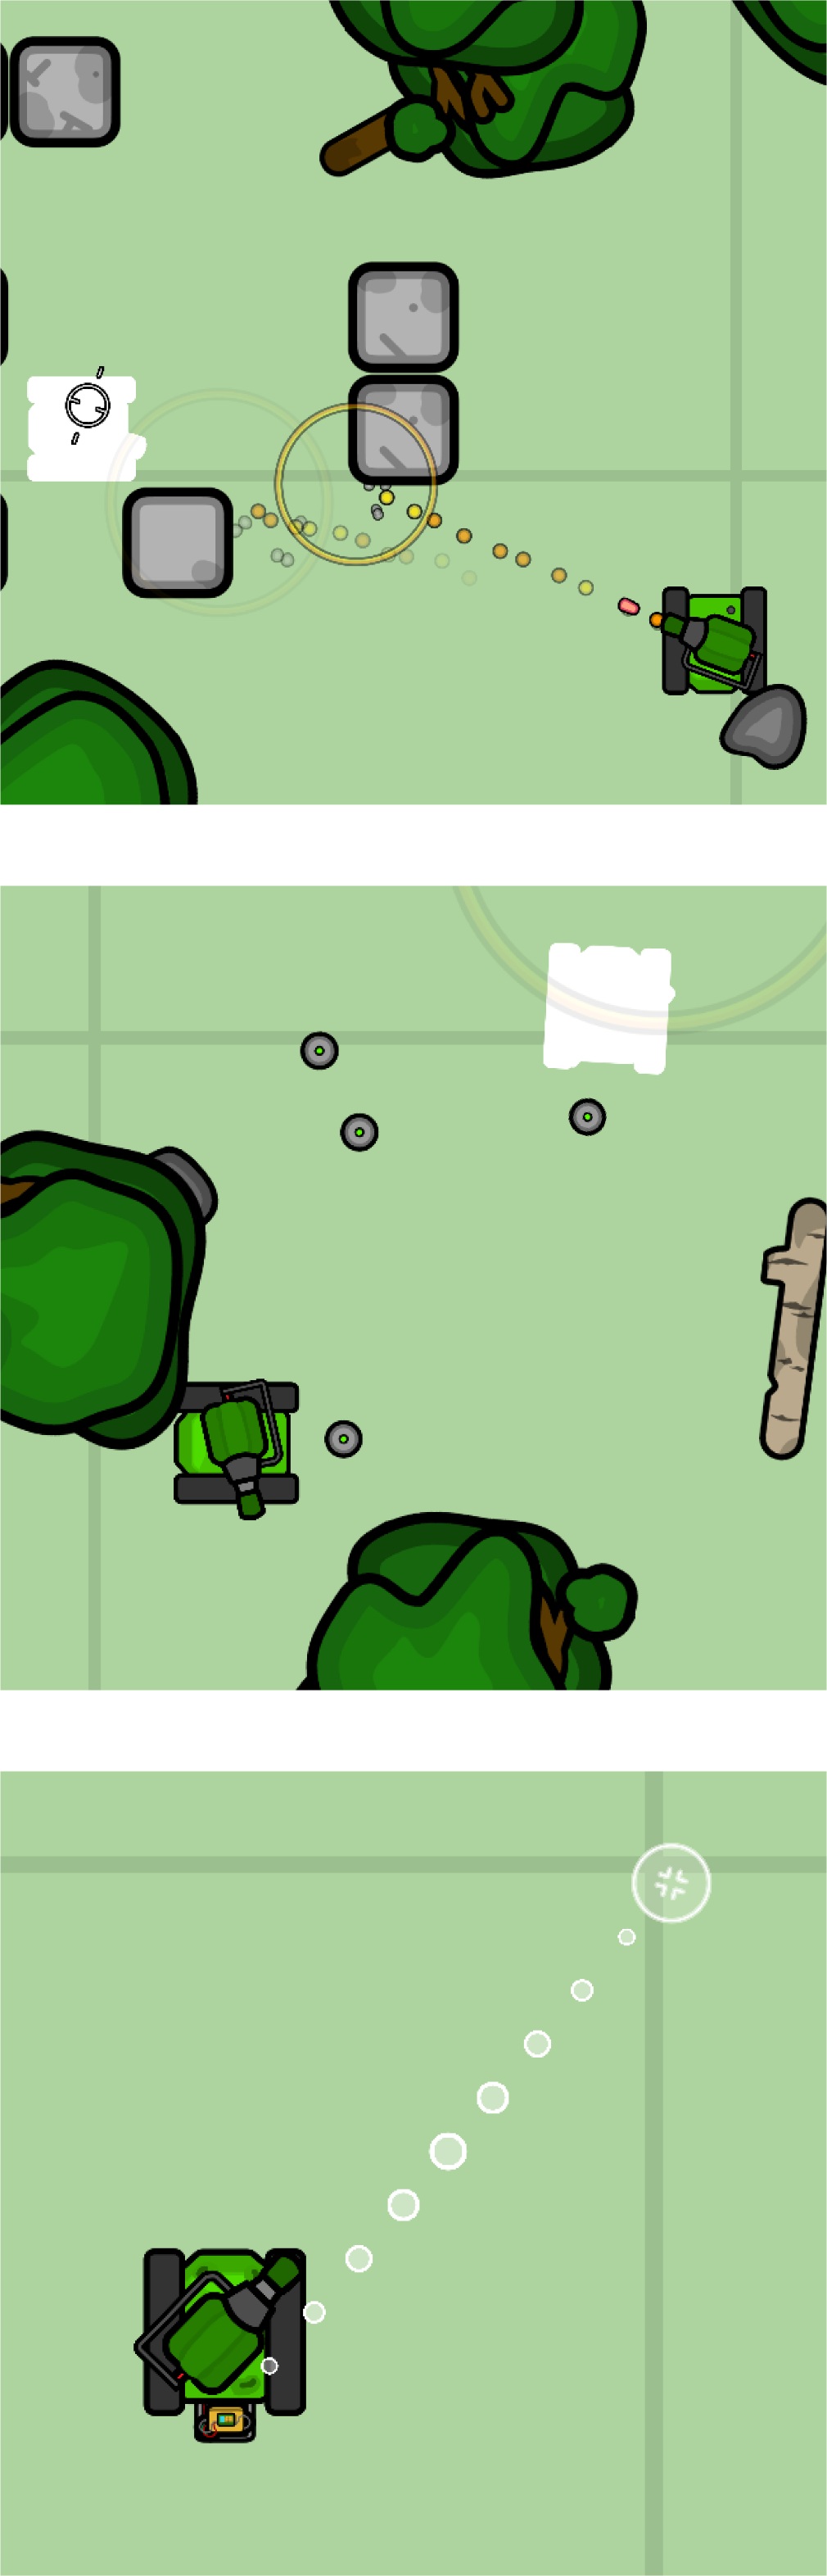
Scout Tank
(Alias: Patrol Tank, The Pinger)
MAIN WEAPONRY:
The main gun is a semi-automatic gun. It shoots
high-velocity tracer rounds. These rounds deal a minimum of 20 HP and
a maximum of 40 HP each round. Once impacted, the enemy is pinged for
5 seconds to all of your teammates. The rate of fire is a max 340
rounds per minute. You are required to press your fire button again to
fire another projectile. 8% of heat is added to the gun temperature
after each round. The gun is highly accurate.
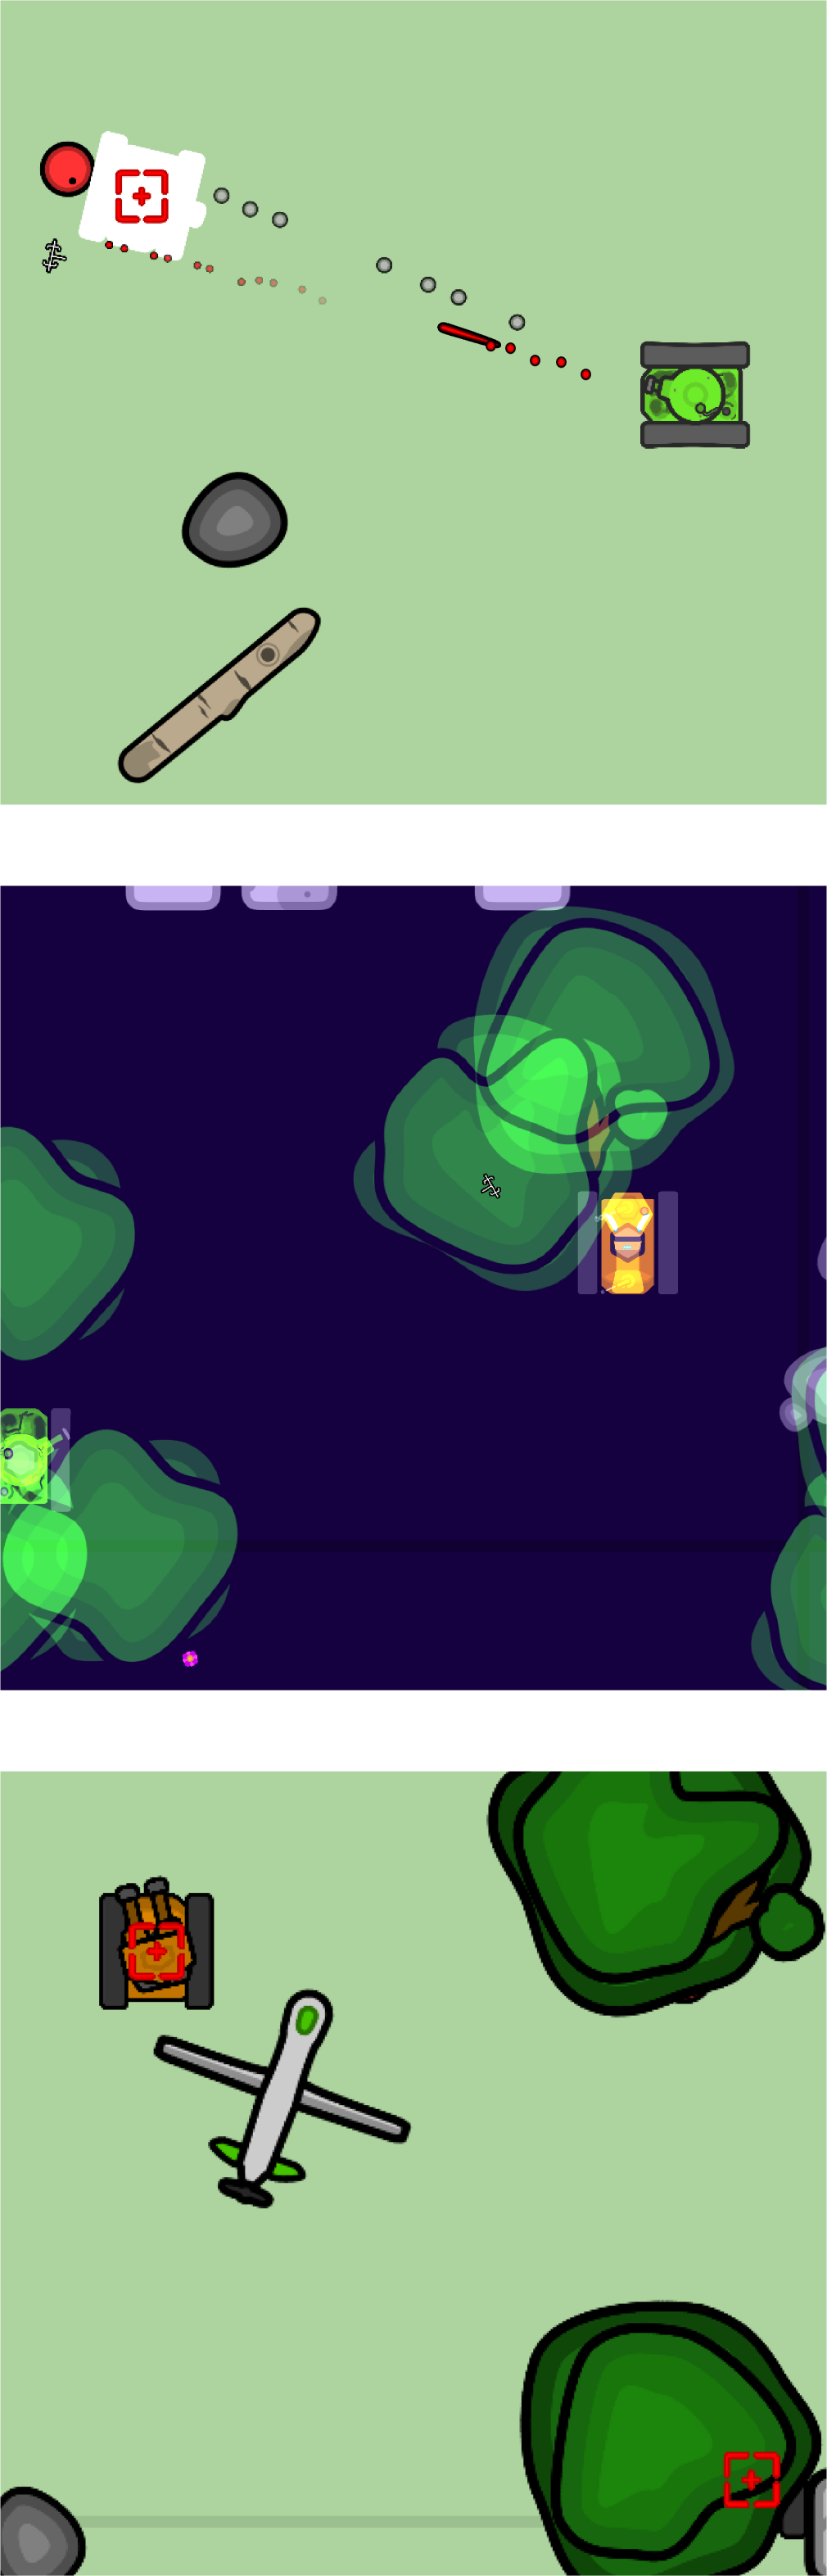
ABILITY
#1:
The first ability is Thermal. Once activated, you have the
ability to see through objects and even invisible snipers! Tanks
hidden through smoke or under trees are easily seen with this ability.
The Thermal lasts for 30 seconds, and it takes an additional 30
seconds to use it again.
ABILITY #2:
The second
ability is an Unmanned Aerial Vehicle. Once clicked, your view is
transported to a UAV which is controlled by your mouse pointer. The
UAV can shoot 1200 rounds per minute. Each projectile deals a minimum
of 20 HP and a maximum of 50 HP. The drone will automatically ping any
nearby enemies. This UAV can fly for up to 60 seconds. Beware of
Missile Tanks[14] because the UAV
can be easily burn down by the HELIOS laser. It takes 75 seconds to
use this power up again.
The UAV will take your attention away from your tank! So make sure your tank is in a safe space or you might be attacked without you knowing. It's best if you stay in your main base when activating the UAV!
PASSIVE ABILITY:
The range you can see is doubled the normal
amount, allowing you to see enemies before they can see you. This
means that the farther your cursor is, the farther you can see.
Recon Tank
(Alias: Airstrike Tank)
MAIN WEAPONRY:
The main guns are two HMGs. The guns are located
at each end of the tank, shooting at the same time. Both shoot
high-velocity rounds, each round dealing a minimum of 12.5 HP and a
maximum of 23.75 HP each round. The rate of fire for each gun is 400
rounds per minute. 6% of heat is added to the gun temperature after
both guns are fired.
If you are surrounded by enemies, aim at the center of your tank to shoot both forwards and backwards. Each gun points at your cursor, so the bottom gun will point up while the top shoots down.
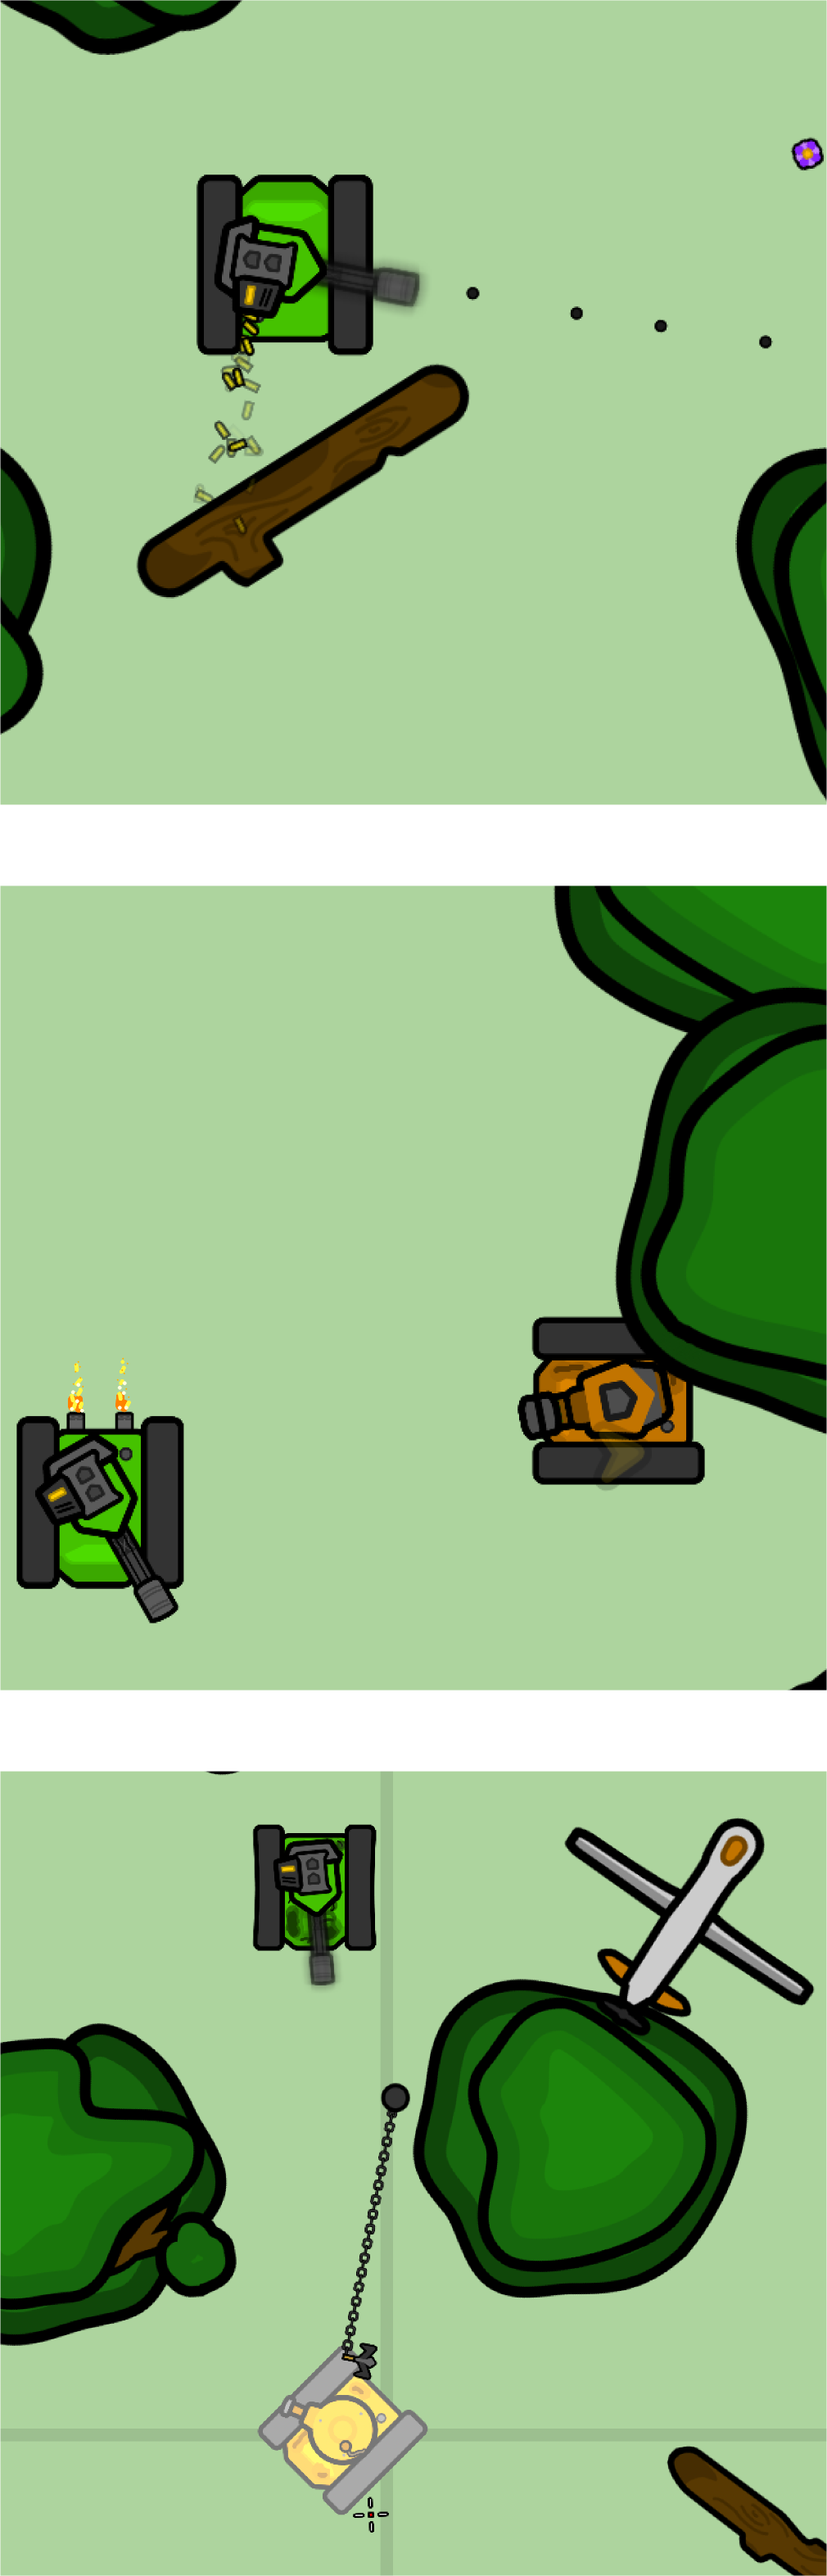
ABILITY #1:
The first ability is an Airstrike. Once activated,
you have the ability to select any position around you. Once selected,
a red airstrike ping (visible to everyone) is shown for 7.5 seconds
before the jets arrive. This allows time for you to escape. Once the
two jets arrive in the direction you point your nozzle, any tank in
the area will die. Each jet releases 30 bombs across the surface, and
each bomb has an area damage of 640 HP within a radius of 2.5
tank-lengths. That is 60 bombs totaling to a maximum damage of 38400
HP! Because of the chaos this ensues, this can only be called once
every 120 seconds.
ABILITY #2:
The second ability is a
move marker. Once activated, you have the ability to select any
position around you. Once selected, a yellow ping (visible to only
your team) is shown for 30 seconds. Any enemy within that area is
pinged. It takes 45 to use this power up again.
PASSIVE ABILITY:
The distance you can see is 125% the normal
zoom, allowing you to see enemies before they can see you. This allows
the Recon Tank to attack/ping the tank from a distance because the
view is more zoomed out.
Sniper Tank
(Alias: Ghost Tank, Marksman)
MAIN WEAPONRY:
The main gun is a heavy single-fire sniper. The
weapon shoots the highest velocity projectile of any tank. Each round
deals a minimum of 300 HP and a maximum of 425 HP each round. You have
to wait three seconds before firing again. 60% of heat is added to the
gun temperature after each fire. The projectile is extremely accurate
and very fast.
ABILITY #1:
The first ability is an Invisible Cloak. Once
activated, you are not visible to your enemies. Only you, your allies,
and Scout's Thermal[19] can see you at
50% opacity. The cloak is active for 30 seconds, and can be used again
after another 30 seconds. However, if you fire your weapon, the cloak
immediately disappears and the ability ends.
If an enemy Sniper tank is damaged, their smoke is visible even when they are cloaked. Look for floating smoke particles: it could be an invisible sniper!
ABILITY #2:
The second ability is a flashbang. Once activated,
you have the ability to select any position around you. Once selected,
a flashbang is flinged, blinding your enemies for a maximum of 7.5
seconds. It deals a maximum area damage of 50 HP within a radius of 3
tank-lengths. It takes 60 seconds to use this ability again.
PASSIVE ABILITY:
This tank is more silent (half the engine sound)
than any other tank. The detectability is also halved, so if you are
pinged by an enemy, it takes 50% less time to disappear. Also, if you
press your aim button, it increases your view range by a factor of 6.
Railgun Tank
(Alias: Pincer)
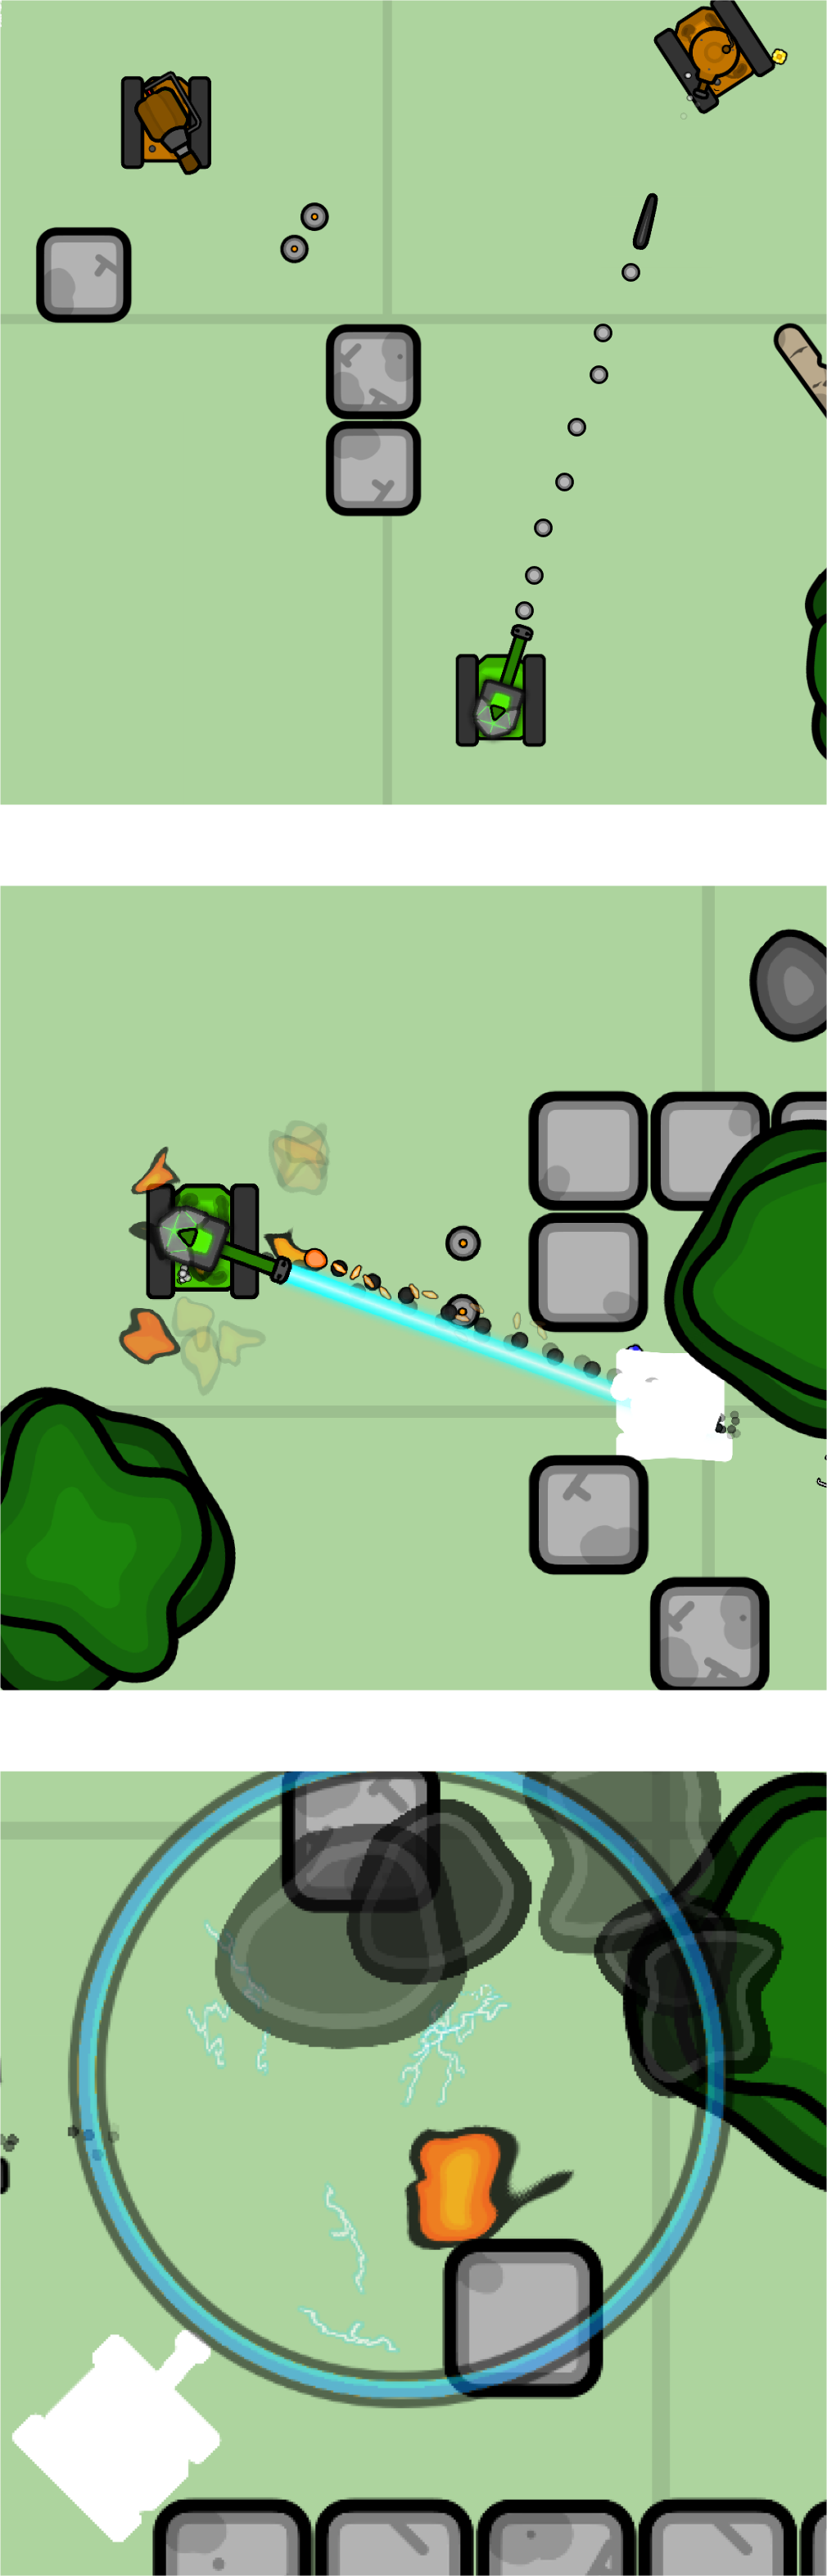
MAIN WEAPONRY:
The main gun is an extremely high-powered
single-shot energy weapon. Each round deals a minimum of 500 HP and a
maximum of 700 HP each round. To combat this damage, it takes about a
second to charge up the gun, which you can do either by holding fire
or aiming (aim button does not fire, it only charges the gun). The
reload time is based on the gun cool, because once fired, the gun cool
reaches maximum. The projectile is extremely accurate and very fast.
ABILITY #1:
The first ability is a high-powered Laser. Once
activated, you can shoot a laser that deals high
Continuous Damage[6]. The laser has a range of 10 tank-lengths, allowing you to reach
your enemies with ease. To combat the damage and range, it takes about
a second to charge up the gun. You can use this for 30 seconds, and it
takes 75 seconds to use this again.
ABILITY #2:
The
second ability is a Movement Immobilizer. Once activated, you have the
ability to select any position around you. Once selected, an ordinance
is launched, disabling your enemies’ movement for 7.5 seconds. It
deals a maximum area damage of 50 HP within a radius of 3
tank-lengths. It takes 45 seconds to use this ability again. You are
not affected by your own Immobilizer.
PASSIVE ABILITY:
If your health is greater than 200 HP, and you
are not moving, you have zero recoil. This means your tank will not
move if fired.
Demolition Tank
(Alias: Demo, Mine Tank, Explosive Tank)
MAIN WEAPONRY:
The main gun is a highly-explosive grenade
launcher. Each round deals impact damage, with a minimum of 20 HP and
a maximum of 50 HP. Each round also explodes, with a maximum area
damage of 350 HP within a radius of 1.75 tank-lengths. The rate of
fire is 240 rounds per minute. 17% of heat is added to the gun cool.
The spread of the weapon is 10 degrees. The range of the projectile is
6 tank-lengths, making this a medium ranged tank.
ABILITY #1:
The first ability allows you to place mines. Once
activated, you can place mines directly beneath your tank that will
only explode if an enemy touches it. Each mine adds 15 seconds to the
powerup’s rechargeability. This means that if you only place three
mines out of the maximum 5 mines, and deactivate the ability, you only
have to wait 45 seconds. You have to wait a maximum of 75 seconds to
use the ability again.
ABILITY #2:
The second ability
is a C4 Sticky Bomb. Once activated, you have the ability to select
any position around you. Once selected, a C4 sticky bomb is flinged,
sticking to any surface (including tanks)! Your view is transported to
the bomb. You can explode it any time by holding the detonate button.
If you do nothing with the bomb, the C4 will automatically explode
after 30 seconds. The detonation causes a maximum area damage of 1200
HP within a radius of 3 tank-lengths. It takes 75 seconds to use this
ability again.
If you attach your C4 Sticky Bomb to an enemy, wait until they are close to other enemies to deal the most damage! If you see a friendly tank stuck with a C4, drive away from them fast!
PASSIVE ABILITY:
This tank is explosion resistant. If this tank
is in an explosion, the area damage is halved. This means that it
might be difficult to kill enemy Mine Tanks!
Corrosive Tank
(Alias: Gas Tank, Smoke Tank)
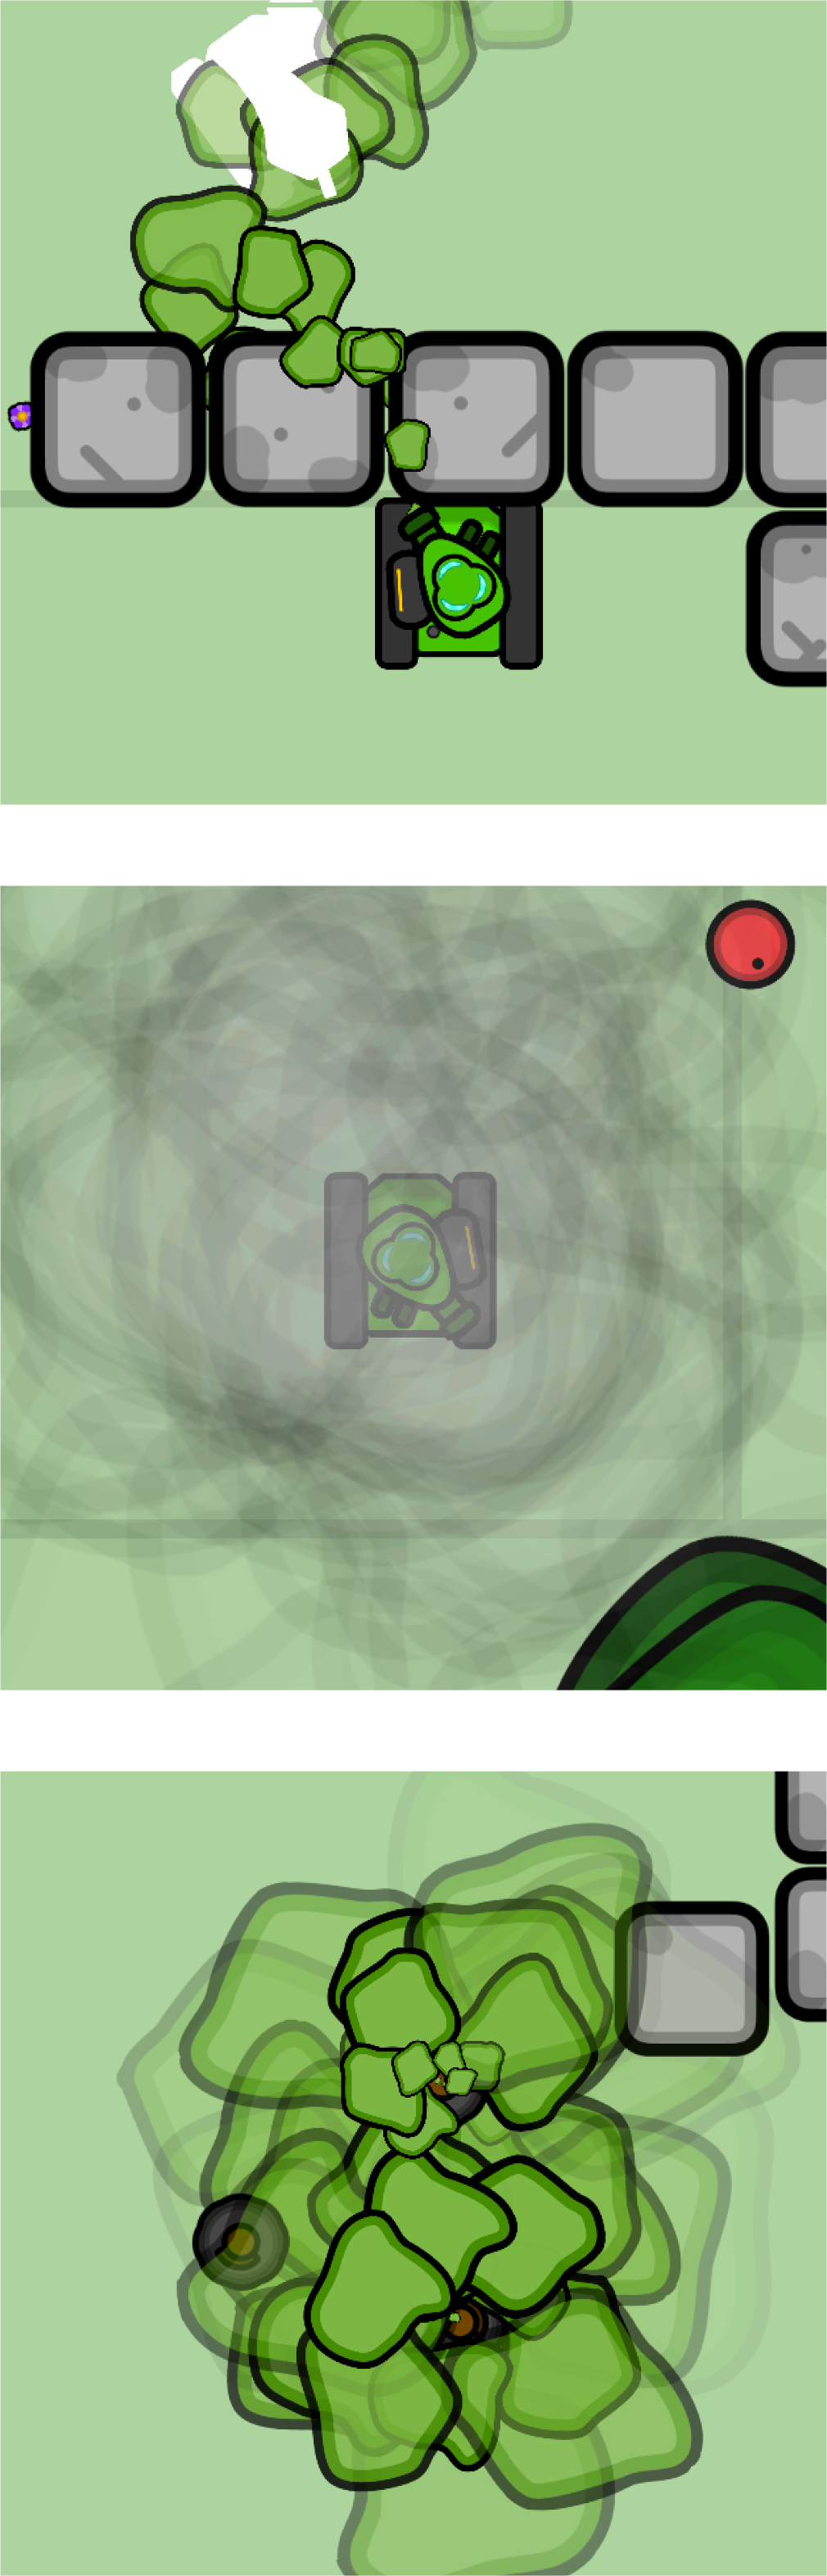
MAIN WEAPONRY:
The main gun is a Corrosive Thrower. It sprays a
large amount of corrosive gas within 4 tank-lengths. Each gas particle
deals Continuous Damage[6]. 30% of heat is added to the gun cool every second. The spread of
the weapon is 15 degrees, making this a short ranged tank.
ABILITY #1:
The second ability is a Smoke Screen. Once activated,
smoke will expand from your tank. Move around to spread the smoke out.
This helps cover your allies and can confuse the enemy. It sprays
smoke for 7.5 seconds, and lasts for 25 seconds. It takes 30 seconds
to recharge this ability.
ABILITY #2:
The second
ability allows you to place gas mines. Once activated, you can place
mines directly beneath your tank that will only release gas if an
enemy is near it (or enemy shoots it). Each gas particle does major
Continuous Damage. Each mine adds 20 seconds to the powerup’s
rechargeability. This means that if you only place one mine out of the
maximum 3 mines, and deactivate the ability, you only have to wait 20
seconds. You have to wait a maximum of 60 seconds to use the ability
again. A gas mine has 400 HP, so if shot to an extent, it will
disappear.
To escape, use both of the abilities at the same time! Not only will they be blinded by the smoke, but they won't realize the position of the gas mines! This also means they can’t chase you in a straight line!
PASSIVE ABILITY:
This tank can see through smoke! So if your
enemies are blinded by smoke, attack them! They won’t know where to
shoot!
Team Deathmatch
Team Deathmatch is a gamemode with the classic rules. There are two teams, Team Green and Team Orange. Both teams are trying to destroy as many opposing enemies as possible. Each kill adds a point to the team’s score. The team with the greatest score before the timer reaches zero wins.
Capture The Bases
Capture the Bases is another classic gamemode. Like Team Deathmatch, there are two teams, Team Green and Team Orange. In this gamemode, both teams are trying to capture as many bases as possible. There are 5 Bases, named A through E. At the very start of the match, all bases are neutral. If you and your allies pile onto a base, the flag starts to turn your team’s color. After capturing it, points are added consistently to the team score until the enemy captures it. The team with the greatest score by the time the clock hits zero wins.
Mini Arena
Mini Arena is a free for all gamemode with no teams. All players are against each other, trying to get the most kills. Each kill adds a point to the player's overall score. The player with the most kills by the time the clock hits zero wins.
Zombies
Zombies is a co-op gamemode with up to 10 players. There are infinite amounts of rounds, so the game ends when everyone dies. Each round gets progressively harder, with new types of zombies appearing in some levels. Players try to kill as many zombies as possible before they are destroyed. There are no abilities (instead of passive ones). If players survive a round, all defeated players can respawn with 75% of their health before the next round starts.
Maps
Each game can be played on different maps. The classic Grasslands map is always selected as default. Each map has its own properties and various objects.
Each map is unique! If you save enough scraps, you can buy camos to match the maps!
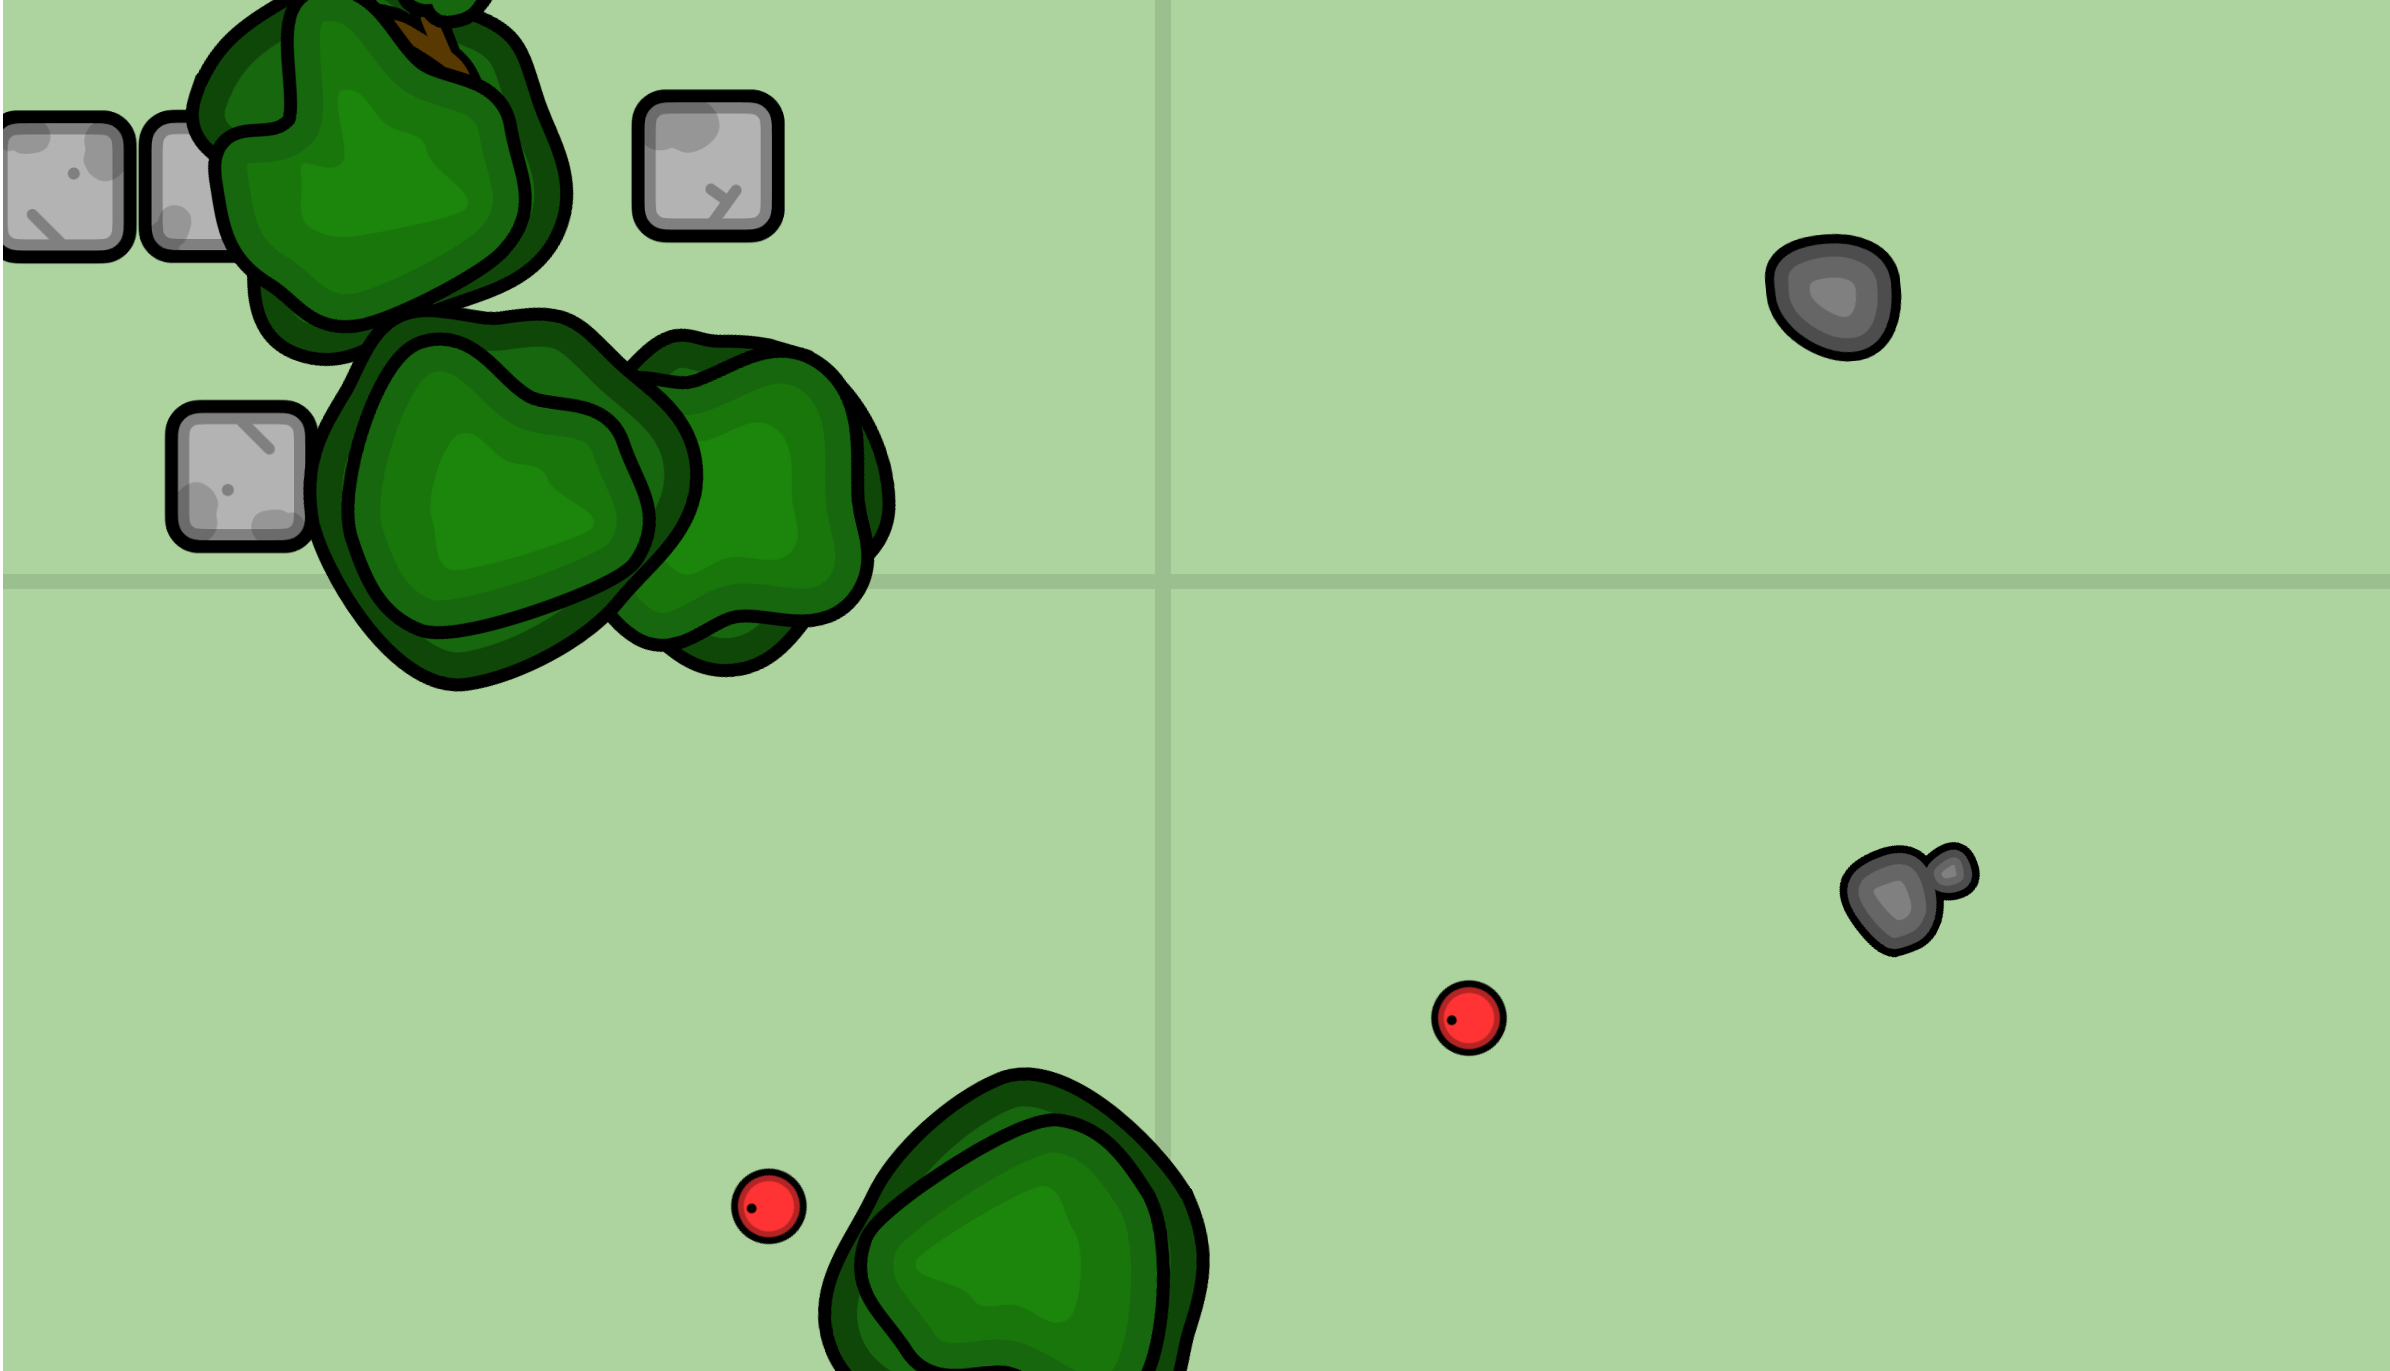
The first map is called Grasslands. This classic green landscape is
uncrowded, filled with scattered trees and rocks. It has various
static and interactive objects.
Static objects include:
- Common Trees
- Rocks
- Walls
- Flowers
- Logs
Interactive objects include:
- Kerosene
Drums
As the name implies, the Grasslands are trying to depict the average
setting of temperamental forests. This simple map makes it easy for
close to far range combat.
 The next map is called Mudlands. This brown and muddy landscape is
interspersed with hay bales and farms. It has various static and
interactive objects, similar to those of the Grasslands.
The next map is called Mudlands. This brown and muddy landscape is
interspersed with hay bales and farms. It has various static and
interactive objects, similar to those of the Grasslands.
Static
objects include:
- Common Trees
- Hay Bales
- Fences
- Flowers
Interactive objects include:
-
Kerosene Drums
- Junk Cars
The Mudlands is depicted as a farm/junk yard with a few trees. On the
other hand, multiple segments of fences makes this map a little
difficult to attack others from far distances. This map is built for
short to mid range combat.
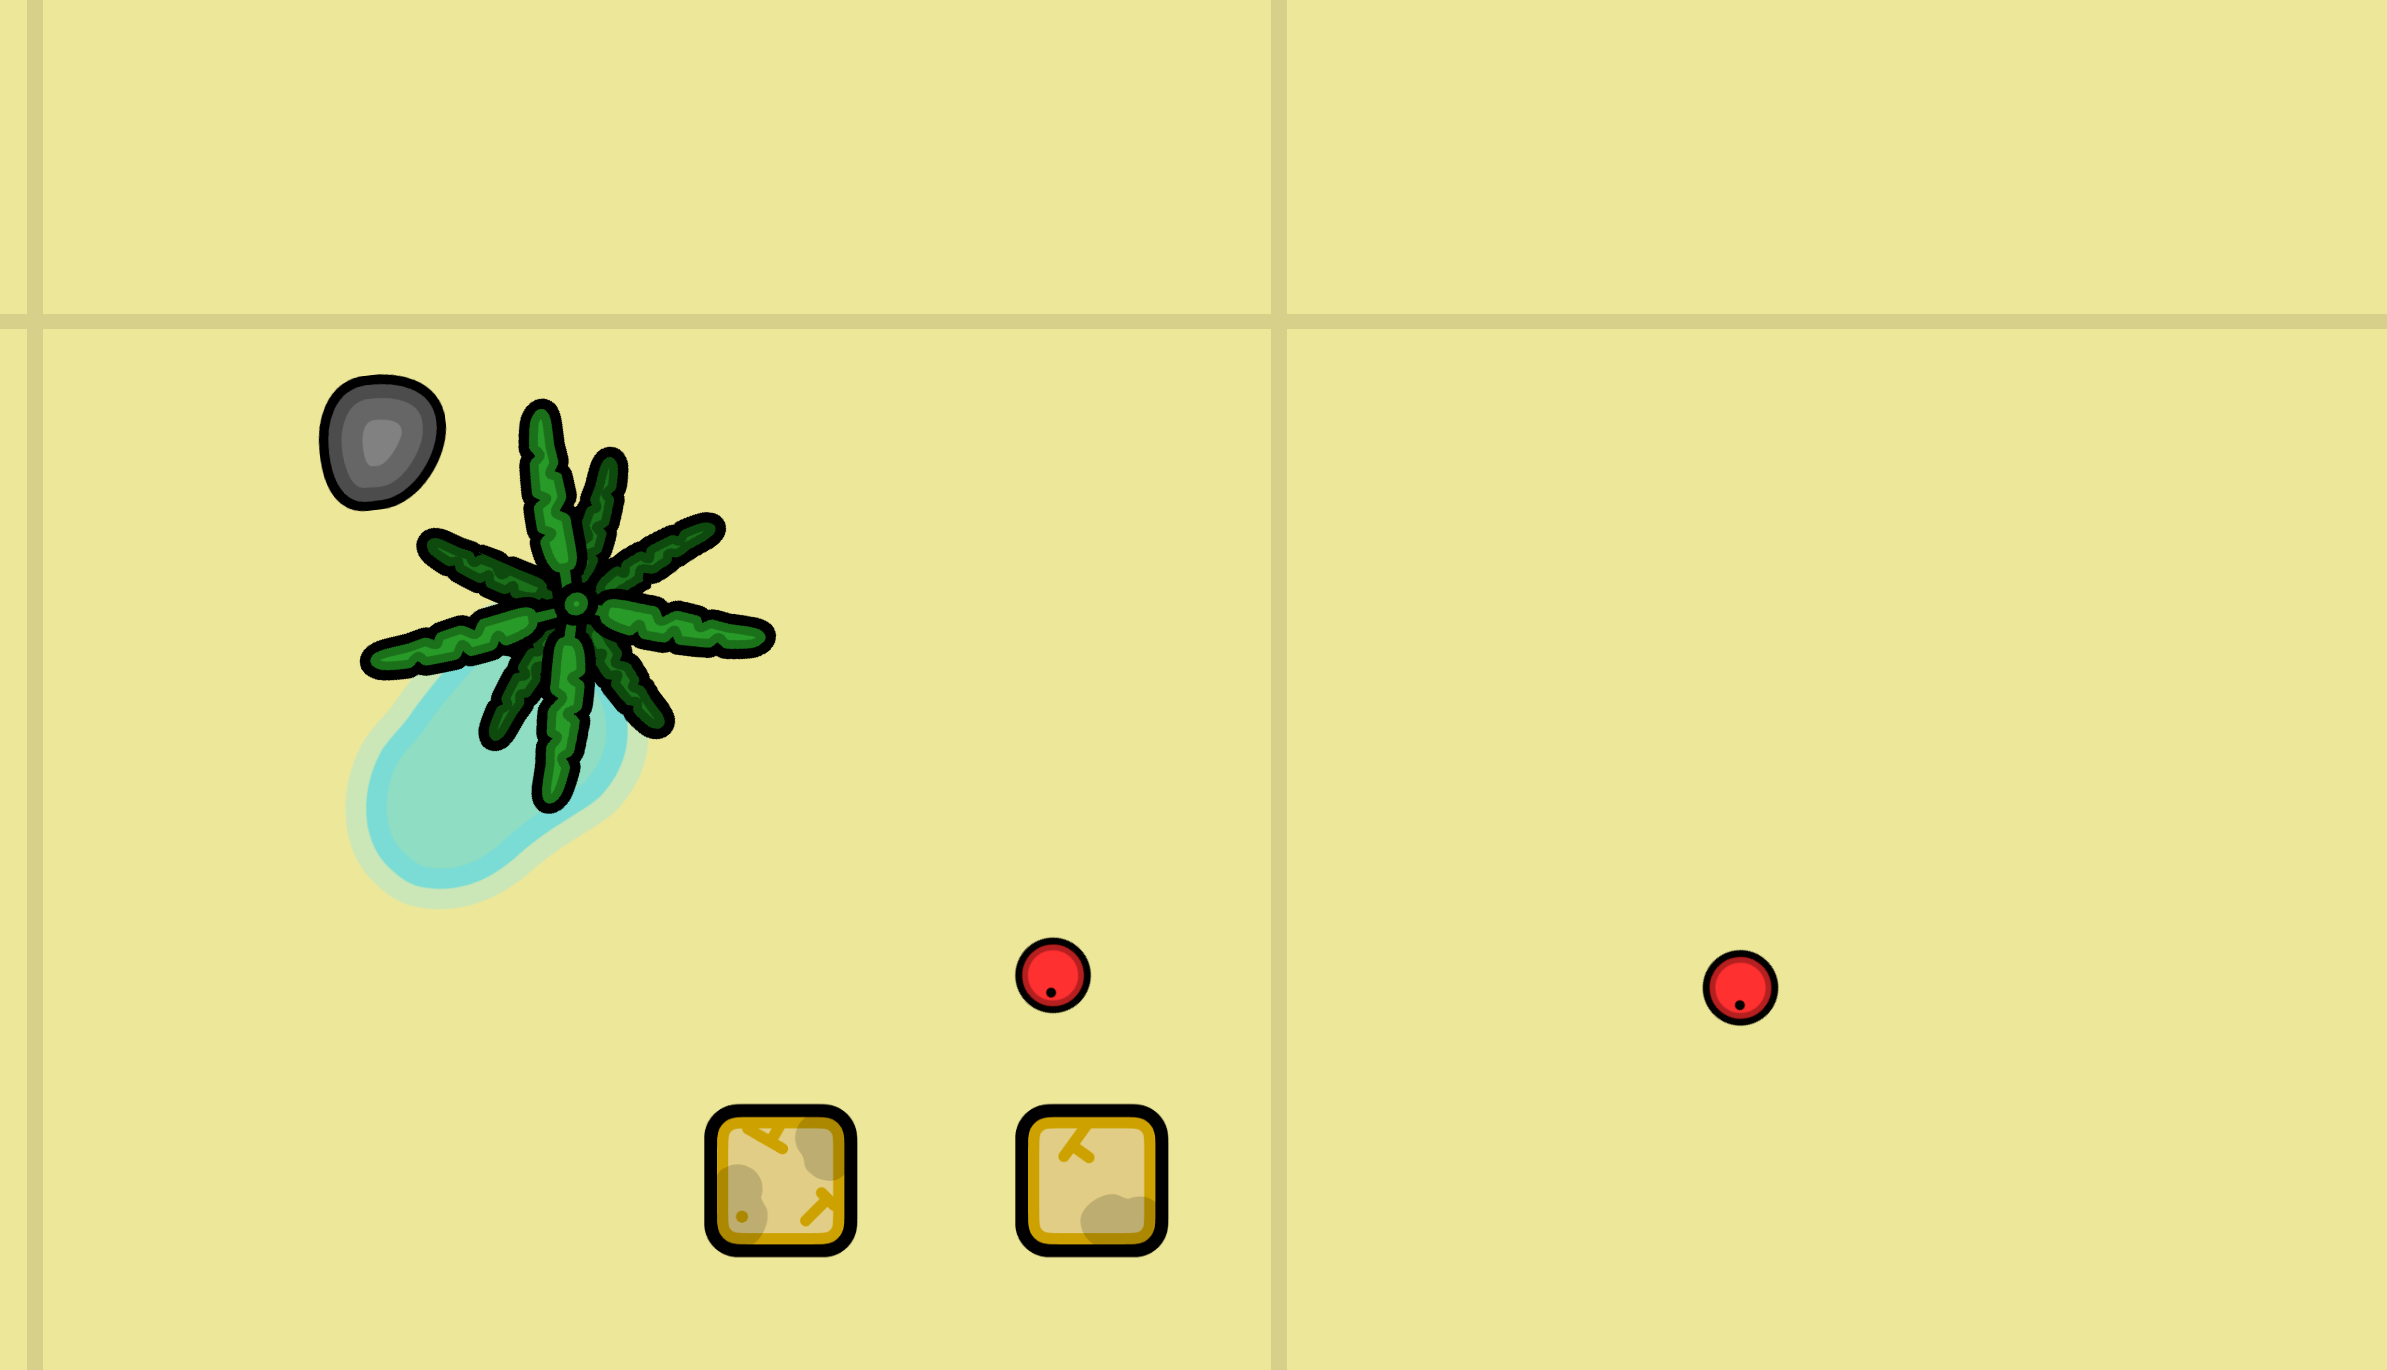 The following map is called Desert. Unlike the Mudlands, this dusty
landscape is barely filled with any objects. It has a few static and
interactive objects.
The following map is called Desert. Unlike the Mudlands, this dusty
landscape is barely filled with any objects. It has a few static and
interactive objects.
Static objects include:
- Palm
Trees
- Rocks
- Desert Walls
Interactive
objects include:
- Kerosene Drums
The Desert is depicted as an empty battle ground with small cover. The
little objects in this map makes defending very difficult. This map is
built for mid to far range combat.
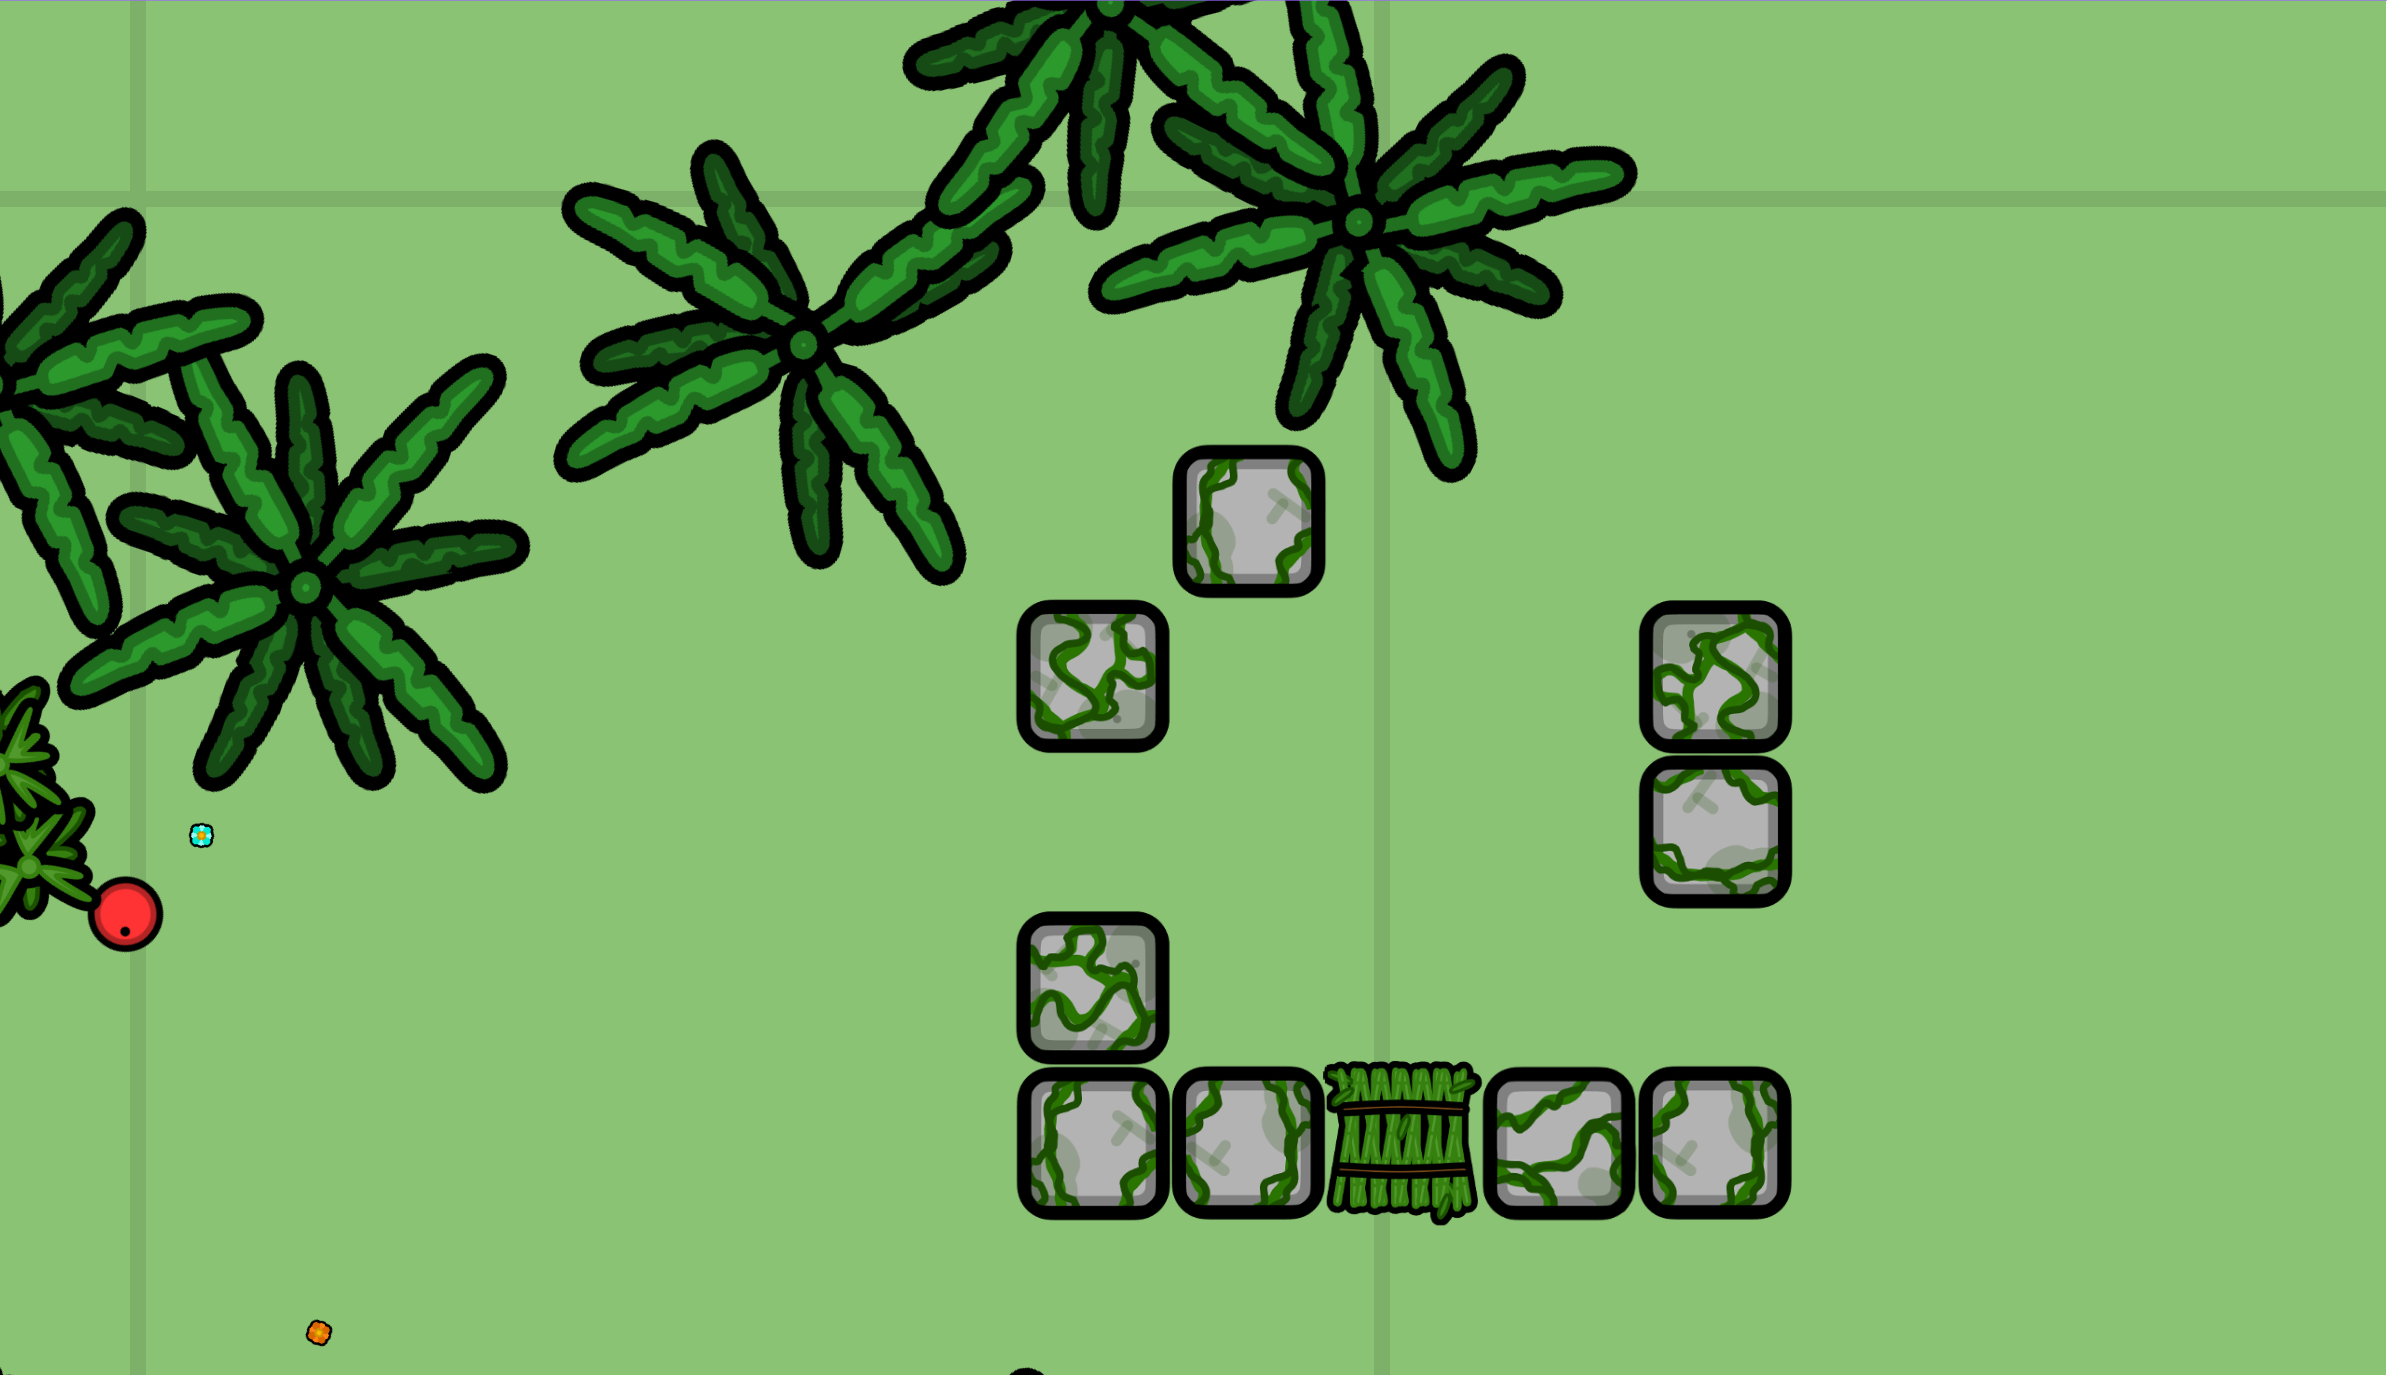 The next map is called Tropical. This compact jungle is filled with
multiple objects. It has various static and interactive objects.
The next map is called Tropical. This compact jungle is filled with
multiple objects. It has various static and interactive objects.
Static
objects include:
- Palm Trees
- Rocks
- Jungle Walls
- Bamboo Stacks
- Bamboo trees
- Flowers
Interactive objects include:
- Kerosene Drums
Tropical is depicted as a small and dense jungle. The amount of trees
and walls in this map makes finding and attacking contacts somewhat
difficult. This map is built for short to mid range combat.
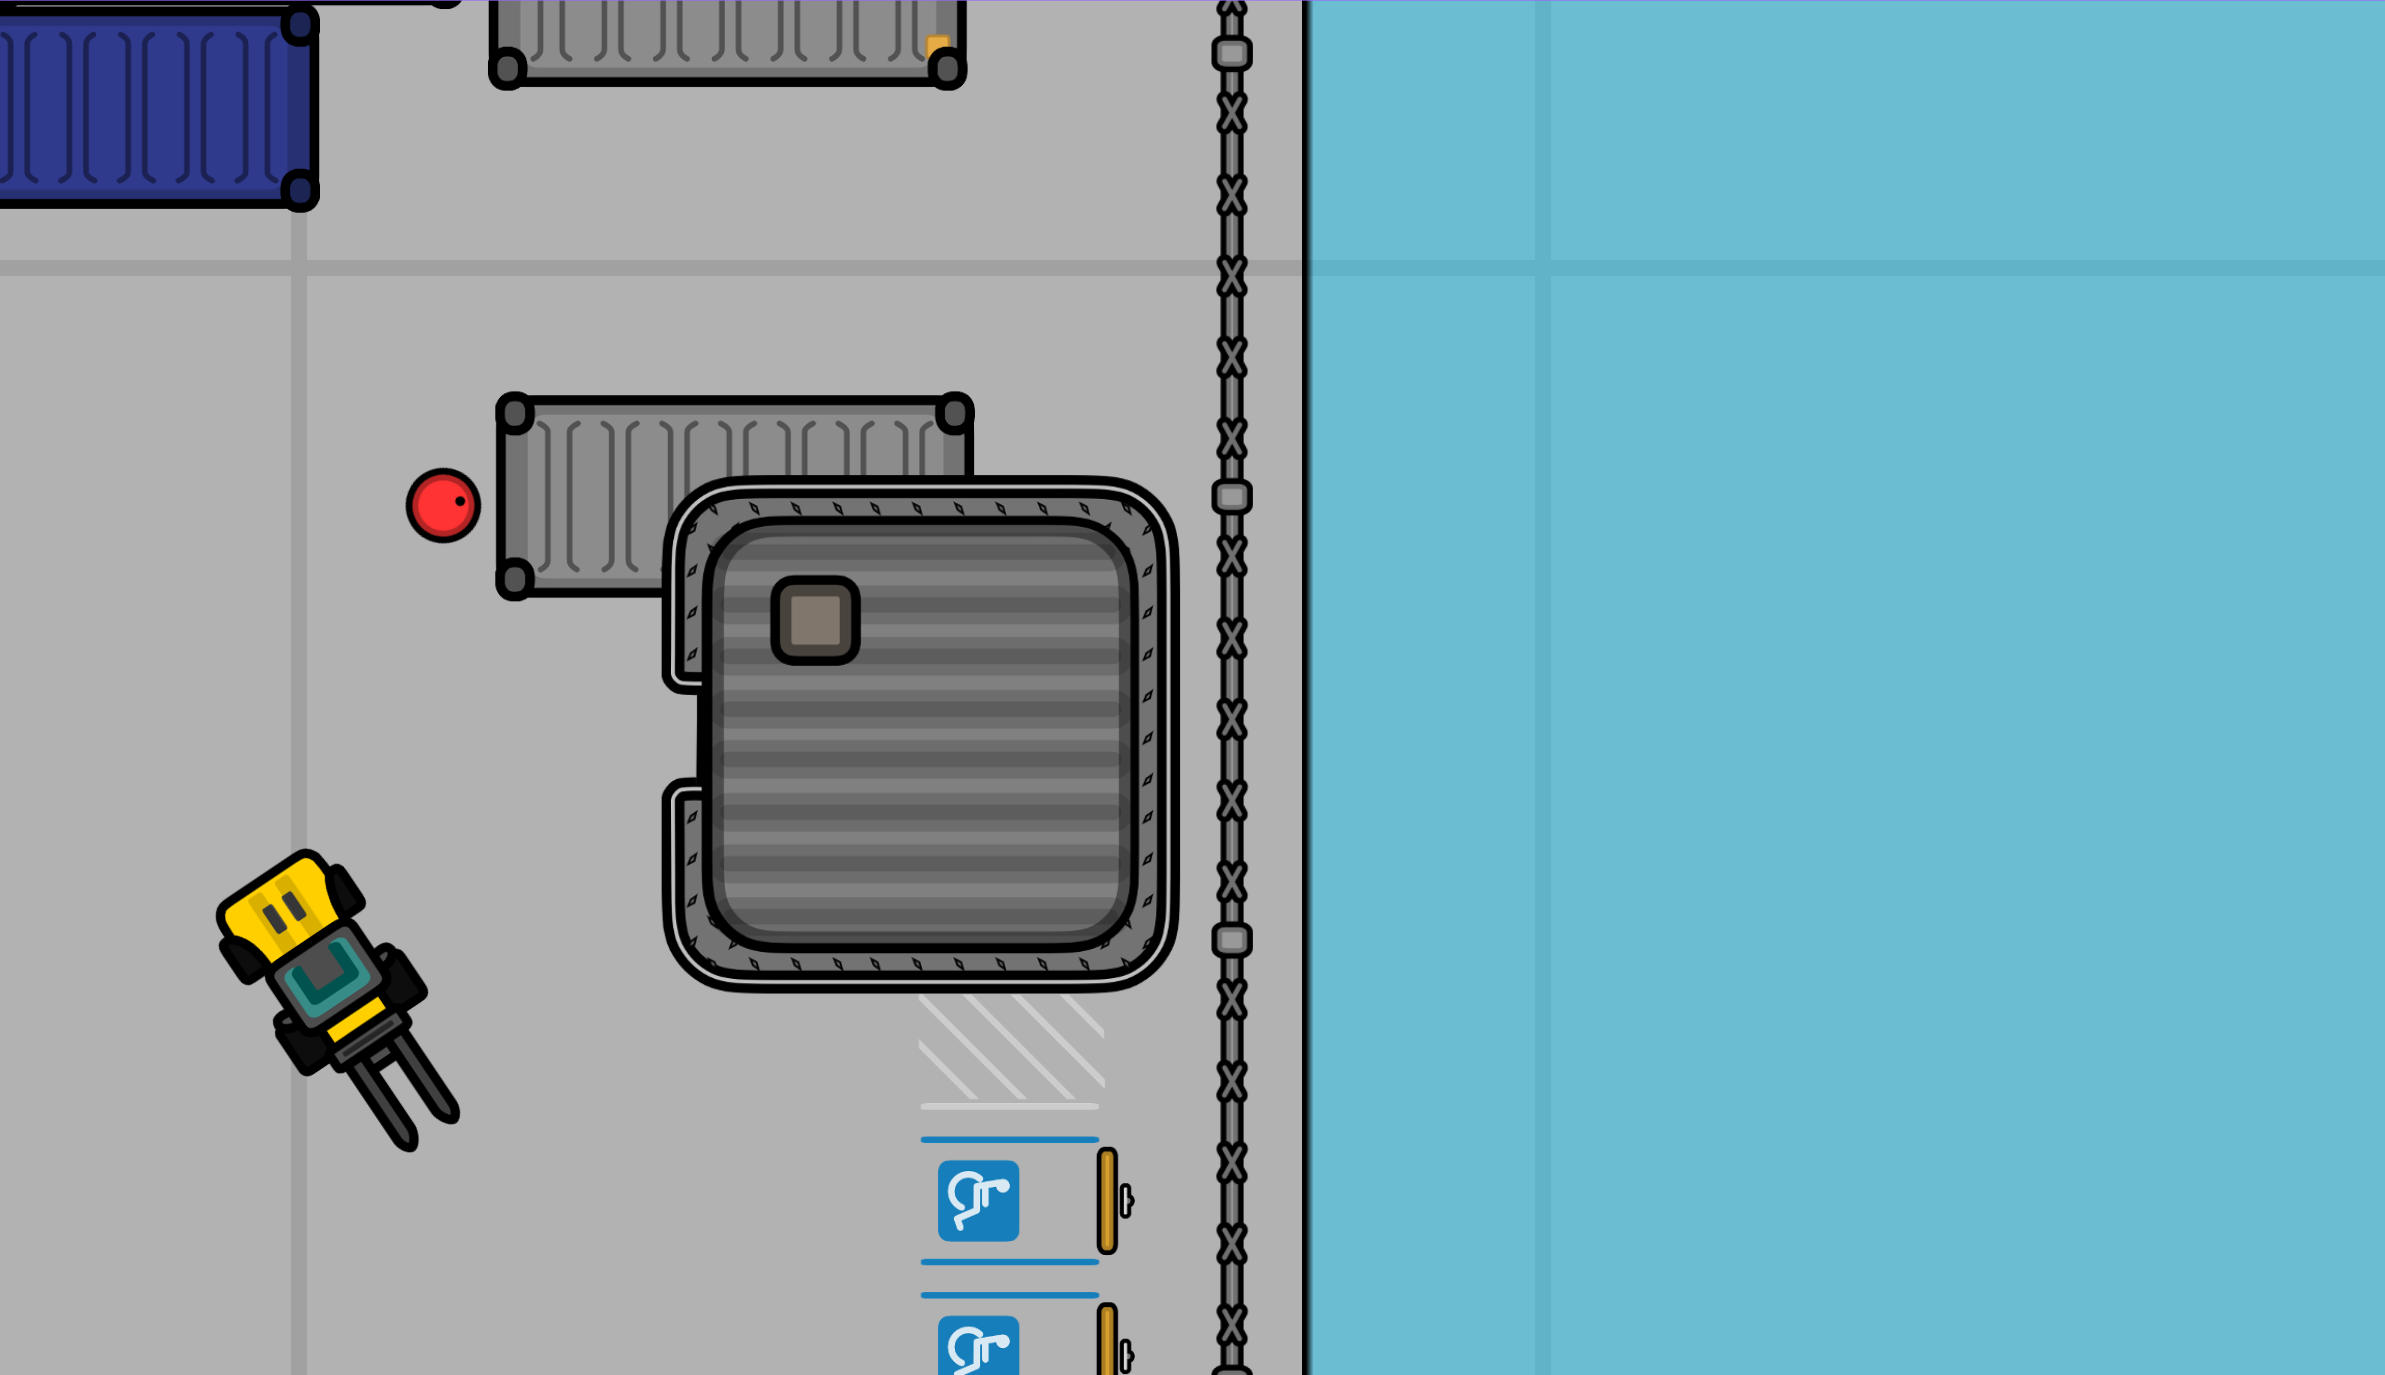 The following map is called Shipyard. Just like the Tropical map, this
compact map is filled with multiple objects. It has various static and
interactive objects.
The following map is called Shipyard. Just like the Tropical map, this
compact map is filled with multiple objects. It has various static and
interactive objects.
Static objects include:
-
Shipping Containers
- Parking Lots
- Garbage Disposals
- AC Units
- Watch Towers
Interactive objects
include:
- Kerosene Drums
- Forklifts
The Shipyard is depicted as a small and compact Shipping yard. The
amount of containers in this map makes navigating and attacking
contacts difficult. The map is also surrounded by water, which acts as
a boundary while making the map smaller. This map is built for short
range combat.
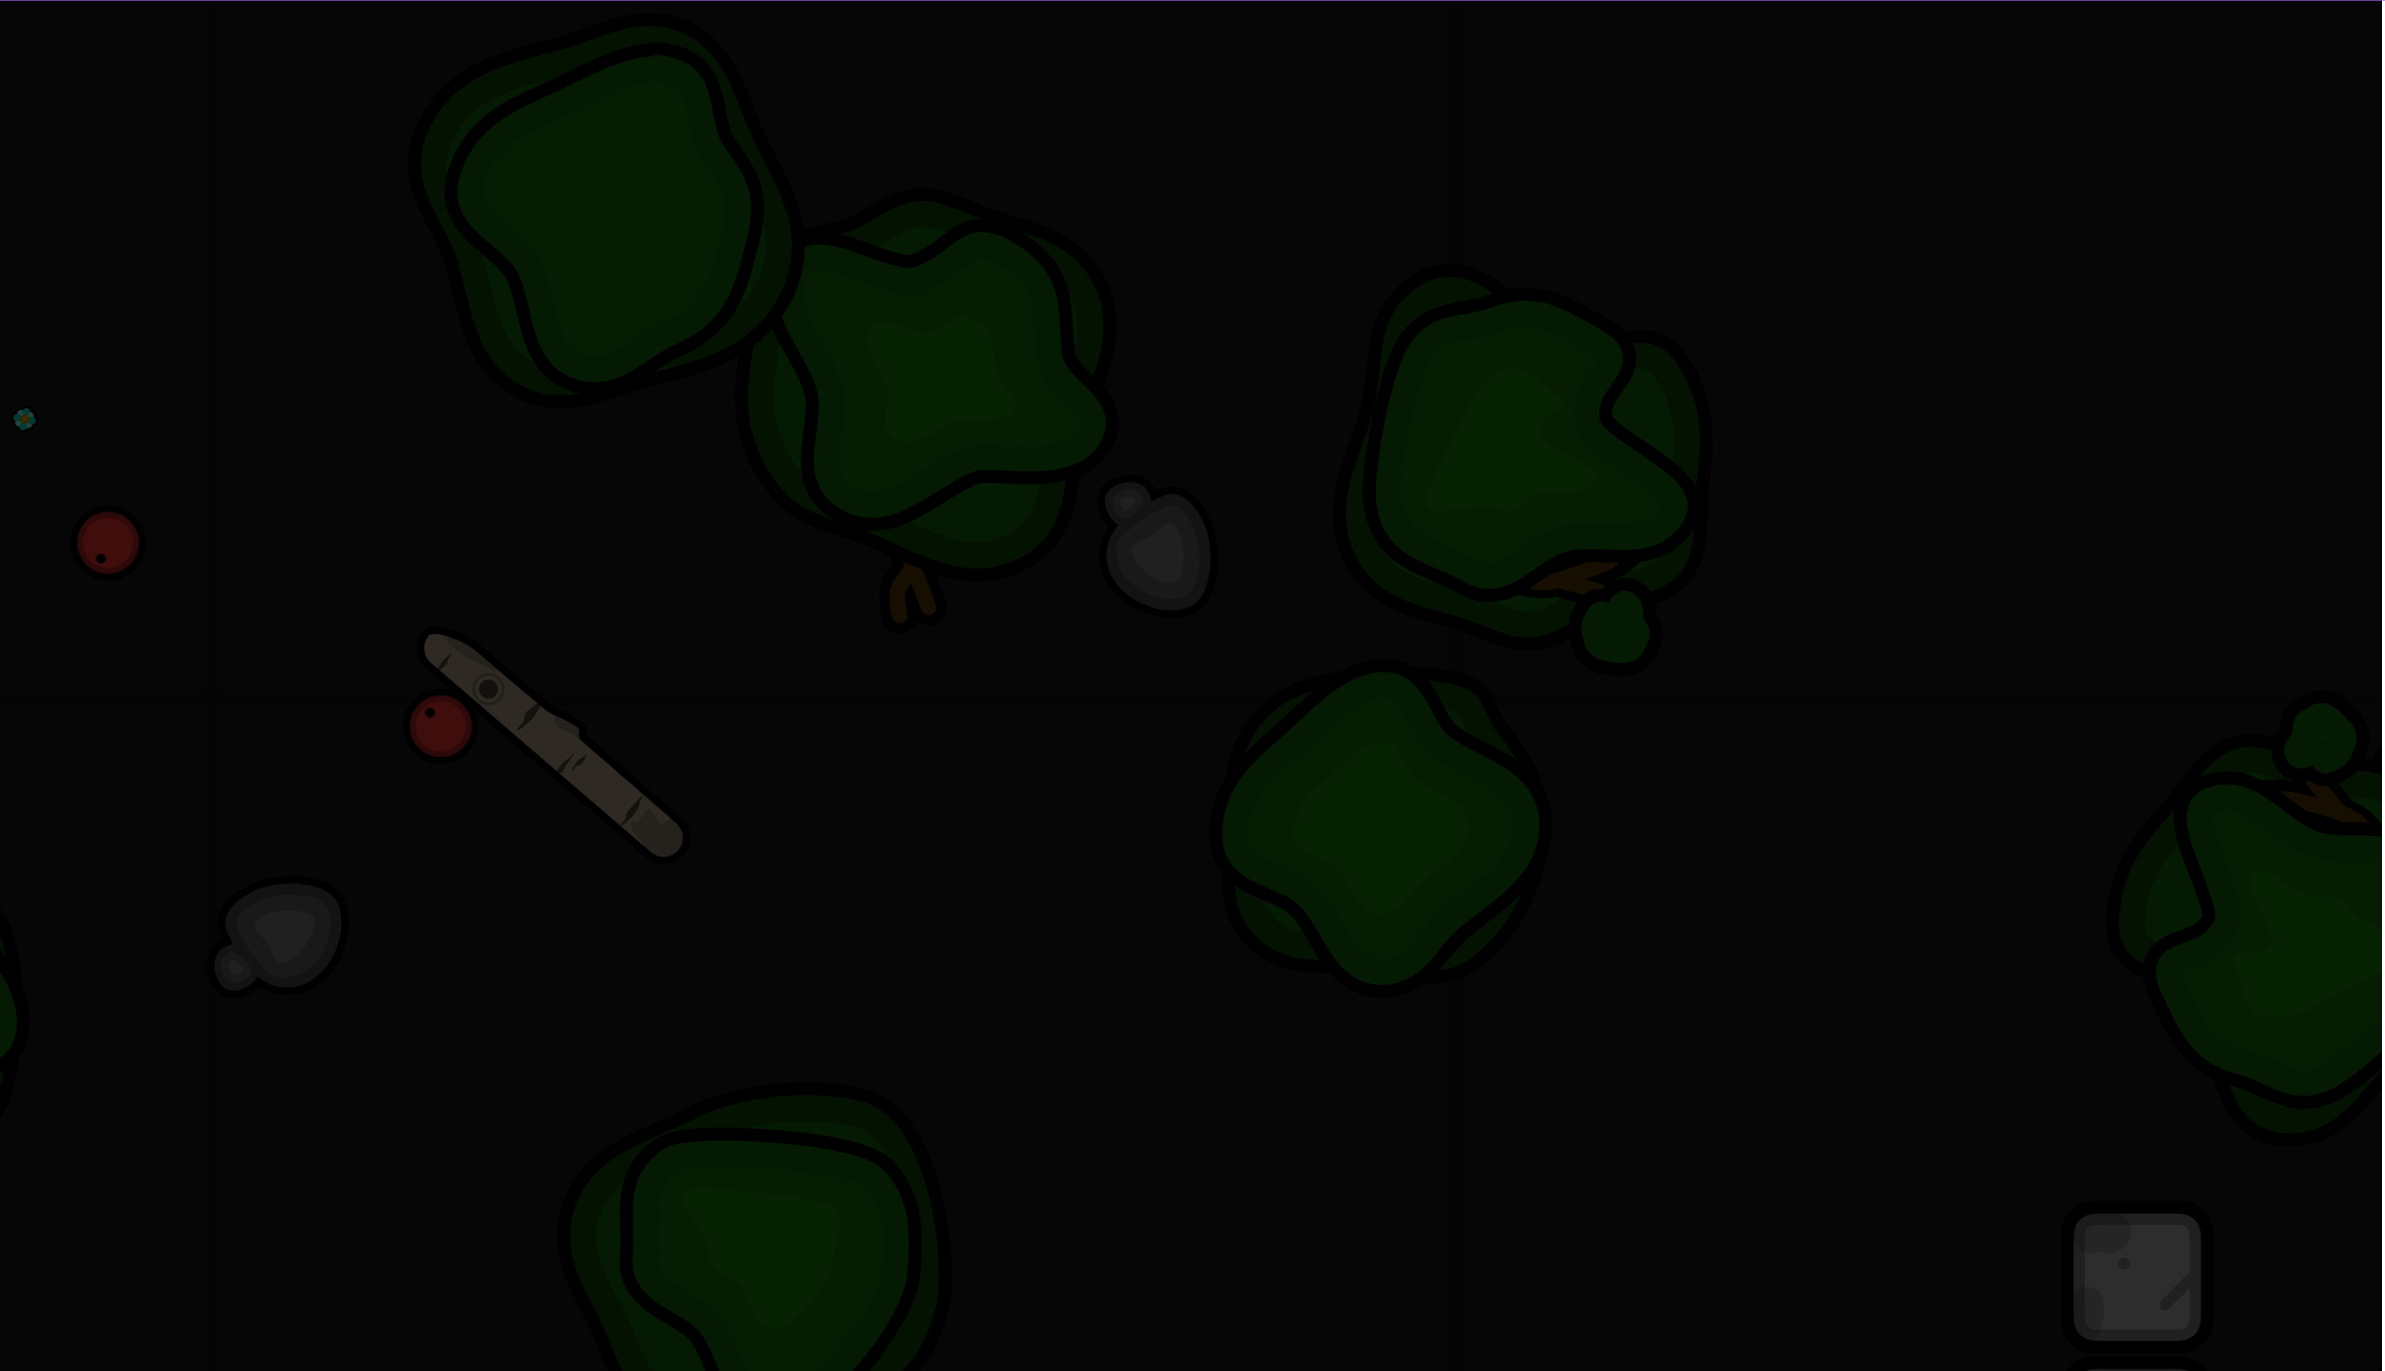 The last map is called Nighttime. This map is almost exactly the same
map as Grasslands, but it takes place at Night. It has various static
and interactive objects.
The last map is called Nighttime. This map is almost exactly the same
map as Grasslands, but it takes place at Night. It has various static
and interactive objects.
Static objects include:
-
Common Trees
- Rocks
- Walls
- Flowers
- Logs
Interactive objects include:
- Kerosene Drums
As the name implies, Nighttime is depicted as the average setting of
temperamental forests during the night. This dark environment makes it
difficult to detect enemies from far ranges. Because of this, this map
is built for close to mid range combat.
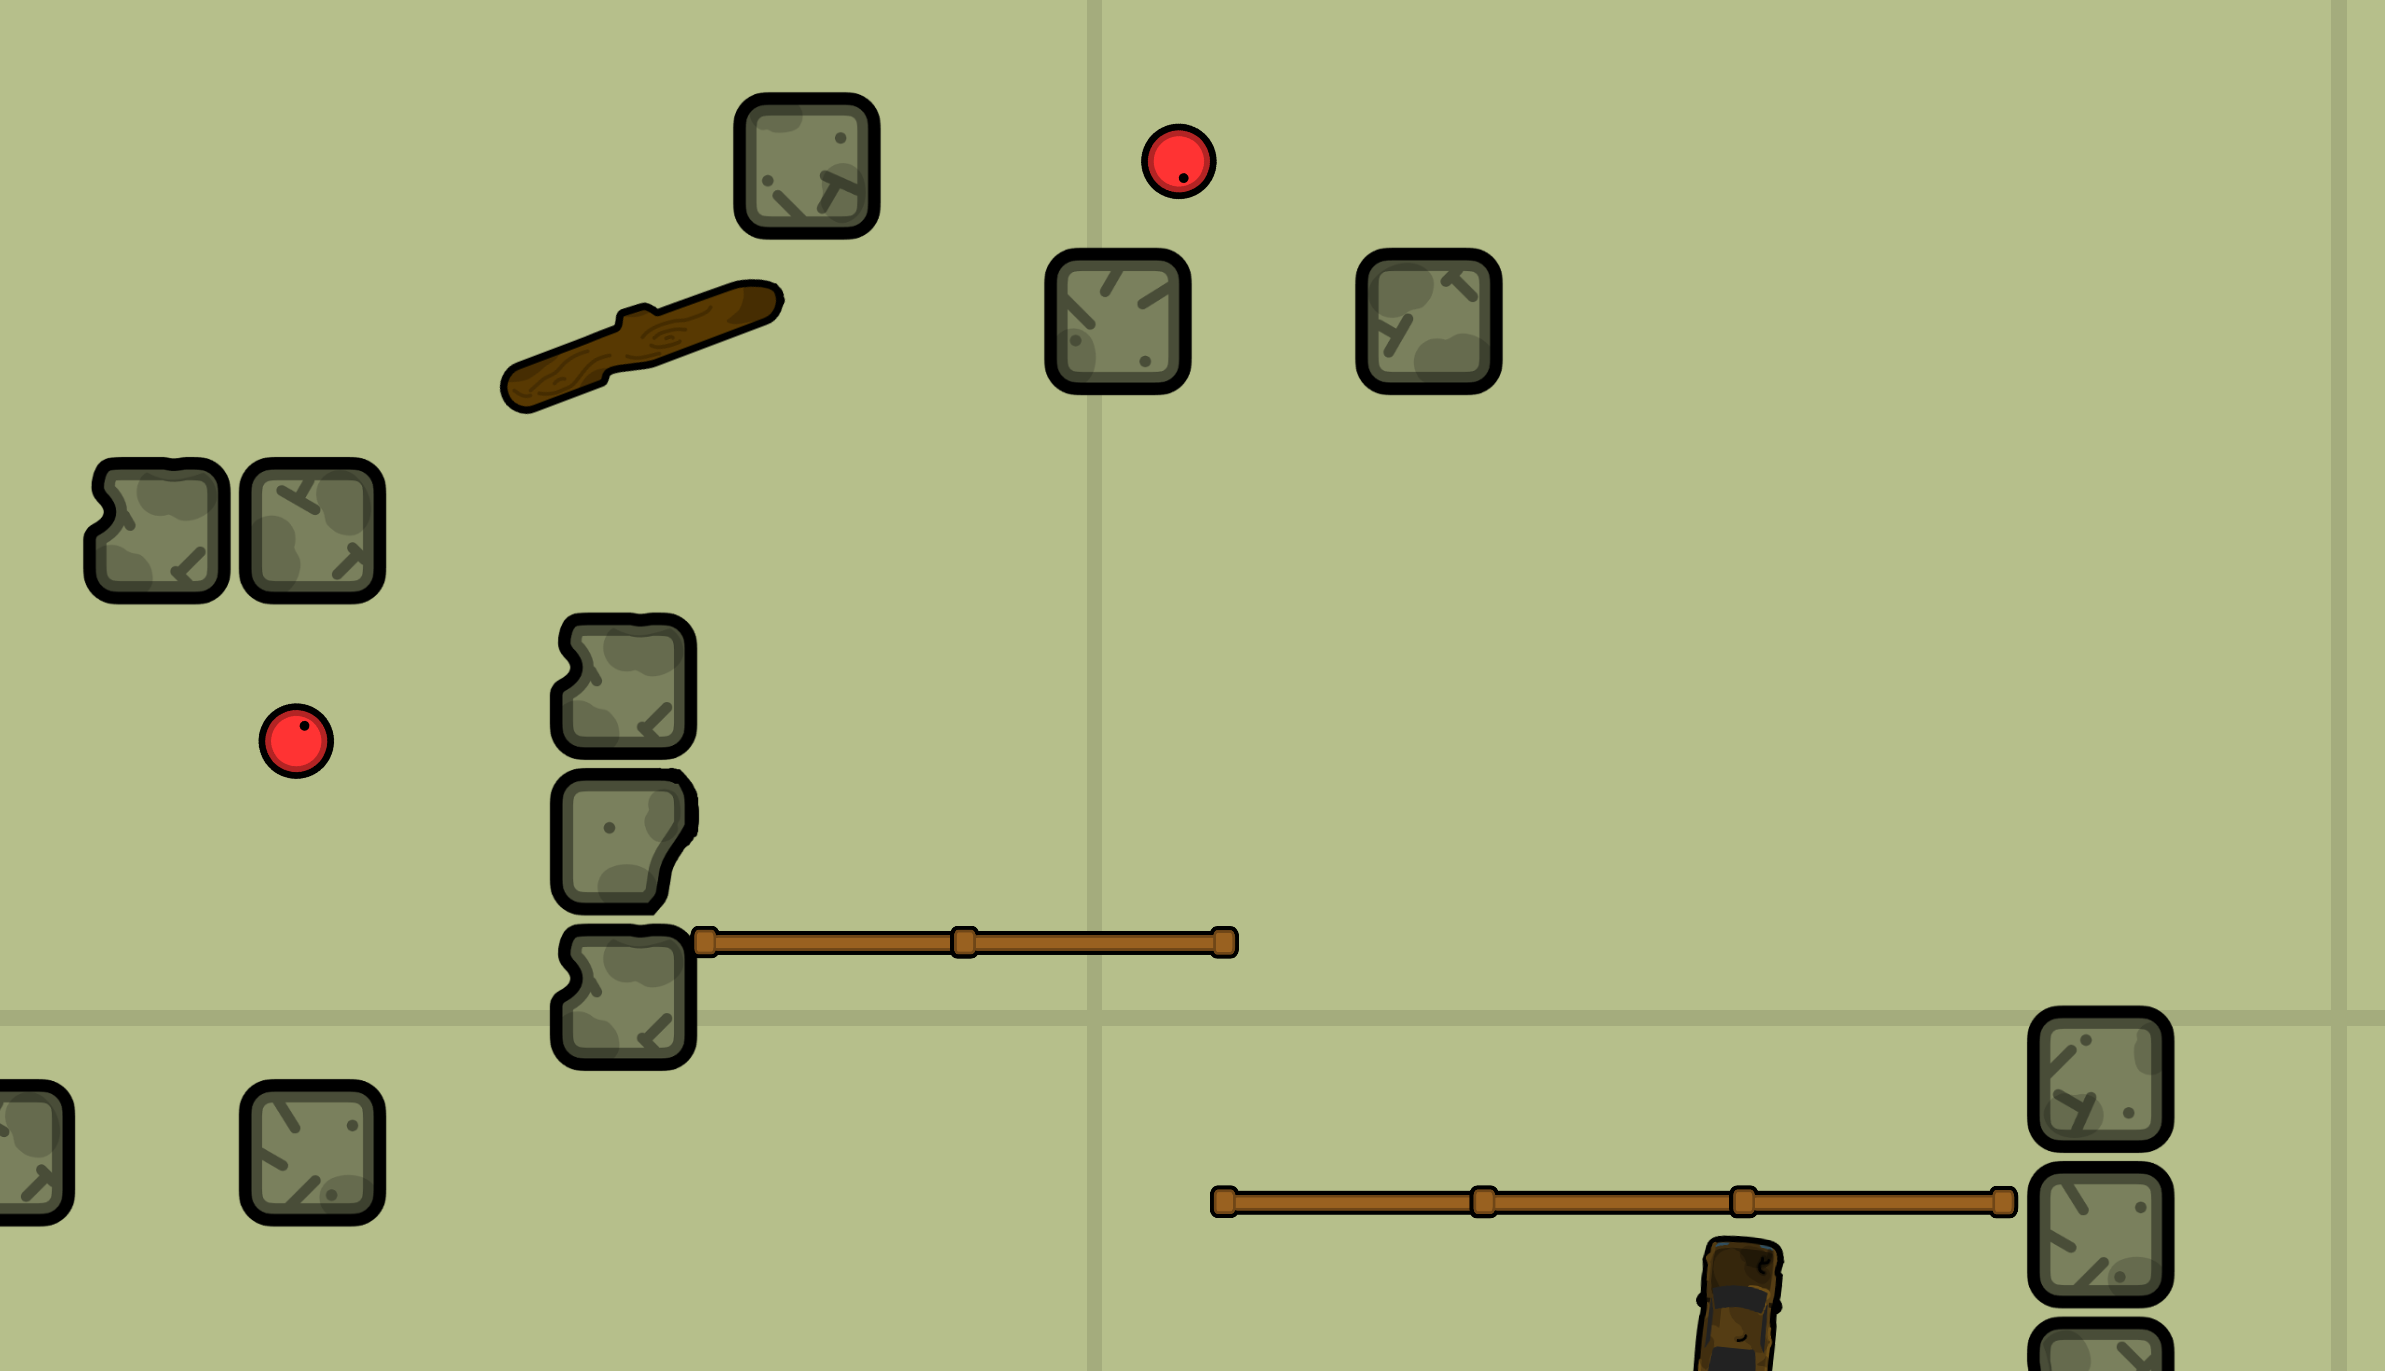 There is also a map specifically designed for Zombies. This map is
called Dead Terror. This map is small. It has various static and
interactive objects.
There is also a map specifically designed for Zombies. This map is
called Dead Terror. This map is small. It has various static and
interactive objects.
Static objects include:
- Rocks
- Crumbling Walls
- Fences
- Logs
Interactive objects include:
- Kerosene Drums
- Junk Cars
As the name implies, Dead Terror is depicted as a horror setting of
the dead. This map is built for close to mid range combat against the
zombies.
Forward Operating Base
Each team has a FOB. This is the general respawn point if you are
destroyed. Although it is mainly considered the respawn point, it also
contains various objects that help assist the players as needed.
First, let’s get the static objects out of the way.
- AC Units
and Tents were built sleeping and recreational areas for your Tank’s
crew.
- Garbage Disposals
- Shipping Containers
-
Watch Towers
These objects are placed inside the walls of
the base. All of these objects have no function. However, there are
key interactive objects that can assist you in the base.
-
Airport and Runway. These are built for
Scout's UAVs[19] which takeoff from
here.
- Artillery Pieces. Three artilleries were built to server
Cannon's[10] purposes. Each artillery
projectile is fired from here.
- Repair Stations. These green
shipping containers rapidly decrease gun temperature and increase
integrity.
Repair Stations were built to help combat spawn camping. If you are ever spawn camped, sit on the repair station and shoot the enemy.
- Kerosene Drums
Finally, the last object of the FOB are the gates. The gates are used to keep players in before the match starts. When the admins start the match the gates of the FOB will open.
Server Errors
In some cases, you might be forcefully ejected from a server or game. If you hadn’t left the game on your own volition, an error has occurred. This error will be promptly shown on the main page. If you don’t understand the error, below is a list of errors and their definitions.
[X] Error: a1 key doesn’t exist
This error is shown when you have entered a game with no a1 key. This a1 key stores all the server parameters and rules, so without this, no game can run. This error might occur when there is a sudden loss of connection or if the a1 key is tampered with.
[X] Error: AT values not set
This error is shown when the game cannot find the host’s list of banned tanks. This error might occur when a mod/third-party developer hosts a game where all tanks are banned.
[X] Error: invalid mapsize
This error is shown when the game cannot recognize the size of the map. This error might occur when the a1 key is tampered with or if a mod/third-party developer sets the map size to less than 1000 pixels subsequent with an incorrect gamemode.
[X] Error: is host/supposed to be peer
This error is shown when you enter a game where the host is not present. This error might occur when the a1 key is tampered with or if you joined a game exactly when the host leaves.
[X] Error: is peer/supposed to be host
This error is shown when you host a game but you are set as a peer. This error will occur when the a1 key is tampered with. If you are a mod/third-party developer, disable this error validator or it might be difficult to develop your changes.
[X] Error: tampered seed
This error is shown when you enter a game where the host hands you a manipulated map generator code (seed).
[X] Error: Disconnected from Signaling Server
This error is shown when you are forcefully disconnected from the server. This error might occur when connectivity is interrupted or the server detects you as a threat/virus.
[X] Error: Corrupted server signal
This error is shown when the signaling server goes down or there was a miscellaneous error between you and the signaling server.
[X] Error: a1 key error (200, 201, 202…386)
This error will occur when the a1 key is tampered with. This error will most likely pop up for mods/third-party developers who tamper with the a1 key decoder or the a1 key itself.
[X] Error: host new game not detected
This error is shown when you cannot detect the next round. This error will most likely occur after the round is over and the host leaves.
[X] Error: Leave reason not defined
This error is shown when you have entered a game with no leave reason key. This key stores all of the above errors or any other reason the game would kick you. Without this, no game can run. This error might occur when there is a sudden loss of connection, if a mod/third-party developer alters the Leave reason key, or if a mod/third-party developer inserted a malformed URL.